- Gyroscope
- Accelerometer
- Magnetometer
- Temperature
- Barometric pressure
- Humidity
In this article, I am going to show you how to create a Python API based weather station web application by using the temperature, barometric pressure, and humidity sensors of the Raspberry Pi Sense Hat. To follow along with this article, you will need the following:
- A Raspberry Pi 3 or Raspberry Pi 4 with network connectivity.
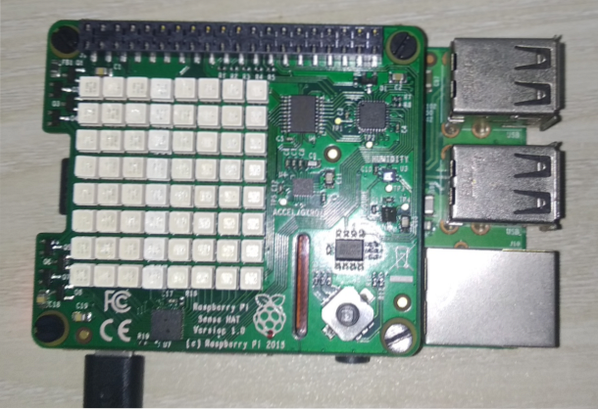
- A Raspberry Pi Sense Hat module.
- A micro-USB (Raspberry Pi 3) or USB Type-C (Raspberry Pi 4) power adapter.
- A 16 GB or 32 GB microSD card with Raspberry Pi OS.
- A laptop or a desktop computer for VNC remote desktop access or SSH access to the Raspberry Pi.
NOTE: In this article, we will connect to the Raspberry Pi remotely via VNC or SSH using the headless setup of the Raspberry Pi. If you do not want to access your Raspberry Pi remotely via SSH or VNC, you will need to connect a monitor, a keyboard, and a mouse to your Raspberry Pi.
To learn how to flash the Raspberry Pi OS image onto a microSD card, please reference How to Install and Use Raspberry Pi Imager. If you need help installing Raspberry Pi OS on your Raspberry Pi, read How to Install Raspberry Pi OS on Raspberry Pi 4. If you need help with the headless setup of Raspberry Pi, check out How to Install and Configure Raspberry Pi OS on Raspberry Pi 4 Without External Monitor.
Connecting Raspberry Pi Sense Hat to Raspberry Pi
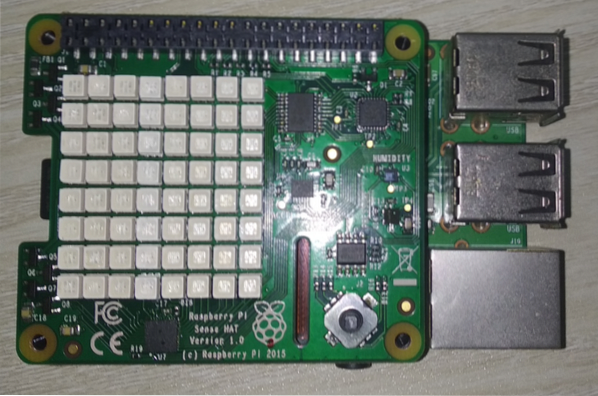
Raspberry Pi Sense Hat kit comes with the Raspberry Pi Sense Hat add-on board, a 40-pin male-to-female header, and some screws and spacers.
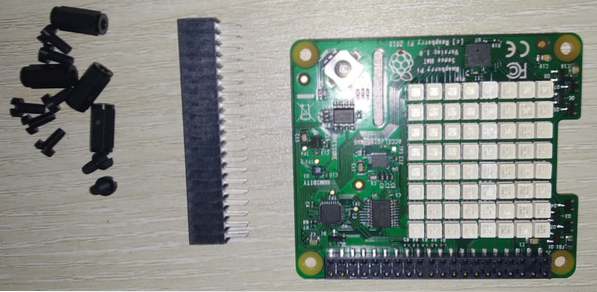
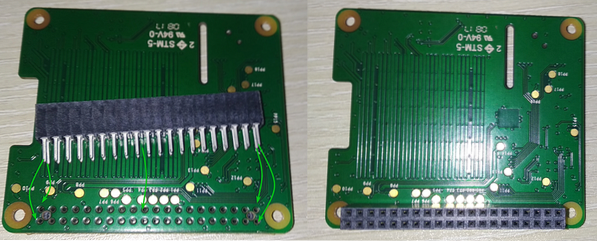
Before you can attach the Sense Hat board to the Raspberry Pi, you have to connect the 40-pin header to the Sense Hat. Connect the male pins of the 40-pin male-female header to the Sense Hat as shown in the images below.
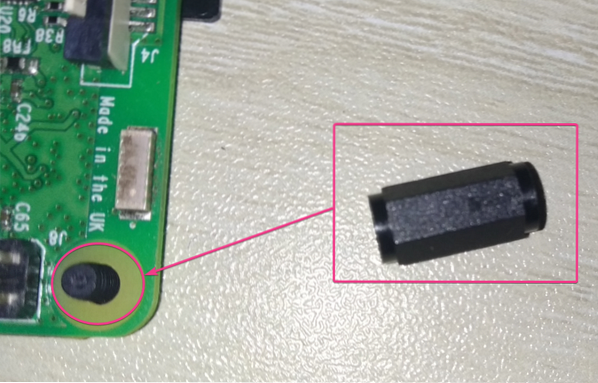
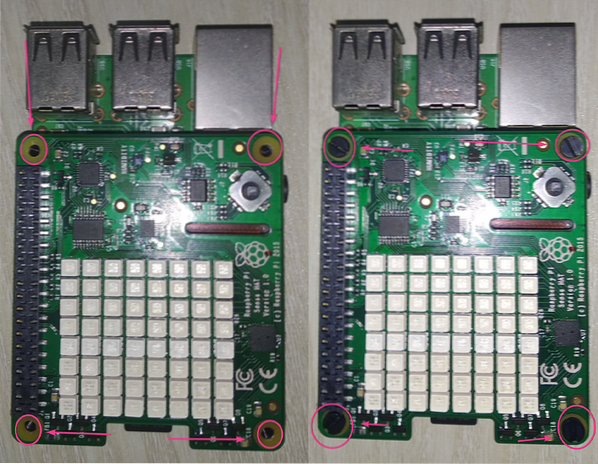
Raspberry Pi single-board computers have 4 holes that can be used to attach add-on boards or a case. To attach the add-on board, insert screws from the back of the Raspberry Pi, as shown in the images below.
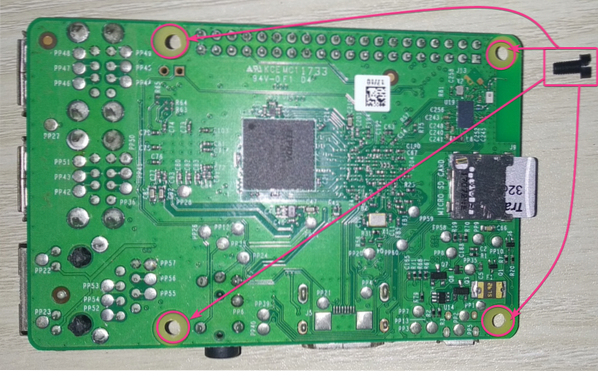
Then, connect a spacer to the screw.
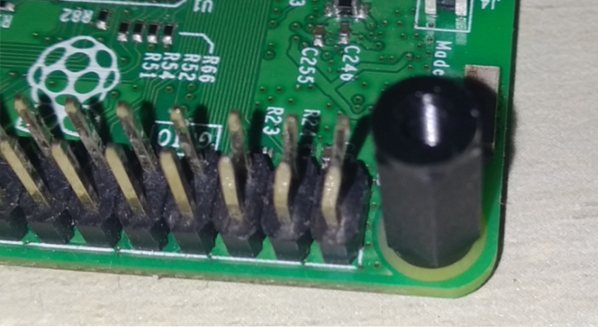
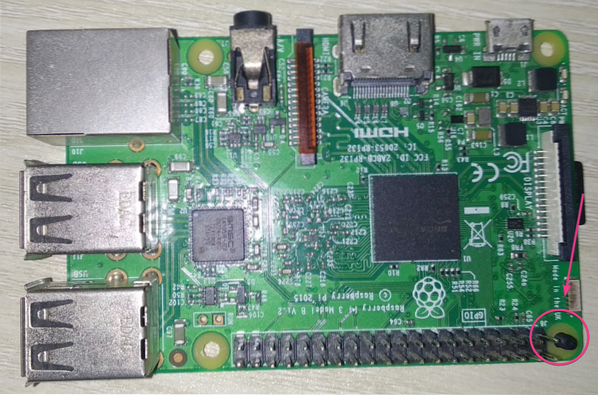
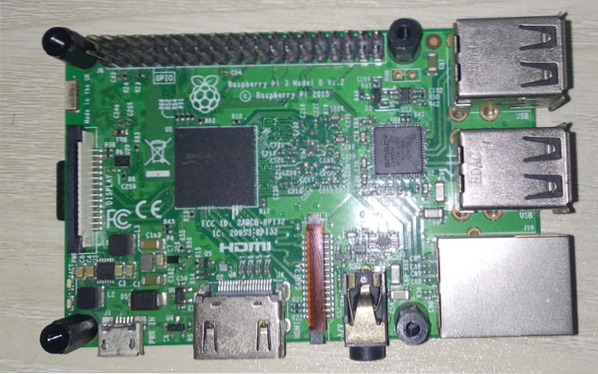
Once you add all four screws and spacers , your Raspberry Pi should look like that shown in the image below.
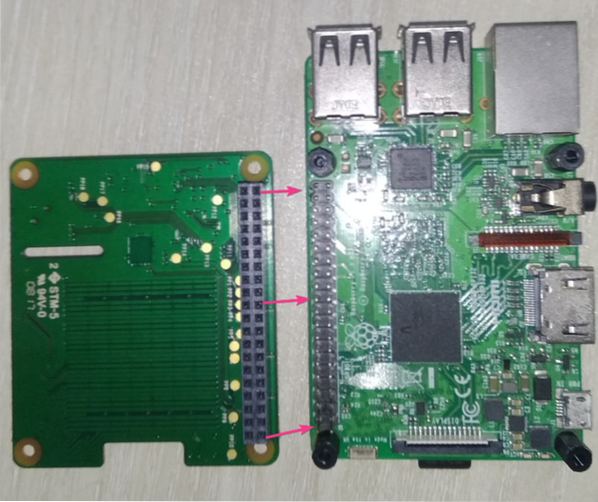
Connect the Raspberry Pi Sense Hat to the 40-pin GPIO male header of the Raspberry Pi, as shown in the images below.
NOTE: Be careful while disconnecting the Raspberry Pi Sense Hat from the Raspberry Pi 40-pin GPIO header to avoid bending the pins of the Raspberry Pi GPIO.
With the four remaining screws, fasten the Raspberry Pi Sense Hat, as shown in the images below.
Powering on the Raspberry Pi
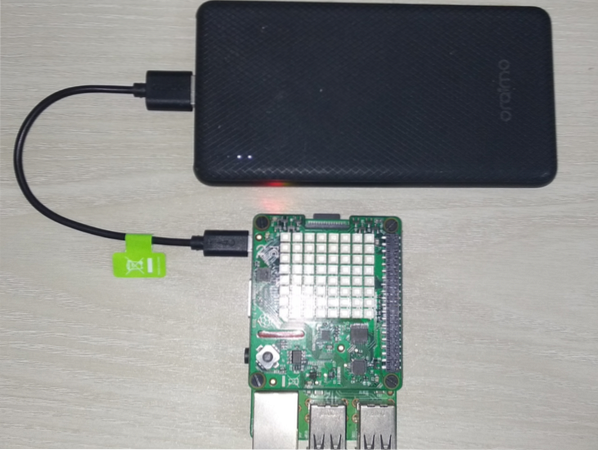
Now that the Raspberry Pi Sense Hat is connected to the Raspberry Pi, insert the microSD card with Raspberry Pi OS into the microSD card slot of the Raspberry Pi, connect the power cable to the Raspberry Pi, and power it on.
Installing the Raspberry Pi Sense Hat Python Library
To use Raspberry Pi Sense Hat on the Raspberry Pi, the sense-hat Python library must be installed on the Raspberry Pi OS. The sense-hat library is available in the official package repository of Raspberry Pi OS.
To install the Raspberry Pi sense-hat Python library on the Raspberry Pi OS, first update the APT package repository cache with the following command:
$ sudo apt update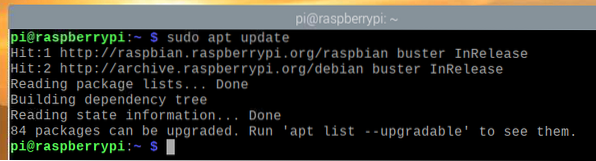
Then, run the following command:
$ sudo apt install sense-hat -y
Installing the Flask Micro Web Framework Python Library
We will use the Flask Python framework to create our weather application. You can install Flask from the official package repository of Raspberry Pi OS with the following command:
$ sudo apt install python3-flask -y
Creating a Project Directory
It is a good idea to create a project directory to organize your project files. To create a project directory ~/work, use the following command:
$ mkdir ~/work
Once the project directory is created, navigate to the project directory as follows:
$ cd ~/work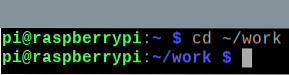
Testing the Raspberry Pi Sense Hat
To test whether the Raspberry Pi Sense Hat is working, we can write a simple test Python script. You can create a new Python script called test.py with the nano text editor as follows:
$ nano test.py
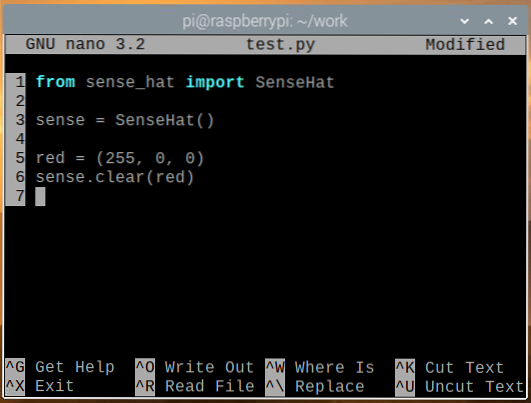
Enter the following code in the test.py file. Line 1 imports SenseHat from the sense_hat module, line 3 creates a SenseHat object and stores a reference in the sense variable, and lines 5-6 set the color of all 8×8 LEDs to red. Once you are done, press
You can run the test.py Python script with the following command:
$ python3 test.py
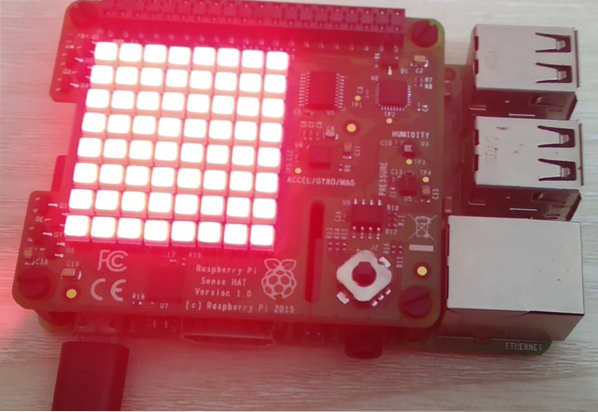
The 8×8 LED matrix should glow in red color as shown in the image below.
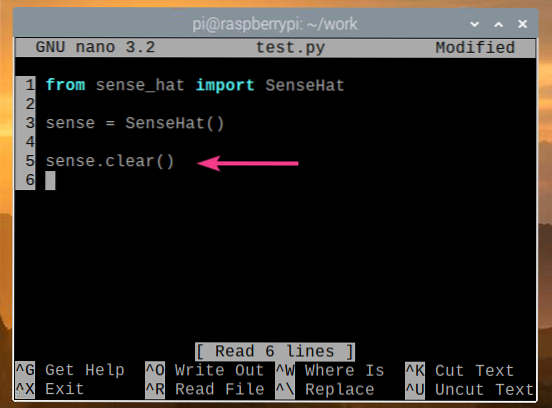
To turn off the LEDs of the Sense Hat, run the clear() method without any color value in the test.py Python script, as shown in the screenshot below, and run the test.py Python script again.
The LEDs of the Sense Hat should now be turned off, as shown in the image below.
If the Sense Hat is working properly, then move on to the next section.
Getting Weather Data from Sense Hat
You can obtain sensor data from the Sense Hat very easily by using the sense-hat Python library. To retrieve sensor data from the Sense Hat, you can create a new Python script read_sensor_data.py as follows:
$ nano read_sensor_data.py
Enter the following code in the read_sensor_data.py Python file.
from sense_hat import SenseHatfrom time import sleep
sense = SenseHat()
sense.clear()
while True:
tempC = sense.get_temperature()
tempF = tempC * (9/5) + 32
pressure = sense.get_pressure()
humidity = sense.get_humidity()
print("Temperature: %.2f°C/%.2f°F\n" % (tempC, tempF))
print("Pressure: %.2f mb\n" % (pressure))
print("Humidity: %.2f%%\n\n" % (humidity))
sleep(5)
Once you are done, press
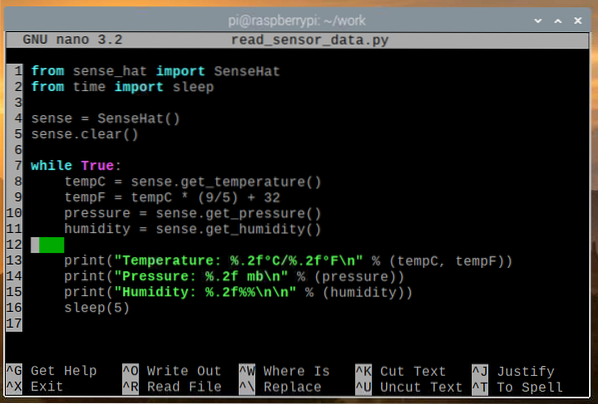
In the code above, lines 1 and 2 import all the required libraries, line 4 creates a SenseHat object, and line 5 turns off all the LEDs of the Sense Hat using the clear() method. The while loop in line 7 is an infinite loop that will run the code in lines 8-16 forever.
In line 8, the get_temperature() method is used to read the temperature data (in degrees Celsius) from the humidity sensor of the Sense Hat. In line 9, the temperature data is converted from degrees Celsius to degrees Fahrenheit. In line 10, the get_pressure() method is used to read the air pressure data (in millibars) from the pressure sensor of the Sense Hat. In line 11, the get_humidity() method is used to read the humidity data (in %) from the humidity sensor of the Sense Hat.
Lines 13-15 are used to print the sensor data to the console, and line 16 is used to wait for 5 seconds before reading the sensor data again.
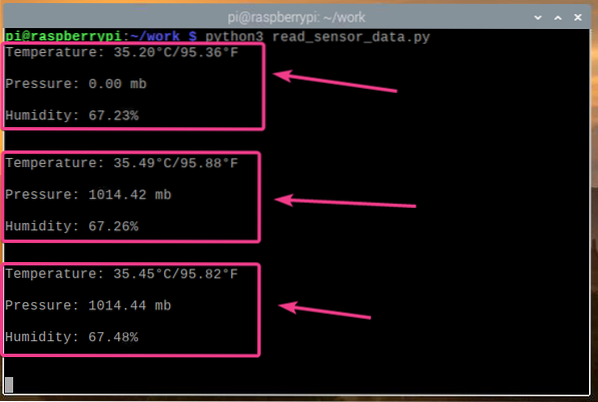
You can run the read_sensor_data.py Python script as follows:
$ python3 read_sensor_data.py
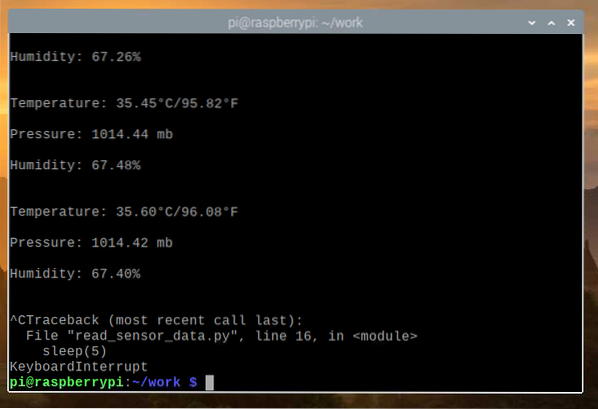
Once the script is run, sensor data will be printed to the console.
Now that we can read the sensor data from the Sense Hat, press
Creating a Weather Station Web App
In this section, we will show you how to use the Python Flask web framework to create a weather API and a weather application. The weather application will access the weather data API and show the weather data in real time. All the code discussed in this section is available on GitHub at shovon8/raspberry-pi-sense-hat-weather-app.
First, create a server.py Python script in the project directory as follows:
$ nano server.py
Enter the following code in the server.py Python file.
from flask import Flaskfrom flask import jsonify
from flask import render_template
from flask import url_for
from sense_hat import SenseHat
app = Flask(__name__)
app.config['SEND_FILE_MAX_AGE_DEFAULT'] = 0
sense = SenseHat()
sense.clear()
with app.test_request_context():
url_for('static', filename='style.css')
url_for('static', filename='app.js')
@app.route('/api')
def api():
tempC = sense.get_temperature()
tempF = tempC * (9/5) + 32
pressure = sense.get_pressure()
pressurePsi = pressure * 0.0145038
pressureP = pressure * 100
humidity = sense.get_humidity()
return jsonify(
"temperature": "C": tempC, "F": tempF ,
"pressure": "mb": pressure, "hPa": pressure,
"psi": pressurePsi, "P": pressureP ,
"humidity": humidity
)
@app.route('/')
def home():
return render_template('./home.html')
Then, press
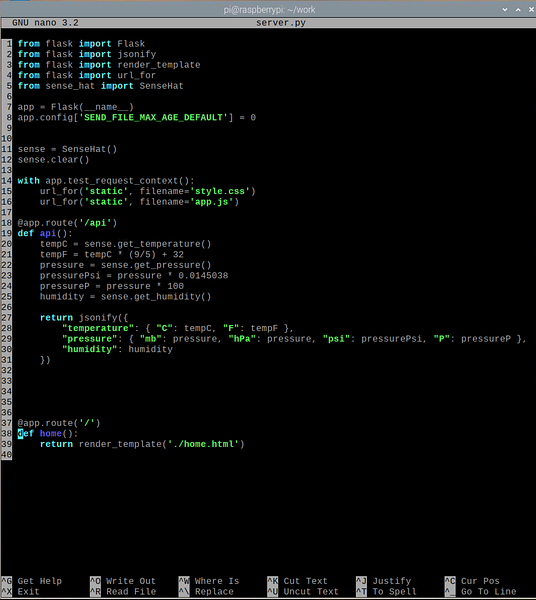
In the code above, lines 1-5 import all the required libraries, line 7 creates a Flask app, line 11 creates a SenseHat object, and line 12 turns off all LEDs of the Sense Hat. Line 8 disables web caching for the Flask app. Because this app is lightweight, there is no need for caching. If you want to modify the app, then having web caching disabled will make testing much easier.
Lines 18-31 read the sensor data from the Sense Hat and return the API data in JSON format on HTTP GET request in the /api endpoint of the web server. Lines 37-39 return the weather web app homepage on the / endpoint of the web server. The homepage is rendered from the home.html file, which should be in the templates/ directory of the project directory.
Lines 14-16 are used to allow access to the style.css and app.js static files. These files should be in the static/ directory of the project directory. The style.css file is used to style the home.html homepage, and the app.js file is used to request the API data from the /api endpoint and update the weather data on the home.html page every 5 seconds.
Create the static/ and templates/ directory in the project directory as follows:
$ mkdir -v static,templates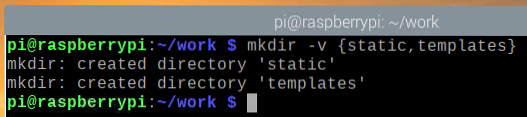
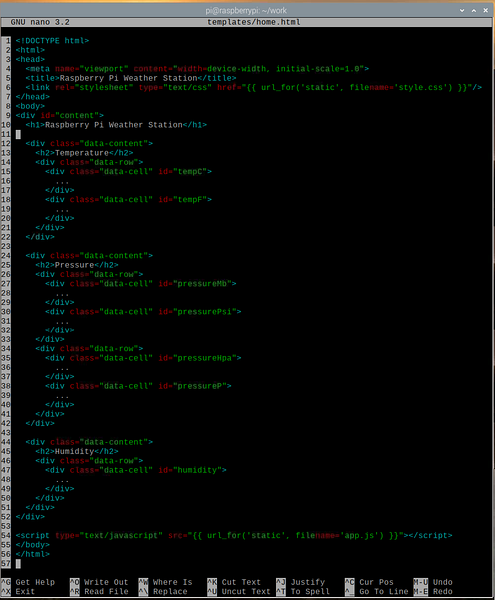
Create a home.html file in the templates/ directory as follows:
$ nano templates/home.html
Enter the following code in the home.html file.
href=" url_for('static', filename="style.css") "/>
Raspberry Pi Weather Station
Temperature
…
…
Pressure
…
…
…
…
Humidity
…
Then, press
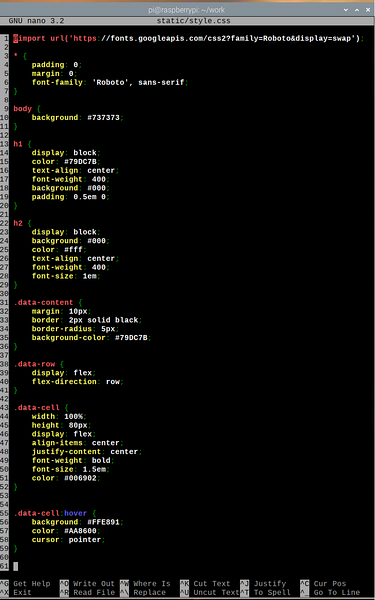
Create a style.css file in the static/ directory as follows:
$ nano static/style.css
Enter the following codes in the style.css file.
@import url('https://fonts.googleapis.com/css2?family=Roboto&display=swap');*
padding: 0;
margin: 0;
font-family: 'Roboto', sans-serif;
body
background: #737373;
h1
display: block;
color: #79DC7B;
text-align: center;
font-weight: 400;
background: #000;
padding: 0.5em 0;
h2
display: block;
background: #000;
color: #fff;
text-align: center;
font-weight: 400;
font-size: 1em;
.data-content
margin: 10px;
border: 2px solid black;
border-radius: 5px;
background-color: #79DC7B;
.data-row
display: flex;
flex-direction: row;
.data-cell
width: 100%;
height: 80px;
display: flex;
align-items: center;
justify-content: center;
font-weight: bold;
font-size: 1.5em;
color: #006902;
.data-cell:hover
background: #FFE891;
color: #AA8600;
cursor: pointer;
Then, press
Create an app.js file in the static/ directory as follows:
$ nano static/app.js
Enter the following code in the app.js file.
window.addEventListener('load', main);function main()
function getAPIData()
var http = new XMLHttpRequest();
http.onreadystatechange = function()
if(this.readyState === 4 && this.status === 200)
update(JSON.parse(this.responseText));
http.open("GET", "/api", true);
http.send();
function update(apiData)
var tempC = document.getElementById("tempC");
var tempF = document.getElementById("tempF");
var pressureMb = document.getElementById("pressureMb");
var pressurePsi = document.getElementById("pressurePsi");
var pressureHpa = document.getElementById("pressureHpa");
var pressureP = document.getElementById("pressureP");
var humidity = document.getElementById("humidity");
tempC.innerHTML = parseFloat(apiData.temperature.C).toFixed(2) + "°C";
tempF.innerHTML = parseFloat(apiData.temperature.F).toFixed(2) + "°F";
pressureMb.innerHTML = parseFloat(apiData.pressure.mb).toFixed(2) + " mb";
pressurePsi.innerHTML = parseFloat(apiData.pressure.psi).toFixed(2) + " psi";
pressureHpa.innerHTML = parseFloat(apiData.pressure.hPa).toFixed(2) + " hPa";
pressureP.innerHTML = parseFloat(apiData.pressure.P).toFixed(2) + " P";
humidity.innerHTML = parseFloat(apiData.humidity).toFixed(2) + " %";
function app()
window.setInterval(function()
getAPIData();
, 5000);
app();
Then, press
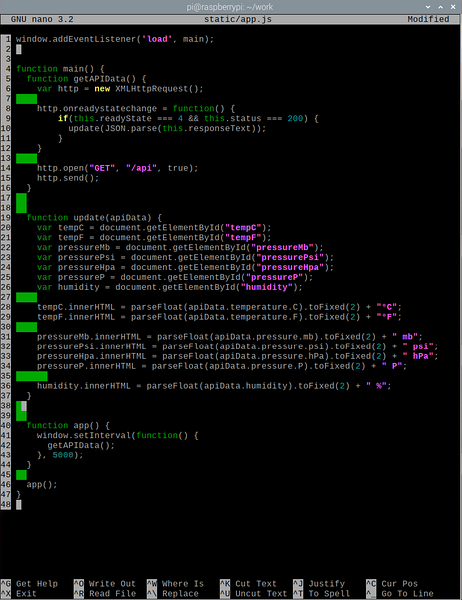
Here, line 1 runs the main() function when the web page finishes loading. In the main() function, the getAPIData() function fetches the weather API data using AJAX and calls the update() function (in line 10) once the data has been successfully fetched. The update() function updates the web page element using the API data.
In line 20, the document.getElementById() method is used to get the reference of the web page element with the id tempC. Line 28 is used to replace the content of the web page element that has the id tempC with the temperature (in Celsius) from the API. In the same way, the contents of all web elements (lines 21-26) are replaced with their respective API data.
In the app() function, the getAPIData() is called every 5 seconds (5000 milliseconds) to keep the weather data up to date in the weather app. Finally, in line 46, the app() function is executed.
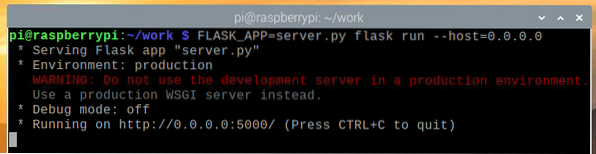
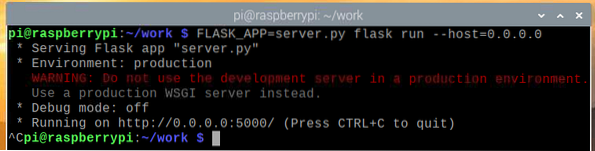
To test the web app, enter the following command:
$ FLASK_APP=server.py flask run --host=0.0.0.0
The weather app should run on port 5000 (by default).
To test whether the Weather API is working, run the following command:
$ curl -s http://localhost:5000/api | json_pp
As you can see, the Weather API data is printed to the console. Therefore, the API is working.

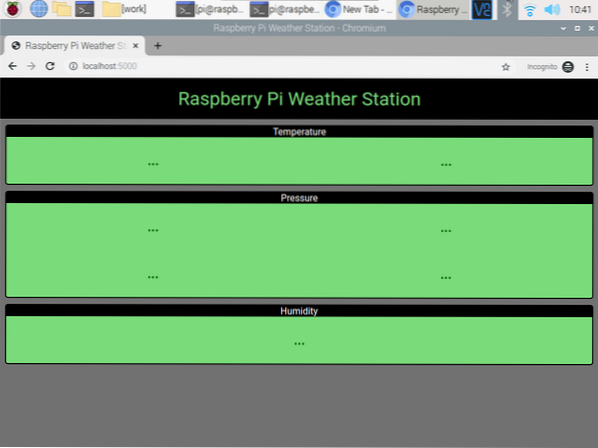
To test the Weather app, visit http://localhost:5000 from a Chromium web browser. The Weather app should be loaded on the web browser, but no weather data should be displayed at first.
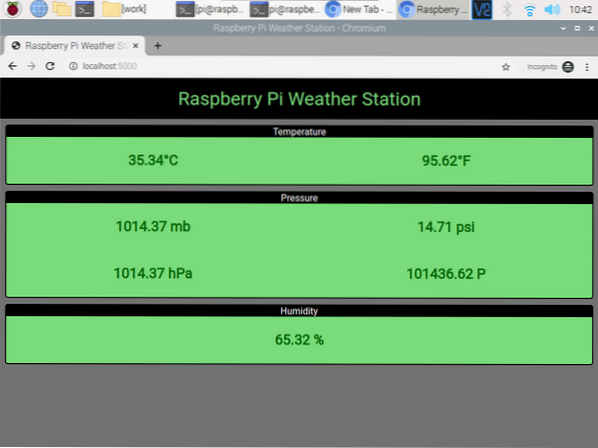
After a few seconds, the weather app should finish fetching the weather data from the API and display it.
At any point, you can press
Creating Systemd Service for the Weather Web App
In this section, we will show you how to create a systemd service file for the weather app so that it will automatically start upon booting.
First, create a weather-station.service file in your project directory as follows:
$ nano weather-station.service
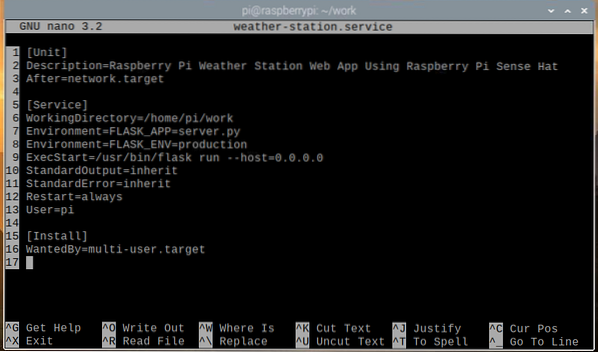
Enter the following lines of code in the weather-station.service file.
[Unit]Description=Raspberry Pi Weather Station Web App Using Raspberry Pi Sense Hat
After=network.target
[Service]
WorkingDirectory=/home/pi/work
Environment=FLASK_APP=server.py
Environment=FLASK_ENV=production
ExecStart=/usr/bin/flask run --host=0.0.0.0
StandardOutput=inherit
StandardError=inherit
Restart=always
User=pi
[Install]
WantedBy=multi-user.target
Then, press
Copy the weather-station.service file to the /etc/systemd/system/ directory with the following command:
$ sudo cp -v weather-station.service /etc/systemd/system/
Reload the systemd daemons for the changes to take effect as follows:
$ sudo systemctl daemon-reload
The weather-station systemd service should be inactive at the moment, as shown in the screenshot below.
$ sudo systemctl status weather-station.service
Start the weather-station service with the following command:
$ sudo systemctl start weather-station.service
As you can see, the weather-station service is now running.
$ sudo systemctl status weather-station.service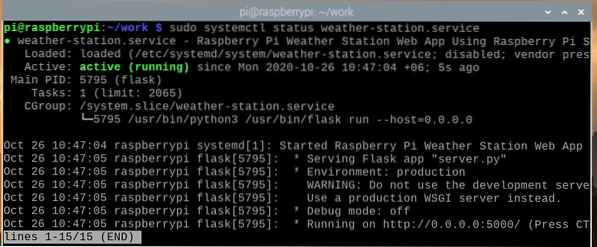
Now that the weather-station service is working, you can add it to the system startup of Raspberry Pi OS with the following command:
$ sudo systemctl enable weather-station.service
Reboot your Raspberry Pi with the following command:
$ sudo reboot
Once your Raspberry Pi boots, the weather-station service should be running, as shown in the screenshot below.
$ sudo systemctl status weather-station.service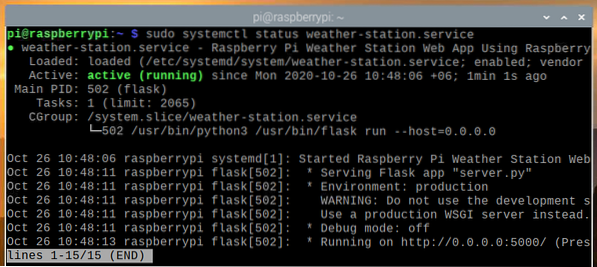
Accessing the Weather App from Other Devices
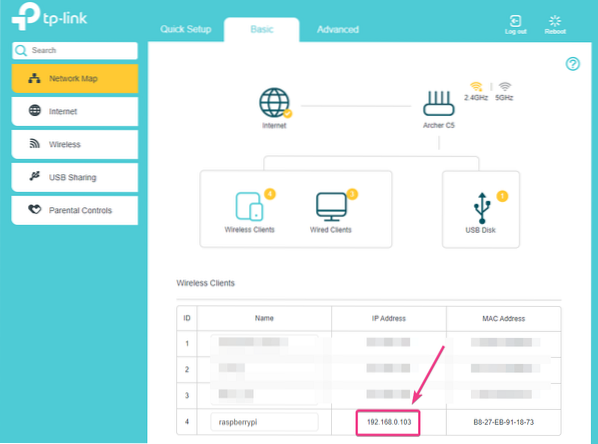
To access the weather app from other devices in your home network, you need to know the IP address of your Raspberry Pi. You can find the IP address of your Raspberry Pi 4 from the web management interface of your home router. In our case, the IP address is 192.168.0.103, but this address will be different for you, so make sure to replace this address with yours in all subsequent steps.
If you have access to the Raspberry Pi console, you can run the following command to find the IP address as well.
$ hostname -I
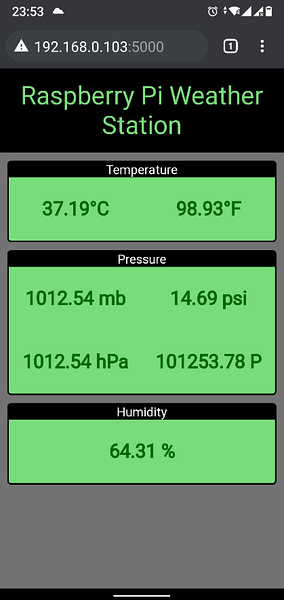
Once you know the IP address of your Raspberry Pi, you can access it from any device in your home network. As shown in the screenshot below, we have accessed the weather app from an Android smartphone.
Conclusion
In this article, we showed you how to use the Raspberry Pi Sense Hat to build a Raspberry Pi weather station. We used the sense-hat Python library to extract weather data from the Raspberry Pi Sense Hat. Then, we used the Flask Python micro web framework to create a weather API and a web application. The web app gets the weather data from the weather API every 5 seconds to keep the web app up to date with the latest weather data.


