Network Topology:
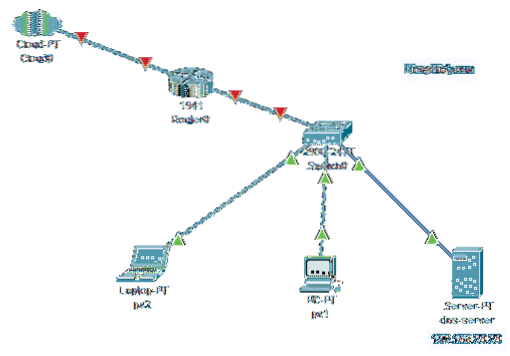
Figure 1: network topology of this article
Here, I will configure a CentOS 8 machine as a DNS server. The CentOS 8 machine has a static IP address 192.168.20.20. The other computers on the network will be able to access the DNS server to resolve domain names.
Setting Up Static IP Address:
You must set up a static IP address on your CentOS 8 machine if you want to set up a DNS server. To set up a static IP address on CentOS 8, check my article Configuring Static IP on CentOS 8.

Installing DNS Server on CentOS 8:
BIND 9 is available in the official package repository of CentOS 8. So, it is very easy to install.
First, update the DNF package repository cache with the following command:
$ sudo dnf makecache
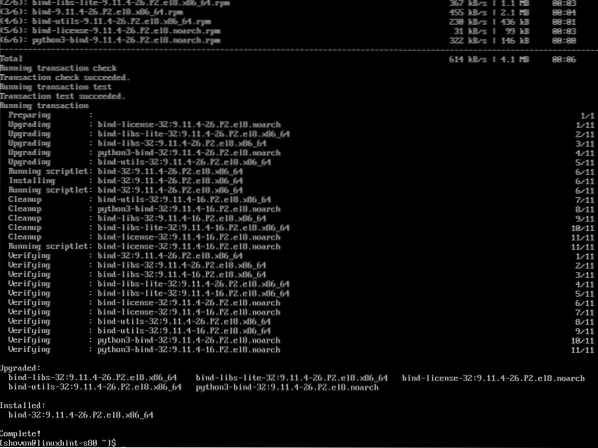
Now, install BIND 9 with the following command:
$ sudo dnf install bind
To confirm the installation, press Y and then press
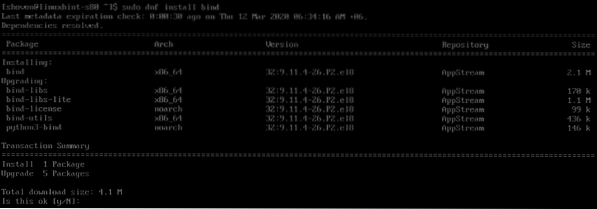
BIND 9 should be installed.
Configuring BIND 9 DNS Server:
The main configuration of BIND is /etc/named.conf. You add your custom DNS databases in the /var/named/ directory. Once the DNS databased are created, you add your custom zone files in the /etc/named/ directory and include the zone files in the /etc/named.conf configuration file. That's basically how you configure BIND 9 DNS server.
Let's create a DNS database for linuxhint.local domain name.
Create a new file db.linuxhint.local in the /var/named/ directory as follows:
$ sudo vim /var/named/db.linuxhint.local
Now, type in the following lines in the db.linuxhint.local file and save the file.
$TTL 1d$ORIGIN linuxhint.local.
@ IN SOA ns root (
2020031201 ; Serial
12h ; Refresh
15m ; Retry
3w ; Expire
2h ; Minimum
)
@ IN A 192.168.20.20
@ IN NS ns
ns IN A 192.168.20.20
@ IN MX 10 mail
mail IN A 192.168.20.20
help IN A 192.168.20.111
support IN A 192.168.20.112
www IN A 192.168.10.12
router IN A 192.168.2.1
ftp IN CNAME www

Once you've added a DNS database for linuxhint.local domain, you can check whether the file syntax is alright with the following command:
$ sudo named-checkzone linuxhint.local /var/named/db.linuxhint.local
As you can see, there are no syntax errors. If there is any, you will see respective error messages.

Now, create a zone file linuxhint.local.zones in the /etc/named/ directory for linuxhint.local domain as follows:
$ sudo vim /etc/named/linuxhint.local.zones
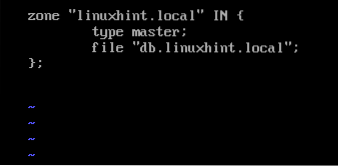
Now, type in the following lines in the linuxhint.local.zones file.
zone "linuxhint.local" INtype master;
file "db.linuxhint.local";
;
Now, edit the /etc/named.conf file as follows:
$ sudo vim /etc/named.conf
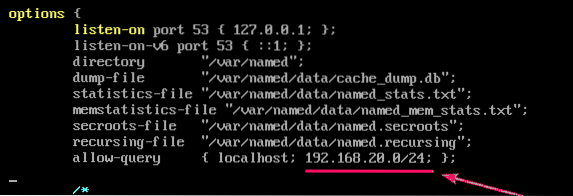
First, you have to add your network subnet to allow-query. Otherwise, none of the computers in your network will be able to use the DNS server.
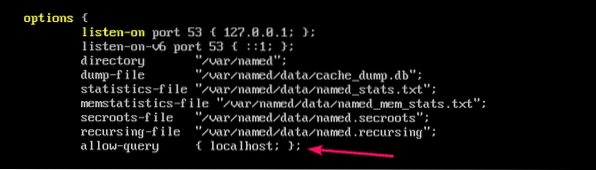
The network subnet is 192.168.20.0/24. So, this is what I've added there.
You also have to add the IP address of your CentOS 8 machine which you're configuring as a DNS server as listen-on address. In my case, it is 192.168.20.20. So, I've added it there.

Finally, include the linuxhint.local.zones file from the /etc/named/ directory at the end of the /etc/named.conf file with the following line.
include "/etc/named/linuxhint.local.zones";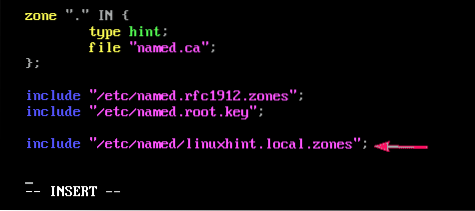
Now, start the named service with the following command:
$ sudo systemctl start named
As you can see, the named service is running.
$ sudo systemctl status named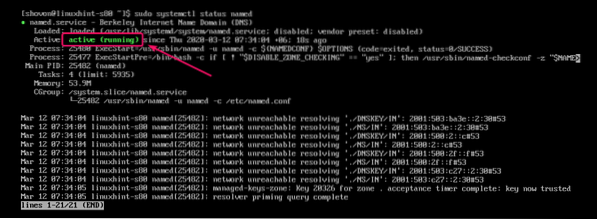
Also, add the named service to the system startup of CentOS 8. So, the DNS server will automatically start on boot.
$ sudo systemctl enable named
If you make any changes to the DNS server configuration file after starting the named service, you must restart the named service for the changes to take effect.
To restart the named service, run the following command:
$ sudo systemctl restart namedTesting DNS Server:
You can test the DNS nameserver using dig.
To check whether the DNS server is listening on the outgoing network interface as follows:
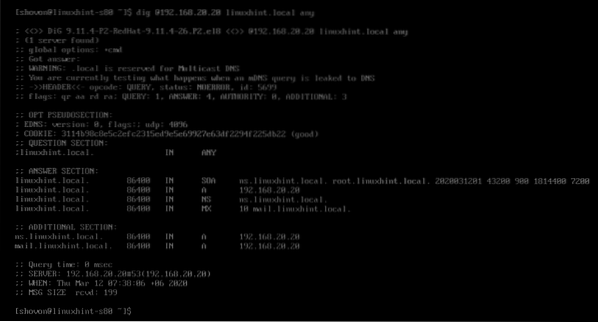
$ dig @192.168.20.20 linuxhint.local any
Great! The DNS server is accessible from the outgoing network interface of CentOS 8.
The DNS nameserver is also accessible locally to the CentOS 8 machine.
$ dig @localhost linuxhint.local any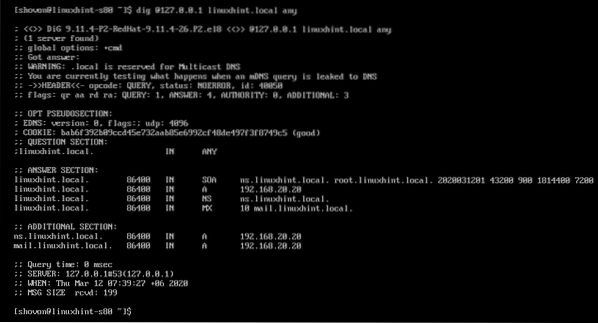
I can also resolve www.linuxhint.local as you can see in the screenshot below.
$ dig @127.0.0.1 www.linuxhint.local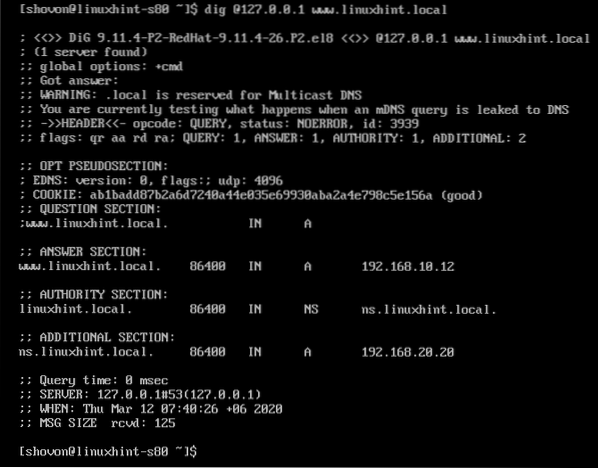
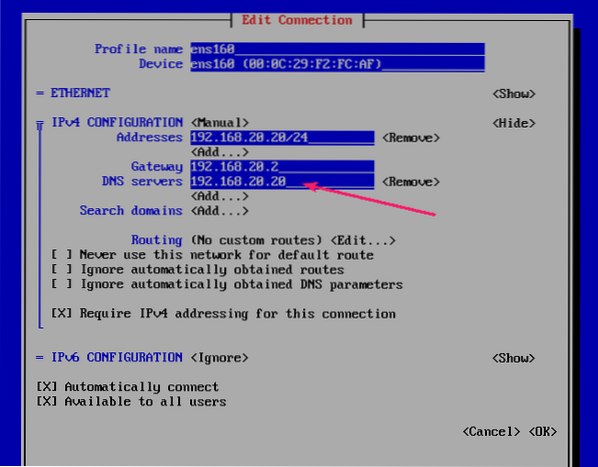
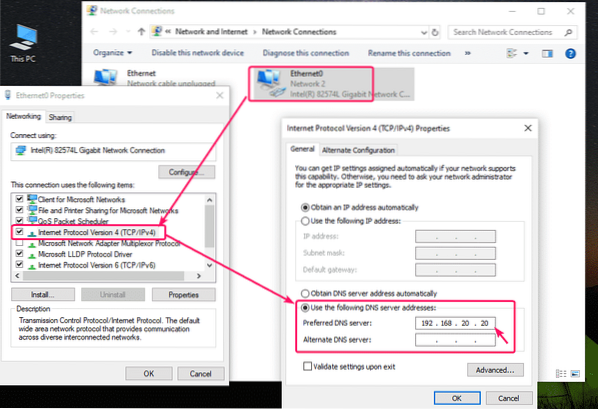
Changing the DNS Server Address of Network Interface:
Now, you can change the DNS server address of your network interface to use the local DNS server by default. Check my article Configuring Static IP on CentOS 8 for a detailed instruction on how to do that.
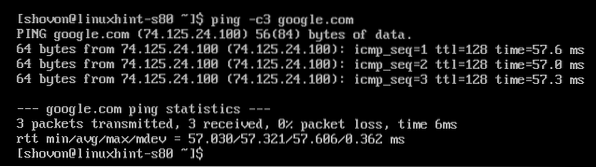
As you can see, BIND can resolve the internet domain names.
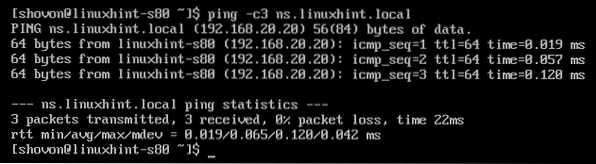
BIND can also resolve the locally configured domain linuxhint.local
Configuring the Firewall:
Now, to allow DNS requests through the firewall, open the DNS server port 53 with the following command:
$ sudo firewall-cmd --add-service=dns --permanent
For the changes to take effect, run the following command:
$ sudo firewall-cmd --reload
Testing the DNS Server from Other Computers:
I've configured a Windows 10 machine on the same network subnet to use the DNS server I've just configured on the CentOS 8 machine.
As you can see, the DNS resolution for linuxhint.local sub domains works.
$ nslookup ns.linuxhint.local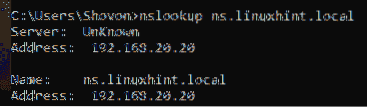
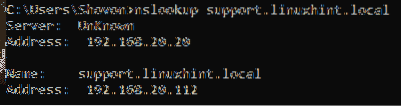
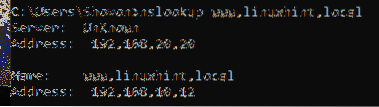
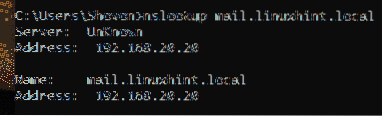
So, that's how you configure BIND 9 DNS server on CentOS 8. Thanks for reading this article.


