
EndeavourOS is a recent distro in the Linux space released back in July 2019 as a spiritual successor to Antergos Linux, which was discontinued in May 2019. In function, EndevourOS is a rolling release distro based on Arch Linux with a focus on delivering a beginner-friendly pre-configured desktop environment to its users.
Over a short span of two years, EndeavourOS has amassed a respectable following. And with the latest release, the distro has the Arch community hyped with a slew of awesome bells and whistles.
Now, all things considered, how exactly is EndeavourOS making Arch more beginner-friendly and accessible to new users? What's the overall user experience? And what are the features it brings to the table?
In this in-depth review of EndeavourOS, we will answer all these questions and much more.
So without further ado, let's get started:
EndeavourOS Review: Key Features
Before we talk about anything else, let's first get an idea of all the key features that make EndeavourOS great!
Calamares Installer: Support for Online and Offline Installation
EndeavourOS removes the need to go through Arch Linux's complicated text-based installer in favor of the GUI-based Calamares installer. It's much more user-friendly and offers a pragmatic solution to installing your Arch desktop with all the necessary options bundled in.
Furthermore, the EndeavourOS developers have customized the installer to include support for both online and offline installation.
Offline Installation: Here, you don't need to have an active internet connection during the installation process. Also, the XFCE desktop will be installed along with EndeavourOS theming.
Online Installation: In this case, you will require an active internet connection. But as a benefit, all the mirrors will get automatically updated during the installation. Also, you will get to choose from 9 different desktop environments (including XFCE) along with the EndeavourOS theming.
We have included a detailed installation guide of EndeavourOS in a later section to give you a full tour of the Calamares installer.
Tons of Desktop Environments
EndeavourOS officially supports 9 different desktop environments, as mentioned below:
- XFCE
- Mate
- Cinnamon
- Gnome
- Plasma
- Budgie
- Deepin
- i3-wm
- LXQT
The lightweight XFCE desktop environment is chosen as the default option, whereas any one of the other DEs can be picked during the online installation. You get a completely vanilla experience of all the DEs without any unnecessary customizations besides the light EndeavourOS theming.
Minimalistic
EndeavourOS is a terminal-centric OS and one of the most minimalistic distros out there.
It just comes with the necessary apps and packages that users will generally install on their Arch PC. This includes basic drivers for sound, network, graphics, as well as Yay support and a terminally operated AUR helper. Firefox browser is also bundled for your internet browsing needs. And that's it.
You get no extra apps and no unnecessary bloatware.
The distro hands you all the basic building blocks, which can be a bit of a hassle for new users to install on a vanilla Arch system. After this, you are in full control of your PC, installing apps and packages to create your own custom-made personal computer.
A Well Thought-Out Welcome App
To further help the beginners and new users, EndeavourOS comes with a rich Welcome app available both before and after the installation, acting as an assistant to guide you through your journey of using the distro.
Before installation, the Welcome App gives you access to the Calamares installer and the option to update mirrors, troubleshoot issues, and links to useful guides and tutorials.
Once the installation is complete, the Welcome is updated with new options to help you configure basic settings. It also contains dedicated sections to share tips and tricks for effectively using the distro and the option to “add more apps” like an Office suite, the Chromium web browser, and so on.
Nvidia Drivers
One of the major life-saving features of EndeavourOS is that it comes with the non-free Nvidia drivers preloaded into the kernel. This is super helpful for users who are using an Nvidia GPU on their system.
Installing the Nvidia drivers can be a real hassle, and to have them preloaded and automatically installed during the OS installation is super convenient. There are also additional steps for Nvidia Optimus users.
Friendly Community
Another one of the major focuses of the EndeavourOS project is on its community.
The EndeavourOS team has done a commendable job creating a platform where advanced Arch users help Linux newcomers with all their questions and doubts.
You can reach out to the EndeavourOS community using any one of the following methods:
- EndeavourOS Forum
- EndeavourOS SubReddit
- EndeavourOS Telegram
ARM Support
With the latest release of EndeavourOS, the developers have added ARM support. This makes the distro a viable option for running on Raspberry PI, Odroid, Pinebook Pro, and Pine64.
In fact, the distro has already been tested and cleared for the following ARM platforms:
- Odroid N2
- Odroid N2+
- Odroid XU4
- Raspberry PI 4b
Note: Although the overall performance is smooth with little bugs here and there, it should be noted that Arch Linux ARM is still unofficial and in its experimental stages.
EndeavourOS vs. Manjaro: Which is the better Arch-based Distro?
When talking about Arch-based Linux distros, one name always comes to mind - Manjaro. And wouldn't you happen to know it - it too prides itself on simplicity and is recommended for beginners.
So this begs these questions - which is the better Arch-based distro? And which is more beginner-friendly?
Well, to answer these, we must first get a quick idea of the key differences between both distros. So let's take a quick dive into that right now:
- EndeavourOS uses AUR (Arch User Repository), Arch's official software repository. Manjaro doesn't use AUR by default and instead has its own repository. This is to ensure software packages and system updates are thoroughly tested for full compatibility.
- The Manjaro GUI package/software manager integrates Flatpak, Snap, and AUR, all in one, making it super easy for users to download the packages they need. With EndeavourOS, Snap and Flatpak need to be installed separately - the distro only comes with AUR.
- Manjaro comes with many pre-installed apps and packages like Steam, VLC, GIMP, Thunderbird, making it an out-of-the-box solution. EndeavourOS only gives you the bare minimum apps to custom-build your PC from scratch using the software you like.
- EndeavourOS allows you to switch back to the “vanilla theme” for the DE with a click of a button. This will remove the EndeavourOS theming. Whereas Manjaro is a heavily themed distro, and it can't be so easily removed.
- EndeavourOS comes with a preloaded Nvidia driver, which is a godsend for users with an Nvidia GPU. With Manjaro, you need to install Nvidia drivers for your system manually.
Other than this, both distros are fairly similar to one another.
So with all things considered, which distro is more beginner-friendly?
Well, if you are completely new to Linux, looking for an out-of-the-box solution, and want access to cutting-edge software that comes with Arch, then go for Manjaro. However, if you are already acquainted with the Linux OS but want to try out Arch, then EndeavourOS presents a beginner-friendly option to easily install a close-to vanilla Arch experience.
The main thing to note is that even though Manjaro is Arch-based, there's a lot of things it does differently from Arch. We have a detailed article going over the main differences between Arch and Manjaro that you should find informative.
EndeavourOS: Installation
Now that you have a basic idea of what EndeavourOS brings to the table, here is a quick walkthrough of its installation procedure.
Quick Disclaimer: We will be installing EndeavourOS on VirtualBox and are aware that this might cause some occasional hiccups here and there. As such, we will not penalize/review the performance of the distro. The main focus of this review is to give you the overall feel of EndeavourOS, so you can decide whether it is the right distro for you.
On first boot, EndeavourOS will present you with the following screen.
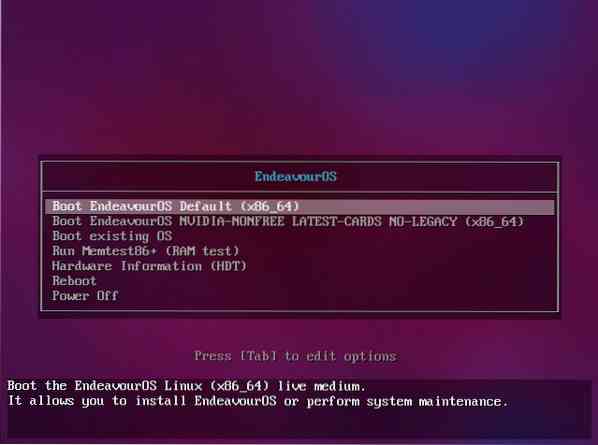
Here you get two options. The first option is for a regular installation of the distro, whereas the second option will install Nvidia drivers right from the get-go, in case you are running an Nvidia GPU.
After selecting your preferred option, you will be taken to the EndeavourOS live environment to give you a live demo of the distro without you having to install it.
The EndeavourOS Welcome app will also open up with the installation options.

It is recommended that you click on “Update this app!” before going ahead with the installation. Also, make sure to click on “Update Mirrors” as well. It will help with a faster installation and also decrease the possibility of a failed install.
Once done, you can now click on the “Start the Installer” button, and you will be asked whether you want to proceed with an “Offline” installation or an “Online” installation.
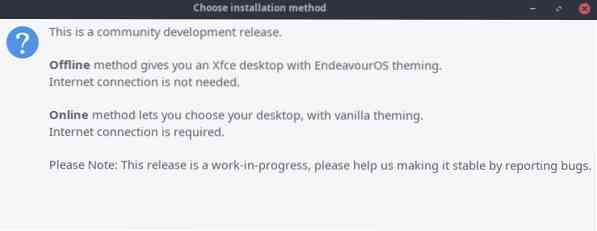
For this tutorial, we are going forward with the “Online Installation.”
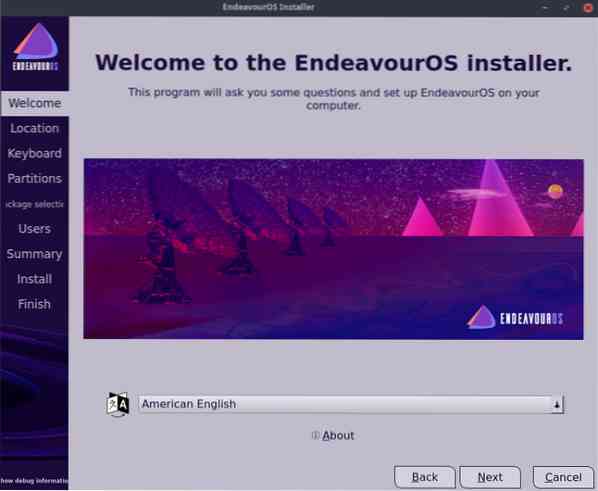
After selecting your preferred installation method, the system will present you with a customized version of the Calamares installer to help you install EndeavourOS.
Here is a quick tour of the entire installation process step-by-step:
- Welcome: This is a generic welcome screen with the option to select the preferred language for the distro as well as the rest of the installation.
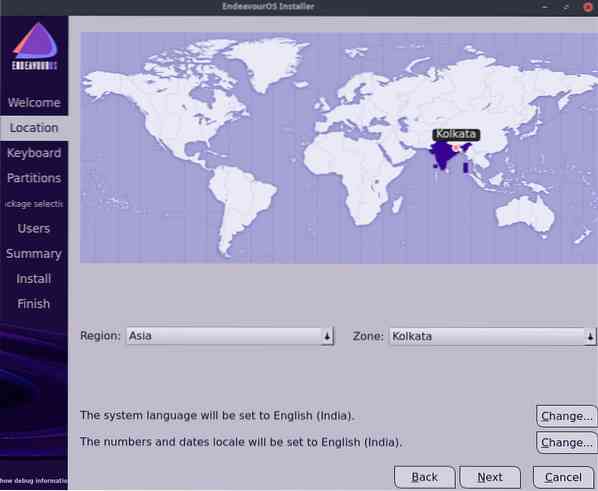
- Location: Next comes the Location section. Here you will need to select your “region” and “zone” using the dropdown menu. Alternatively, you can also use the interactive map to pinpoint your location as well. The time on your system will be automatically adjusted depending on the timezone of your location.
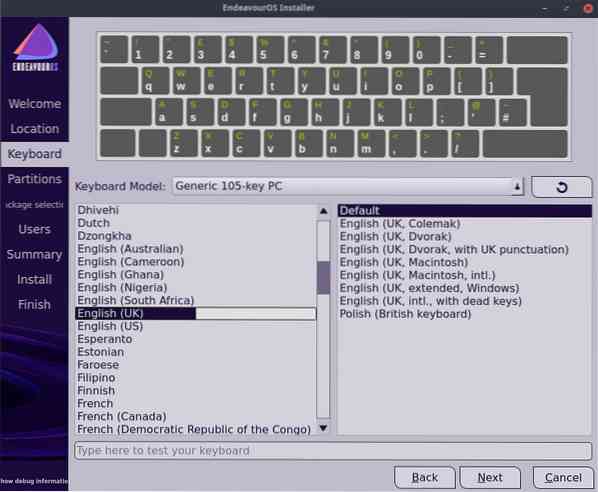
- Keyboard: Up next, you will need to select the Keyboard layout for your PC. The installer will automatically select a keyboard layout based on your location, but you can use the drop-down menu if you wish to change it. There is even a drop-down menu containing a list of keyboard models that you can select from.
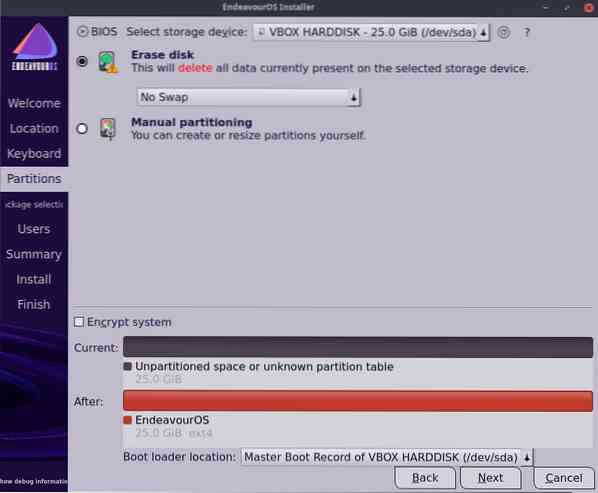
- Partitions: Now comes the part where you need to specify the partition where you wish to install EndeavourOS. An option lets you delete the entire disk you are booting from and install the distro on it. Or you can manually create and select a partition using the second option. We are going with the “Erase Disk” option because we are installing it on a VM.
- Package Selection: Next, you will be taken to the package selection section. Here you will get to select what packages you wish to install. This also includes your preferred desktop environment. However, don't unselect the option “Base-devel + Common Packages” option as that is crucial for your system's proper functioning.

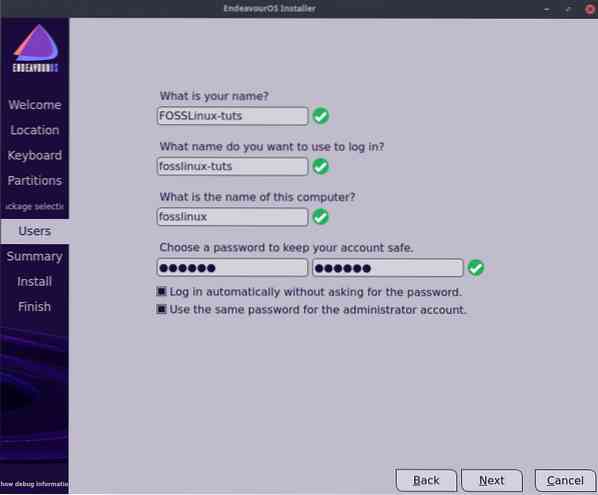
- Users: Once you are done selecting the packages, you will need to set a name for your EndeavourOS system, as well as create a new username and password for your account.
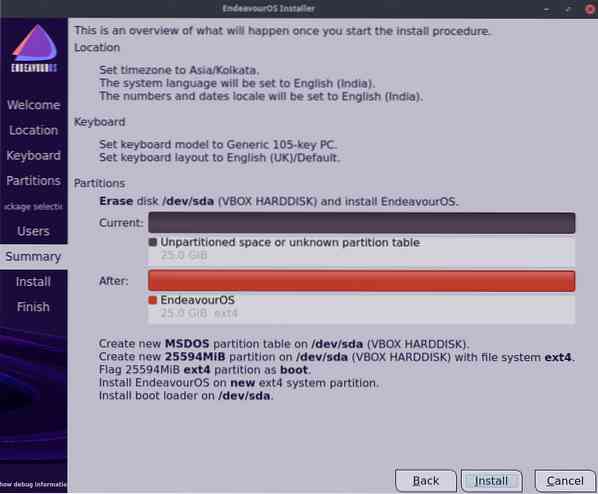
- Summary: Before starting the installation, the Summary section will give you a quick glimpse at all the options you have selected in the previous sections. Just go through the options and see if everything is set correctly. In case you find something off, go back to the corresponding previous section and make the change.
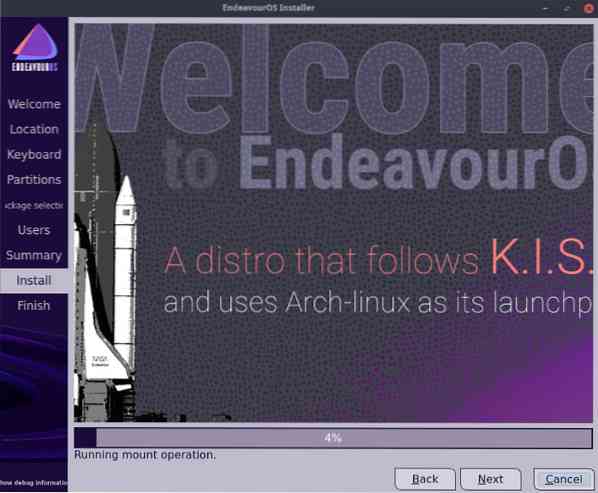
- Install: After reviewing the Summary section, hit the “Install” button, which will commence the installation process. Now you will need to wait for a couple of minutes for the distro to get installed on your PC. The exact time it is going to take will depend on your system configuration. Furthermore, if you have opted for “Online installation,” then the speed of your internet connection will also factor into the installation speed.
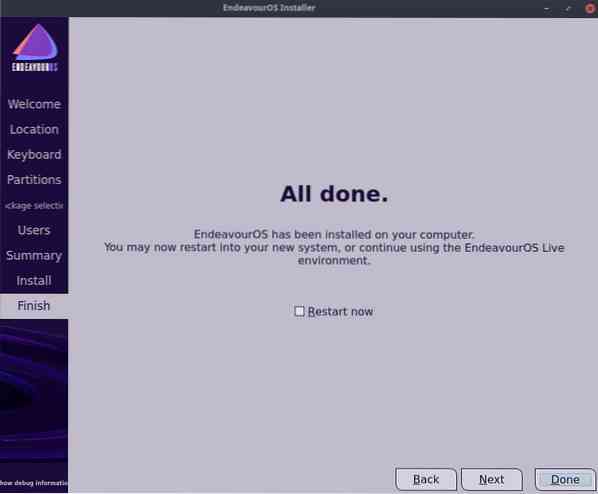
- Finish: As soon as the installation is complete, you will be made aware of that in the “Finish” section. You can now either continue browsing the distro in the Live environment or restart the system, and upon reboot, you will be greeted to your new EndeavourOS PC.
EndeavourOS is now successfully installed on your PC. Now, let's go over a quick desktop tour to give you a basic feel of the distro.
EndeavourOS: Desktop Tour
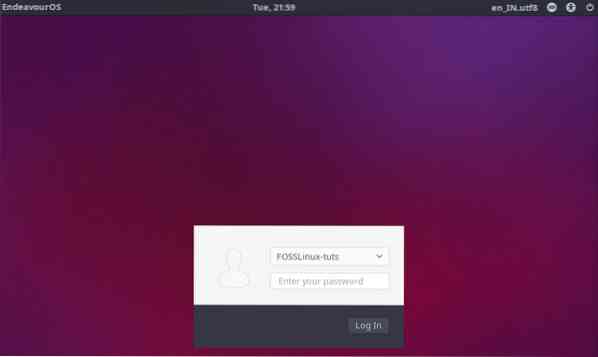
On your first system bootup, you will be greeted with the system lockscreen asking you to select your username and enter your password.
Once you have done that, you will get logged into your EndeavourOS PC for the first time. The Welcome app will showcase a slew of options, as we have shown in the image below.
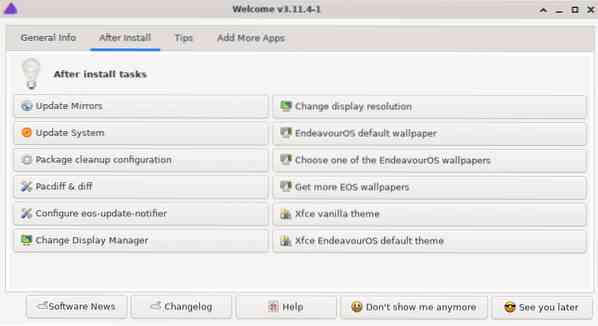
From here, you can directly head on over to the display manager and adjust the resolution to your liking. You can also set wallpaper from here if you like.
But that being said, all of these options are still available later on inside the settings menu. For now, let's get a quick overview of how the desktop looks and feels.
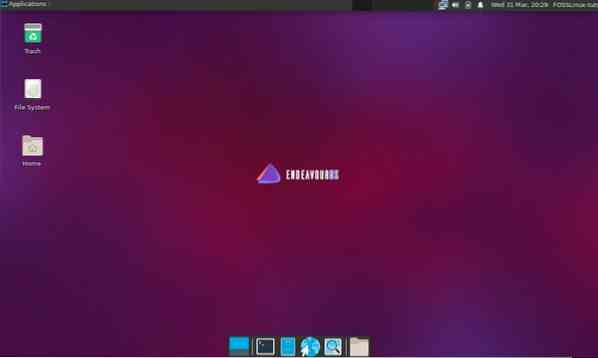
As you can see, it's a slightly customized version of XFCE with a very minimalistic wallpaper showcasing the EndeavourOS logo.
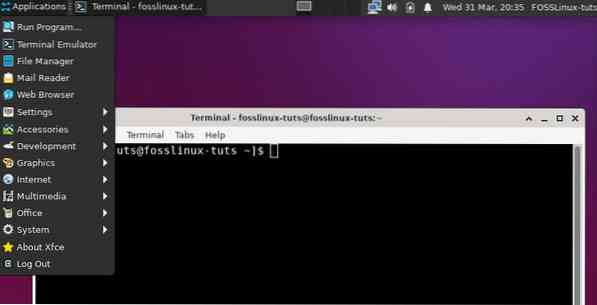
The Application Menu is located in the top-left corner of the screen inside the panel. It contains all the programs installed on the system and shortcuts to some of the important system apps and settings.
Besides the application menu, you have the app tray, which will showcase all the active apps. You can even pin some of your frequently used apps here for quick access.
This is followed by the “workspace” menu to its left. As you can see, there are four active workspaces, and you can switch between any one of them with a simple click.
And finally, to the right-hand corner, you have the applet tray. Here you will find the Calendar & Time applet, Volume applet, and the Network Connection applet. You can even add more applets here by right-clicking on it.
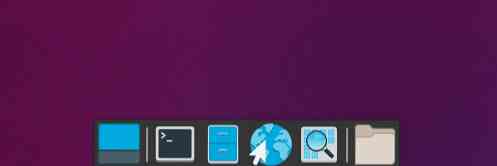
And finally, to the bottom, you have the XFCE dock.
Overall, as you can see, this is a pretty vanilla version of XFCE without many tweaks. In fact, EndeavourOS goes for a stock vanilla version of the desktop environment with minor theming tweaks here and there.
Performance
As we said earlier, this review of EndeavourOS is being run on VirtualBox with the following configuration:
- Processor: 3 Cores of a Ryzen 3 2200G CPU
- RAM: 4GB
- Storage: 25GB
- GPU: Vega 8 (in-built GPU with Ryzen 3 2200G)
And with these configurations, the distro ran comfortably smooth. We experienced no stutters or hiccups, and the performance was perfect for everyday use.
Here is a look at some of the performance statistics:

The system takes around 20 seconds to boot up.

And as you can see, on a fresh boot, the system takes up approximately 350MB of RAM.
EndeavourOS: Who Is It For?
Overall, EndeavourOS is a great starting point for new users to dive into the world of Arch. It gives you a solid foundation on top of installing the apps and packages that you like to create on your own tailor-made personal computer.
Yes, it is beginner-friendly in the sense that it doesn't force you to use a text-based installer to set up your system. All the bare minimum requirements are covered. However, it does require you to be somewhat familiar with Linux to install the other packages you need manually.
As such, we wouldn't recommend EndeavourOS to users who are just moving to Linux from Windows or Mac. For that, there are plenty of beginner-friendly Linux distros.
However, EndeavourOS is the perfect distro for Arch beginners, users who have used distros like Ubuntu or Linux Mint, and now want to experience the power of Arch but don't feel comfortable going GUI-free. EndeavourOS is perfect for this demographic.


