Open Authorization, also known as OAuth, is a protocol used to authorize a user on your website using some third-party service like Google, Github, Facebook, etc. The third-party service shares some data (name, email, profile picture, etc.) with your website and then authorizes the user on its behalf without managing the passwords and usernames for your website, and saving the users a lot of extra trouble.
How OAuth Works
When a user clicks on “Login with Google”, it takes the user to the Google OAuth consent page. When the user agrees to the consent and authenticates his identity on Google, Google will contact your website as a third party service and authorize the user on its behalf and share some data with your website. In this way, the user can be authorized without managing the credentials for your website separately.
Implementing Google OAuth using Node.js
Almost all the programming languages provide different libraries to implement google oauth to authorize users. Node.js provides 'passport' and 'passport-google-oauth20' libraries to implement google oauth. In this article, we will implement an oauth protocol to authorize users to use node.js.
Create a Project on Google
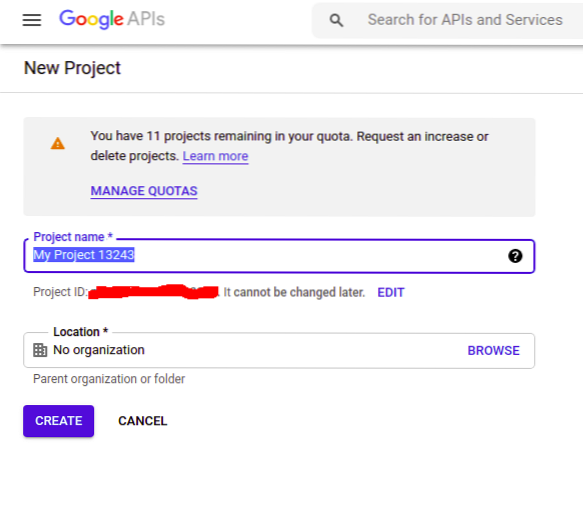
The first step to implement Google OAuth is to create a project on the google developer console for your website. This project is used to get the API keys used to make requests to Google for open authentication. Goto the following link and create your project.
https://console.developers.google.com
Configuring Google Project
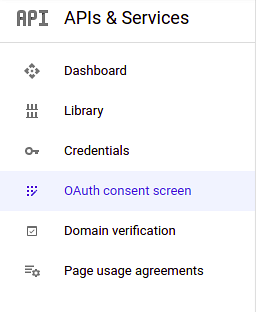
After you create the project, go into the project and select “OAuth consent screen” from the left side menu.
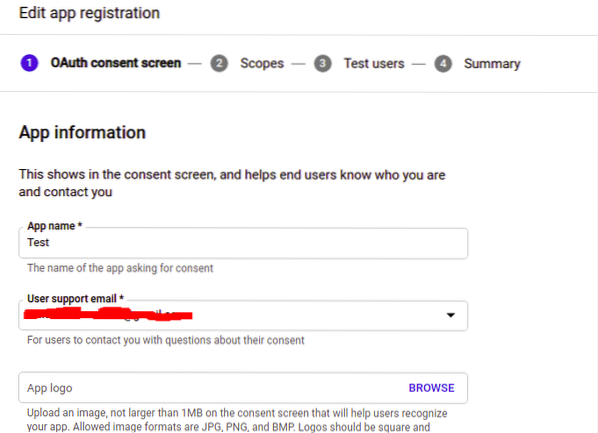
Click on the 'create' button and provide all the details of your project. Click “Save and Continue” to move on.
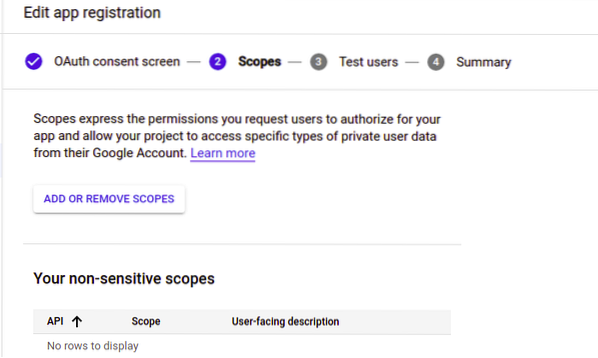
Now provide the scope of your project. Scopes are the types of permissions to access the user's data from a google account. You need to set up the permissions to get specific user data from your google account. Click “Save and Continue.”
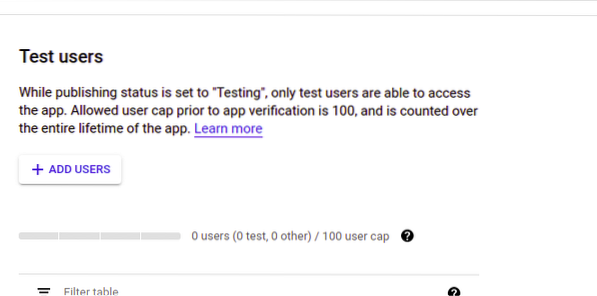
Now add the test users to the project if you want. Test users are the only allowed users who can access your web application in Testing mode. For now, we will not enter any test user and click “Save and Continue” to move on to the summary page of the project.
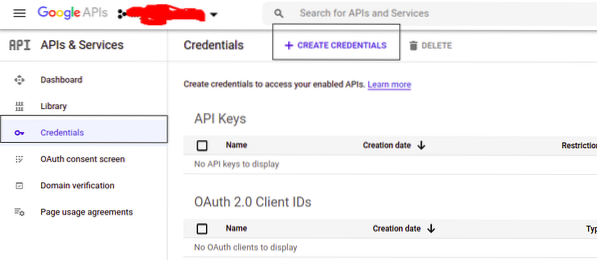
Review your project on the summary page and save the configuration. Now we will generate credentials for our project. Select the 'Credentials' tab on the left side menu and click on the 'Create credentials' button on top to generate OAuth 2.0 Client IDs.
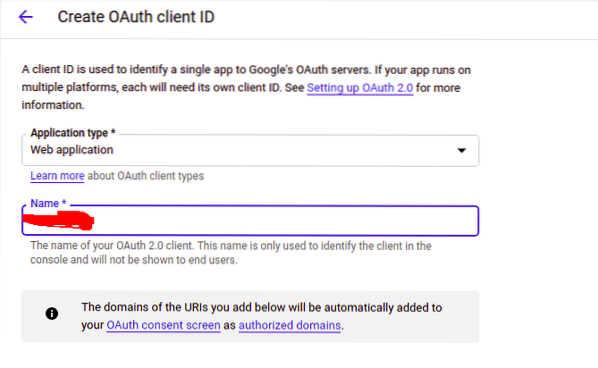
From the dropdown menu, select 'OAuth client ID' and specify the type of application as 'Web application' and your application's name.
On the same page, we have to provide two URIs, the 'Authorized Javascript Origins' and the 'Authorized redirect URIs'. The 'Authorized javascript origins' is the HTTP origin of your web application, and it can not have any path. The 'Authorized redirect URIs' is the exact URI with a path where the user will be redirected after google authentication.
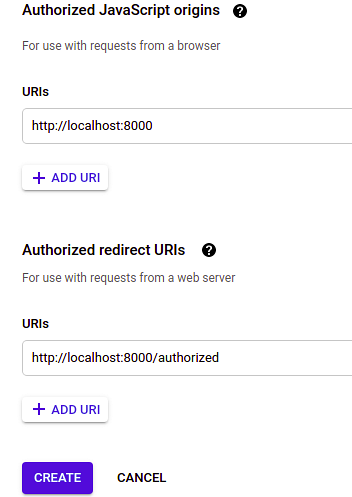
After entering all the required entries, click on 'create' to create OAuth credentials.
Initiating Node.js Project
So far, we have created a google project to authorize users for our application using google. Now we are going to initiate the node.js project to implement oauth. Create a directory named 'auth' and initiate the express project.
[email protected]:~$ mkdir auth[email protected]:~$ cd auth
[email protected]:~$ npm init -y
Installing Required npm Packages
To implement Google OAuth using node.js, we need to install some npm packages. We will use 'passport', 'express', 'path', and 'passport-google-oauth20'. Install these packages using npm.
[email protected]:~$ npm install express passport passport-google-oauth20 pathWriting Node.js Code
First of all, we will write two simple html web pages, the one with a button, and authorize the user when clicked on the button. The second page will be authorized, and the user will be redirected to the authorized page after authorization. Create a file 'public/index.html'.
Authorize Here
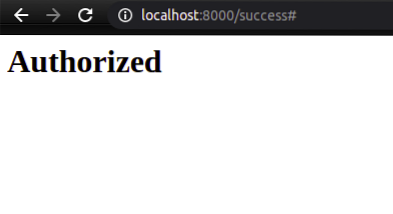
Now create a file 'public/success.html' with the following content.
Authorized
After creating web pages, now we will write code to authorize the users to use google oauth. Create a file 'index.js'.
// importing required packagesconst express = require('express');
const passport = require('passport');
const path = require('path');
const GoogleStrategy = require('passport-google-oauth20').Strategy;
const app = express();
// defining parameters
// client id is the parameter that we will get from the google developer console
CLIENT_ID=”xxxxxxx”;
// client secret will also be taken from the google developer console
CLIENT_SECRET=”xxxxx”;
// user will be redirected to the CALLBACK_URL after authorization
CALLBACK_URL=”http://localhost:8000/authorized”;
// port number must be the same as defined in the developer console
PORT=8000;
// configuring passport middleware
app.use(passport.initialize());
app.use(passport.session());
passport.serializeUser( function(id, done)
done(null, id);
);
passport.deserializeUser( function(id, done)
done(null, id);
);
// following middleware will run whenever passport. Authenticate method is called and returns different parameters defined in the scope.
passport.use(new GoogleStrategy(
clientID: CLIENT_ID,
clientSecret: CLIENT_SECRET,
callbackURL: CALLBACK_URL
,
async function(accessToken, refreshToken, profile, email, cb)
return cb(null, email.id);
));
// serving home page for the application
app.get('/', (req, res) =>
res.sendFile(path.join(__dirname + '/public/index.html'));
);
// serving success page for the application
app.get('/success', (req, res) =>
res.sendFile(path.join(__dirname + '/public/success.html'));
);
// user will be redirected to the google auth page whenever hits the '/google/auth' route.
app.get('/google/auth',
passport.authenticate('google', scope: ['profile', 'email'])
);
// authentication failure redirection is defined in the following route
app.get('/authorized',
passport.authenticate('google', failureRedirect: '/'),
(req, res) =>
res.redirect('/success');
);
// running server
app.listen(PORT, () =>
console.log(“Server is running on Port ” + PORT)
)
Testing Google OAuth
Now our application is ready, and we can test whether it authorizes the users using google oauth. Go to the root directory and run the application.
[email protected]:~$ node index.jsNow enter the url of your application into the browser.
http://localhost:8000
It shows the home page with an anchor tag.
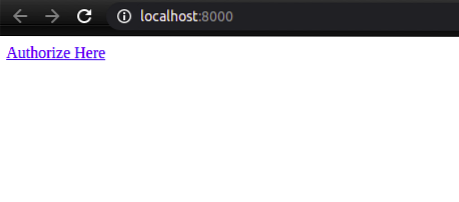
When we click on the 'Authorize Here', it will redirect to the google oauth page.

Your application name 'Test' is displayed on the Google authentication page. When you authorize your account, it will take you to the authorized page.
Conclusion
Managing usernames and passwords for different web applications is not a happy task for users. Many users leave your web application without registering their account just because they do not want to manage credentials. The authorization process on your web application or website can be simplified by using third-party services like Google, Facebook, etc. These services authorize users on their behalf, and the user does not need to manage credentials separately. In this article, we have implemented the google oauth protocol to authorize users to use Node.js.


