Many modern smartphones ship with cameras that are comparable to standalone digital cameras. Some smartphones like Nokia Lumia 950 and iPhone 6s feature cameras that are capable of capturing stunning pictures, even in low light conditions.
Apple iPhone, without a doubt, one of the best smartphones out there and is one of the few smartphones that feature good camera lenses and sensors. Even though most of us prefer backing up captured photos to the cloud, many users still prefer backing up photos to their PC or Mac over cloud storage for obvious reasons.
The official iTunes software that we're all familiar with offers options to backup your pictures from iPhone to a PC or Mac. While there are plenty of alternatives to iTunes around and many of them offer better backup features, users who are on Windows 8 and Windows 10 can easily backup all photos from iPhone to Windows 10/8.1 PC without having to install iTunes or any other third-party software.
The Photos app that ships with Windows 8 as well as Windows 8.1 lets you easily transfer your photos from iPhone to your PC.
Complete the given below instructions to backup your pictures from iPhone to Windows 10/8.1 PC.
Step 1: Connect your iPhone to Windows 10/8.1 PC using the connector that was provided with your iPhone.
Step 2: Once connected, switch to the Start screen, click or tap on Pictures app tile to run the same. And if you can't see the Pictures tile on the Start screen, type Pictures when you are in the Start screen to see Picture app in the search results. You can also launch Pictures app from Apps screen.

Step 3: Once Pictures app is launched and running, right-click anywhere on the empty space to see the apps bar with Import option (appears at the bottom-right of the screen).

Step 4: Click or tap the Import icon and then click or tap Apple iPhone that appears in the list, and let Windows scan your iPhone for all captured photos. On Windows 10, right-click on the empty area and then click Import option

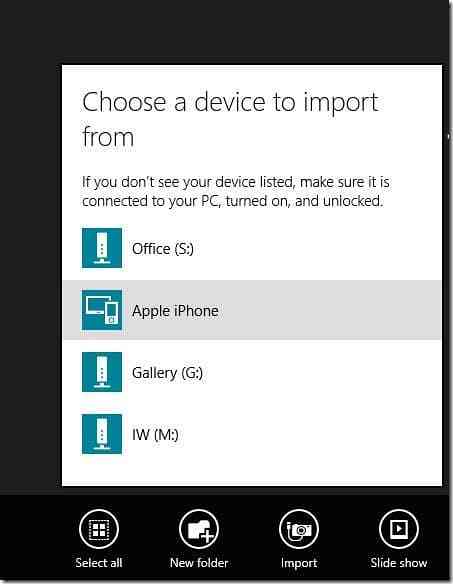

Step 5: By default, Photos app selects all photos for import job. You can manually select a set of pictures and then click the Import icon again to begin transferring all photos from your iPhone to your Windows 10/8.1 PC.


The time required for the import job varies depending on the number of photos and videos present in your iPhone. In our test, it took about a minute and half to import about 430 (~1 GB) pictures and 8 videos (~400 MB).

Once Photos app completes its business, you can open up Pictures Library to view all imported photos. That's it!


