As a Manjaro aspirant, it is ideal to have a live bootable USB. A live USB provides a convenient way for any beginner user to experiment with the distribution without installing it on the system.
In this article, we cover various ways to create a bootable Manjaro USB in Windows and Linux.
Getting Started
Before getting started, download the ISO file from Manjaro official website. Currently, Manjaro offers three desktop environments, choose as per your preference.
Create Manjaro Bootable USB in Windows
To burn the Manjaro ISO image in USB, we need a tool that does this job. There is plenty of software available; however, Manjaro official website suggests using Rufus utility.
Despite its small size Rufus is useful for numerous causes. It formats USBs/CDs to create bootable flash drives to work on an uninstalled OS or create installation media from live USB.
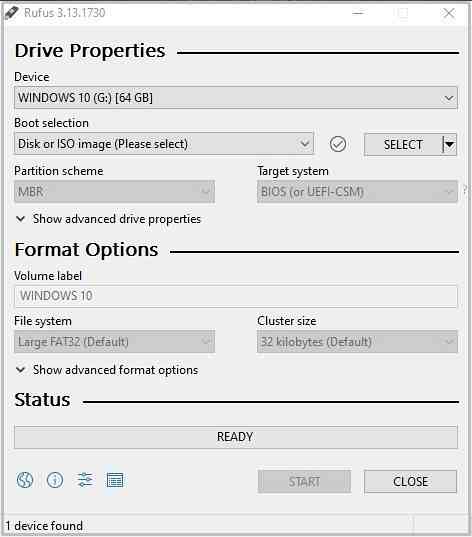
Download and install the utility and plug the USB drive at the port. Now launch the Rufus application. As shown in the screenshot below, it automatically identifies the attached USB.
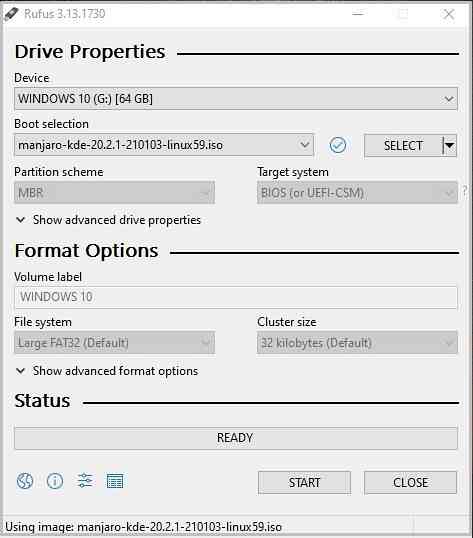
Now click on 'Select' to grab the Manjaro ISO file that you want to write to the selected device.
Rufus utility automatically selects the Disk Partition type and target system BIOS mode (UEFI/Legacy). However, it's better to confirm the partition scheme by opening the Disk Management window and Right-click to select 'Properties and open the 'Volume' tab. Verify partition type from Partition Style option. Similarly, verify the BIOS mode.
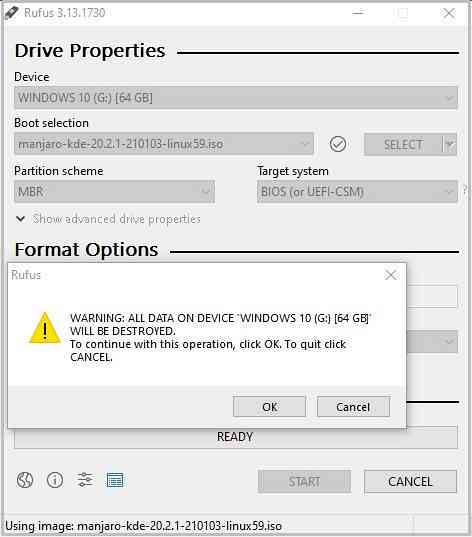
After verification, click on 'Start' to begin the ISO image burning process. A screen will pop up to choose the correct write-up mode. Select the recommended ISO image mode.
Rufus will pop up with a warning screen of formatting the drive if the data has a backup and click 'OK' to continue the operation.
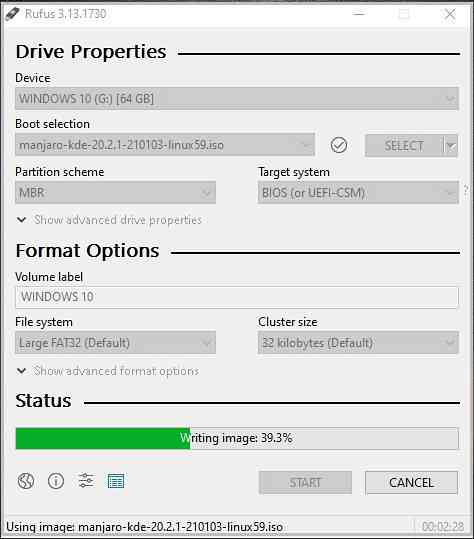
A progress bar will show up to track the image burning process. Once done, restart the machine and press the boot key to start the bootup process from the USB.
Create Manjaro Bootable USB in Linux via GUI
In a Linux distribution, several tools are available for users to create live bootable Manjaro USB in Linux. For this tutorial, we choose the default Ubuntu utility known as 'Startup Disk Application' and the ImageWriter application as it's the most suggested and preferred utility by the Manjaro Community.
ImageWriter
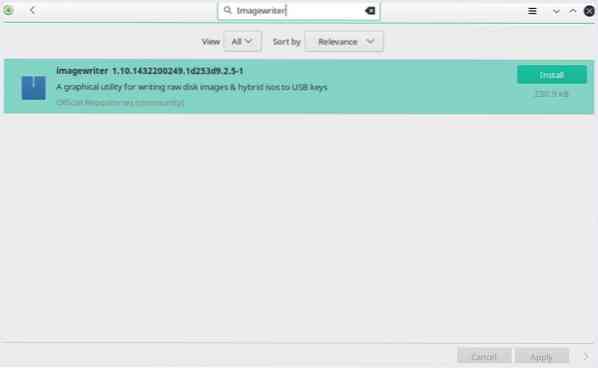
ImageWriter is a third-party application available to download from any Software repository/ package manager or software manager. After download, insert a USB flash drive and open the utility.
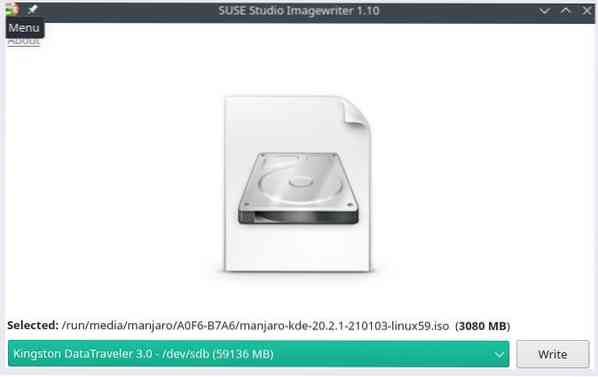
Click in the center Icon and navigate to the folder containing the Manjaro ISO file. Highlight the ISO and click open to select the image.
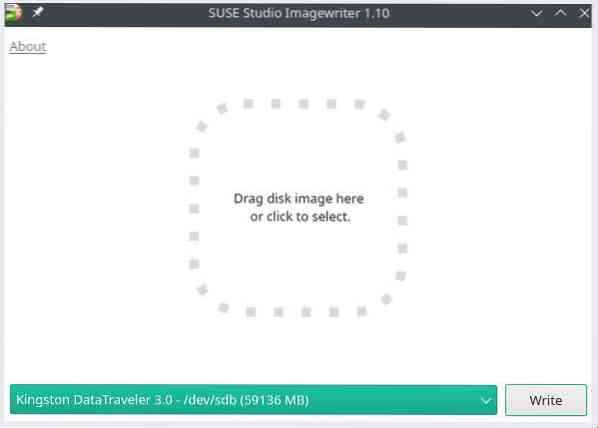
Next up, select the inserted USB drive and click 'Write' to burn the ISO image to it.
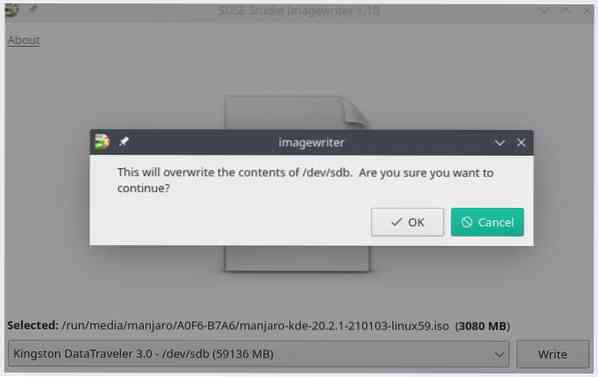
The utility begins the process of writing Manjaro ISO content to the flash drive. Once complete, the USB drive is ready to install Manjaro Linux on the machine.
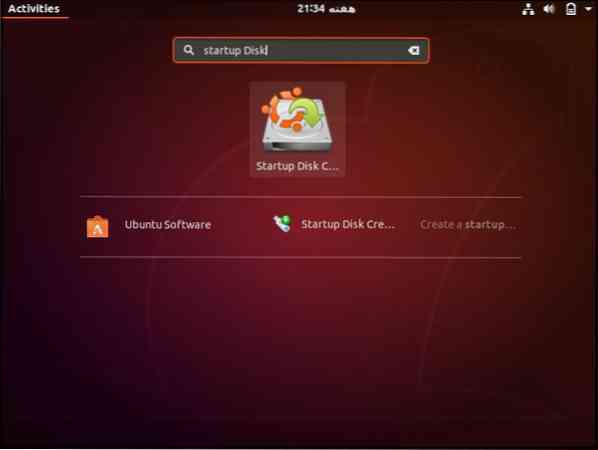
Startup Disk Creator
To write the Manjaro ISO image to a USB in Ubuntu, insert the USB drive and click on the bottom left icon to open Applications. Search for the Ubuntu default utility 'Startup Disk Creator.'
Open the application and click on 'Other' to provide the source disk image file.
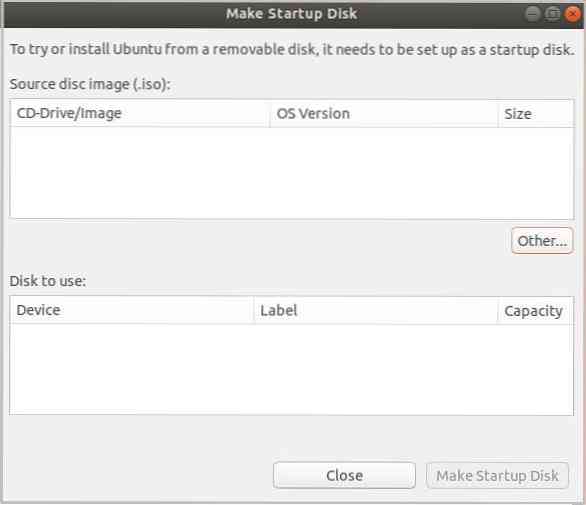
The tool automatically identifies the USB. Once done, click on 'Make Startup Disk' to burn the image files to the USB.
Create Manjaro Bootable USB in Linux via CLI
Another way to create a live Manjaro USB is via Linux command-line terminal. Insert the USB drive to the port and use the following command to check the device name Linux has assigned to the USB.
[email protected]:~$ fdisk -lDisk identifier: BFC9FB3F-BDFE-47F1-9660-51B2F5911961
Device Start End Sectors Size Type
/dev/sda1 2048 206847 204800 100M EFI System
/dev/sda2 206848 239615 32768 16M Microsoft reserved
/dev/sda3 239616 723698391 723458776 345G Microsoft basic data
/dev/sda4 723699712 724721663 1021952 499M Windows recovery environment
/dev/sda5 724721664 1707761663 983040000 468.8G Microsoft basic data
/dev/sda6 1707761664 1947377663 239616000 114.3G Linux filesystem
Disk /dev/sdb: 57.75 GiB, 62008590336 bytes, 121110528 sectors
Disk model: DataTraveler 3.0
The above output shows the USB device labeled as /dev/sdb. Note the device label for use in the follow-up dd command.
The dd command-line utility's main functionality is to duplicate and convert to/from files in Unix or Unix-like OSs. That is, the dd command reads/write to/from files in respective drivers. Such as it backups the entire boot sector of a hard drive.
Run the following command to write an image of Manjaro Linux to a USB drive.
[email protected]:~$ sudo dd bs=4M if=/path/to/manjaro.isoof=/dev/sdb status=progress oflag=sync
The if and of options in the above command represent the input and output file that is the label of our USB device in Linux OS. Replace the /path/to/manjaro.iso with the actual path of the Manjaro ISO file in your system.
The dd command processes one block of input at a time and writes it to an output file. The above command uses the bs option to read and write 4 Megabytes of ISO image data at a time. Whereas, status option prints progress statistics to stderr.
The dd command will write the ISO file content to the drive to create Manjaro installation media.
Conclusion
The article demonstrates ways to create a bootable live Manjaro USB from built-in default Linux applications and third-party software. We have learned to create installation media in Windows and Linux GUI and command-line utility. The installation media provides an effective way for new users to experiment with the latest Manjaro distribution and later use it to install at the system's hard drive.


