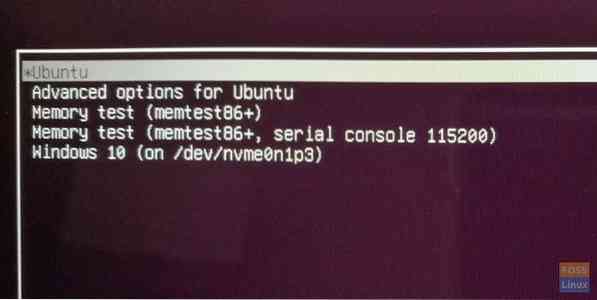
Grub is the bootloader in most of the Linux distros that manage the operating systems installed in a computer. If you have installed multiple operating systems like for instance you have a dual-boot PC running Microsoft Windows and Ubuntu, you should see both the entries during the boot process.
In the recent days, the use of M.2 and PCI Express NVMe Solid State Drives have increased and so it makes the situation a little complicated when you are dealing with multiple operating systems on the same PC, especially involving all the different types of media.
One such problem occurred on my test PC. I have Windows 10 and Ubuntu installed on the M.2 NVMe SSD so that I can benefit from the lightning-fast transfer speeds within the operating system. I also have a normal SSD installed which is only for storing the data. I had successfully installed Windows, Ubuntu, and the Grub on the NVMe drive.
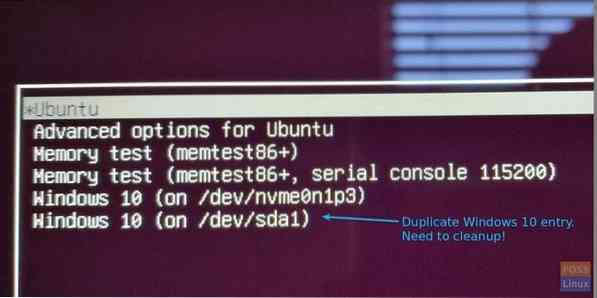
After a kernel update in Ubuntu, I noticed a new duplicate entry in the Grub pointing to Windows on the SSD. That didn't make any sense. I don't have Windows installed on the SSD! Anyway, I tried to select it and see what happens during the boot. Obviously, the screen was blank.
I need to get rid of this duplicate entry. The usual “sudo update-grub” will not fix the issue. Boot Repair can't fix it either. Some reason it also thinks Windows is installed on the sda1 drive. Here is what I did to clean up the Grub.
Editing Grub to delete the entries in Ubuntu
Step 1) Launch the “Terminal”. You can use the Ctrl+Alt+T keyboard shortcut.
Step 2) Enter the following command to add the PPA to install “Grub Customizer”.
sudo add-apt-repository ppa:danielrichter2007/grub-customizer
Step 3) Update the system
sudo apt-get update
Step 4) Install the Grub Customizer package.
sudo apt-get install grub-customizer
Step 5) Launch Grub Customizer from the Apps menu.
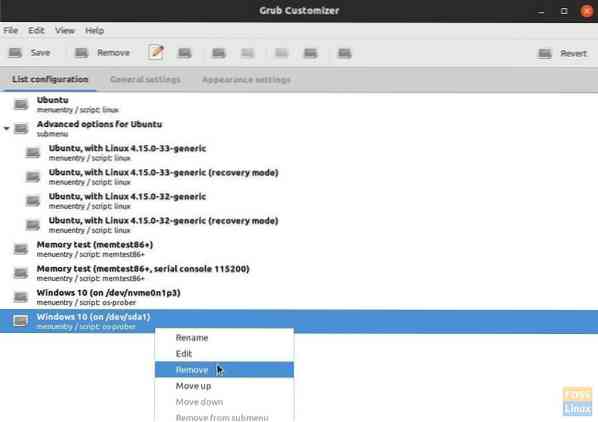
Step 6) Right-click on the option that you wish to delete and select “Remove”. In my case, I want to delete “Windows 10 (on /dev/sda1)”
Step 7) Click “Save”. The application has the revert functionality and puts the deleted entries in the right pane. You can anytime revert the changes - even after reboot!
Step 8) Restart the PC for new settings to take effect. My Grub got cleaned up from the messier looking duplicate Windows entry. I'm happy!