Network Topology:
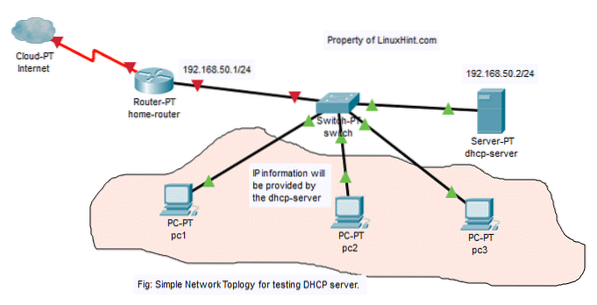
In this article, I am going to implement the network topology in the figure above. There will be a dhcp-server and 3 computers pc1, pc2, pc3 connected to a network switch. The dhcp-server will assign the computers connected to the switch IP addresses in the range 192.168.50.50/24 to 192.168.50.100/24. The gateway address will be 192.168.50.1/24. The dhcp-server will also assign the DNS server addresses 192.168.50.1 and 8.8.8.8 to the computers as well.
Assigning Static IP to the dhcp-server:
It is not necessary to assign a static IP address to the dhcp-server as the DHCP requests are broadcasted on the network and dhcp-server will reply to them automatically. A dynamic IP address on the same network (192.168.50.0/24 in this article) would just work. But, I recommend you assign an IP address to your DHCP server outside the IP address range (or DHCP pool) that you will configure for the computers on the network.
There are many tutorials on LinuxHint.com that you can get help from if you need on assigning static IP address to your Ubuntu 18.04 LTS server.
Installing ISC DHCP Server:
The ISC DHCP server package is available in the official package repository of Ubuntu 18.04 LTS. So, you can easily install it using the APT package manager.
First, update the APT package repository cache with the following command:
$ sudo apt update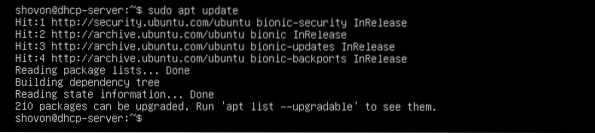
Now, install isc-dhcp-server package with the following command:
$ sudo apt install isc-dhcp-server
Now, press y and then press
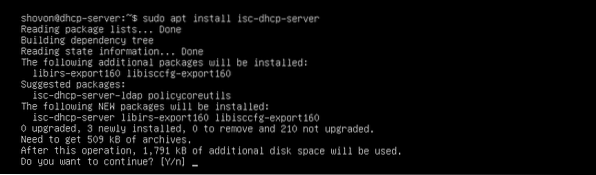
ISC DHCP server should be installed.

Configuration Files of ISC DHCP Server:
The main configuration file of ISC DHCP server is /etc/dhcp/dhcpd.conf
If you want to configure ISC DHCP server, then you have to edit this configuration file. Once you do, you have to restart the isc-dhcp-server service as well for the changes to take effect.
To restart the isc-dhcp-server service, run the following command:
$ sudo systemctl restart isc-dhcp-serverConfiguring ISC DHCP Server:
Before you make any changes to the /etc/dhcp/dhcpd.conf configuration file, make a backup copy of the configuration file /etc/dhcp/dhcpd.conf.backup with the following command:
$ sudo mv -v /etc/dhcp/dhcpd.conf /etc/dhcp/dhcpd.conf.backup
Now, create a new blank configuration file /etc/dhcp/dhcpd.conf with the following command:
$ sudo nano /etc/dhcp/dhcpd.conf
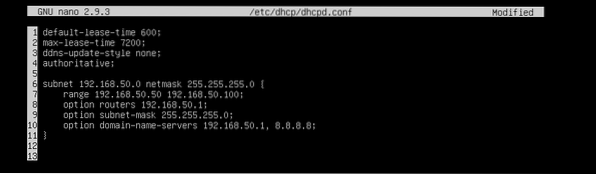
Now, type in the following lines and save the file by pressing
max-lease-time 7200;
ddns-update-style none;
authoritative;
subnet 192.168.50.0 netmask 255.255.255.0
range 192.168.50.50 192.168.50.100;
option routers 192.168.50.1;
option subnet-mask 255.255.255.0;
option domain-name-servers 192.168.50.1, 8.8.8.8;
The final configuration files is:
Now, restart the isc-dhcp-server service with the following command:
$ sudo systemctl restart isc-dhcp-server
Now, check whether the isc-dhcp-server is running correctly with the following command:
$ sudo systemctl status isc-dhcp-serverAs you can see, the isc-dhcp-server service is running correctly. So, the configuration was successful.

Testing the DHCP Server:
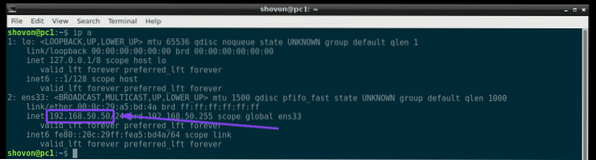
Now, I am going to start all the other computers on the network and see if it's getting the correct IP addresses.
As you can see, pc1 got the IP address 192.168.50.50.
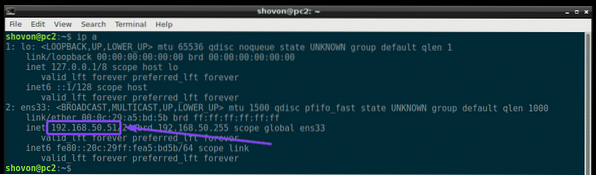
pc2 got the IP address 192.168.50.51.
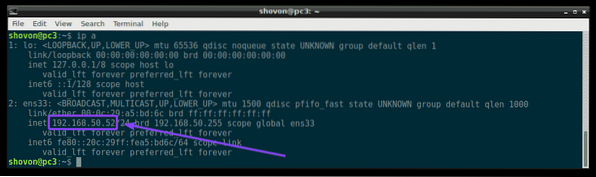
pc3 got the IP address 192.168.50.52.
So, the DHCP server is working as expected.
Assigning Fixed IP Addresses to Hosts via DHCP:
By default, the DHCP server will assign random IP addresses to the computers on the network from the DHCP IP range that you configured. So, there's no guarantee that one specific computer will get the same IP address. But, you can assign fixed IP addresses to the computers on your network using DHCP. You will need the MAC address of the NIC (Network Interface Card) of the computer to which you want to assign a fixed IP address.
You can find the MAC address of your Linux computers with the following command:
$ ip aAs you can see, the MAC address of pc2 is 00:0c:29:a5:bd:5b.
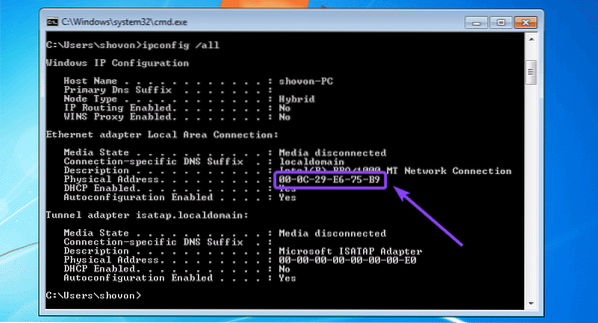
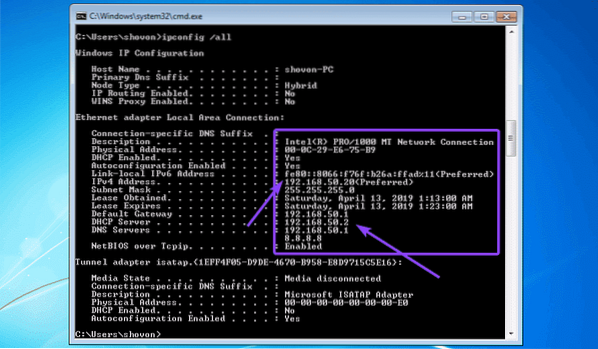
On Windows, you can run the following command to find the MAC address of your NIC card.
$ ipconfig /allAs you can see, the MAC address of my NIC card is 00:0c:29:e6:75:b9.
Now, to configure the DHCP server to assign a fixed IP address to pc2, open the DHCP server configuration file /etc/dhcp/dhcpd.conf as follows:
$ sudo nano /etc/dhcp/dhcpd.conf
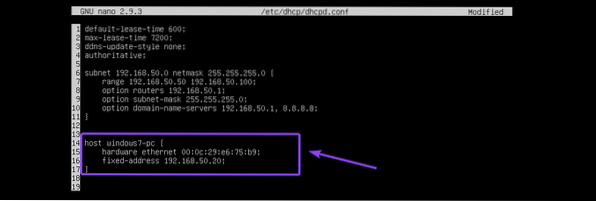
Then, add the following lines at the end of the configuration file and save the file.
host windows7-pchardware ethernet 00:0c:29:e6:75:b9;
fixed-address 192.168.50.20;
Here, 00:0c:29:e6:75:b9 is the MAC address of the computer where we want to assign the fixed IP address 192.168.50.20.
The final configuration file is:
Now, restart the isc-dhcp-server as follows:
$ sudo systemctl restart isc-dhcp-serverAs you can see, the correct IP address 192.168.50.20 is assigned to the Windows 7 machine. So, it worked.
That's how you install and configure ISC DHCP Server on Ubuntu 18.04 LTS. Thanks for reading this article.


