Now that Ubuntu carries GNOME as the desktop environment instead of Unity, you already get the polished look of GNOME. It also opens your Ubuntu to the world of GNOME extensions where you can download hundreds of beautiful themes.
Installing themes in Ubuntu 17.10 and above
This guide is tested to be working in Ubuntu 17.10. It should work without any problem on higher versions too as long as it's based on GNOME! First, let's talk about a few aspects of the themes.
1. GTK Themes
A GTK theme provides the widgets (menus, buttons, scrollbar etc.) and layout of the programs. GTK+3 is the latest version as of today available from the GNOME environment. GTK +2 was the predecessor that got upgraded about a decade ago. Ubuntu 17.10 uses GTK3, so you need to downloaded GTK3 themes for installing it. Head-over to GNOME official page to download your favorite theme.
2. GNOME Shell Themes
GNOME Shell theme provides the overall appearance of the desktop such as the top panel, menu, task switcher appearance etc. and other fancy graphics effects. Therefore, a Shell theme is a separate theme again to enhance the look of your Ubuntu user interface. You can download your favorite Shell theme from GNOME.
Using these two components, you can greatly customize your Ubuntu's appearance. Note that some developers bundle shell and GTK3 theme together, while some don't, and depends on which theme you are downloading.
Prerequisites
In order to install themes, you need to install the Gnome Tweak tool.
Installing GNOME Tweak Tool
Launch 'Terminal' and enter the following commands one at a time.
sudo apt-get update
sudo apt-get upgrade
sudo apt-get install gnome-tweak-tool
Next, you need to enable GNOME shell extensions.
Installing GNOME extensions
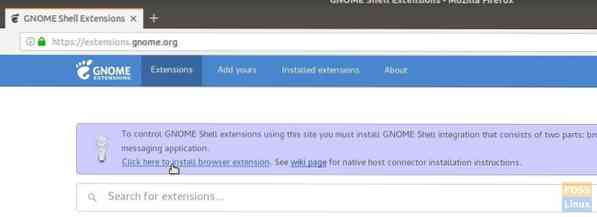
STEP 1: Launch Firefox browser and go to https://extensions.gnome.org/
STEP 2: Click on the link “Click here to install browser extensions”.

STEP 3: Go ahead and add the add-on.
STEP 4: Look for 'user themes' and click on the first result 'User Themes by fmueliner'.
STEP 5: Turn it ON by moving the slider.
GNOME Shell integration is now complete and your PC is ready for installation of themes!
Installing GTK and Shell Themes
For the sake of explanation, I have downloaded the following themes for installation:
GNOME OS-X: This theme is a gnome-desktop-interpretation of Mac OSX. The developer tried to implement the feel of OSX on the gnome-applications and has included both GTK3 and Shell Theme in the downloads.
STEP 1: Go to the official downloaded page and download the GTK and shell themes. I have downloaded Gnome-OSX-V-HSierra-1-3-3.tar.xz which is GTK theme and Gnome-OSX-Shell-themes-V.tar.xz which is shell themes pack.
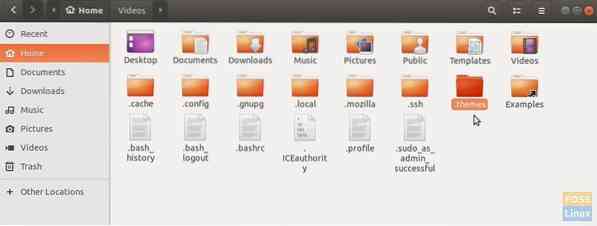
STEP 2: Open File Explorer and create a new folder named .themes. Note that after you create it, it won't be visible. You have to turn ON 'Show Hidden Files' from the hamburger menu.

STEP 3: Copy and paste the downloaded theme files into the .themes folder and only extract the GTK theme contents. Delete the tar file of the GTK theme after extraction is complete. Don't extract the shell theme tar file.
STEP 4: Launch 'Tweaks' application.
STEP 5: In the Tweaks app, click on the drop-down arrow in 'Applications' and select the GTK theme. Then under the 'Shell' section, click '(None)' and navigate and select the tar.xz shell file. You will see the new shell theme appear in the drop-down list. Select it and click OK.
You should immediately see the shiny new theme settings taking into effect. But I suggest to log out and log in again for complete theme integration. Enjoy!
 Phenquestions


