Basics of Apache Kafka Partitions:
To understand the basics of Apache Kafka Partitions, you need to know about Kafka Topic first.
A Topic is like a database in a SQL database such as MariaDB for Apache Kafka. A Topic has a name or identifier that you use to group messages in Apache Kafka.
A Partition is like a channel for each Topic. A Topic can have many Partitions or channels.
A network cable connecting two computers has two ends, one is sending data, the other one is receiving data. Just like that, Apache Kafka Topic has two ends, Producers and Consumers. A Producer creates messages, and sends them in one of the Partitions of a Topic. A Consumer on the other hand reads the messages from the Partitions of a Topic.
Multiple Partitions or channels are created to increase redundancy. It is also used to group messages in a specific Topic.
That's the basics of Apache Kafka Partitions. You can learn more about Apache Kafka partitions on another dedicated article Apache Kafka Partitioning at https://linuxhint.com/apache-kafka-partitioning
Installing Apache Kafka:
I have a dedicated detailed article on how to Install Apache Kafka on Ubuntu, which you can read at https://linuxhint.com/install-apache-kafka-ubuntu/
With a little bit of tweaks, you can install Apache Kafka on other Linux distributions as well.
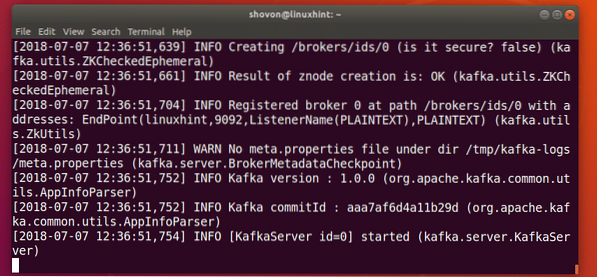
Starting Apache Kafka Server:
If you've followed my article to install Apache Kafka, then first start Apache Kafka server with the following command:
$ sudo kafka-server-start.sh /etc/kafka.propertiesApache Kafka server should start. Keep this terminal open as long as you want Apache Kafka server to run.
Creating an Apache Kafka Topic:
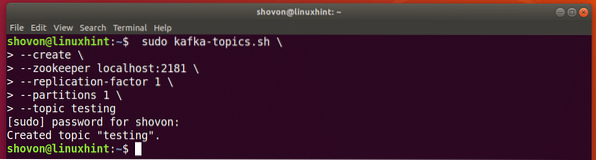
You can create an Apache Kafka Topic testing with the following command:
$ sudo kafka-topics.sh \--create \
--zookeeper localhost:2181 \
--replication-factor 1 \
--partitions 1 \
--topic testing
The Topic testing should be created. This Topic has 1 partition.
If you want to create, let's say N partitions, then set -partitions to N.
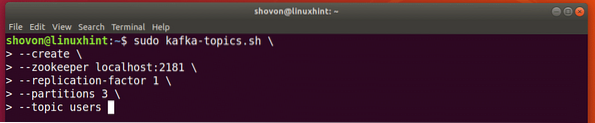
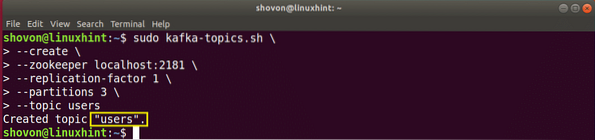
Let's create another Topic, let's say users, with 3 Partitions, then run the following command:
$ sudo kafka-topics.sh \--create \
--zookeeper localhost:2181 \
--replication-factor 1 \
--partitions 3 \
--topic users
Topic users should be created with 3 Partitions.
Adding Partitioned Messages to the Topic:
A Partitioned message of a Topic has a key and a value. The key and value is usually separated by a comma or other special character. It does not matter what special character you use to separate the key and value pair. But you must use the same special character everywhere on that Topic. Otherwise things could go wrong.
The key is used to determine which Partition a message of a Topic belongs to. It should be unique on a Topic. If you have 3 Partitions, then you should use 3 different keys. So that the messages can be divided into 3 Partitions.
Let's say our users Topic has 3 users with key 1, 2, and 3, each of them belongs to one of the 3 Partitions of the users Topic.
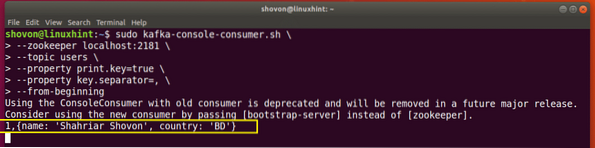
Run the following command to add the first user with key 1 using the Kafka Producer API:
$ echo "1,name: 'Shahriar Shovon', country: 'BD'" | sudo kafka-console-producer.sh \--broker-list localhost:9092 \
--topic users \
--property parse.key=true \
--property key.separator=,

Now you can list the message from the users Topic using the Kafka Consumer API with the following command:
$ sudo kafka-console-consumer.sh \--zookeeper localhost:2181 \
--topic users \
--property print.key=true \
--property key.separator=, \
--from-beginning

As you can see, the key and value pair I just added to the users Topic is listed.
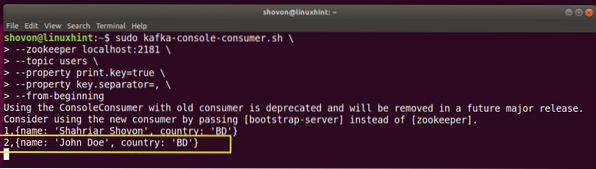
I am going to keep the Consumer program for users Topic open on this Terminal and add the other users to the users Topic from another Terminal and see what happens.
Add another user with key 2 with the following command:
$ echo "2,name: 'John Doe', country: 'BD'" | sudo kafka-console-producer.sh \--broker-list localhost:9092 \
--topic users \
--property parse.key=true \
--property key.separator=,

As you can see from the marked section of the screenshot below, the new user is listed on the Consumer program instantly.
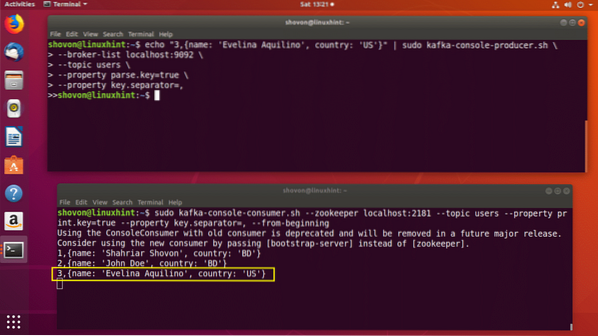
Let's add our last user with key 3 with the following command:
$ echo "3,name: 'Evelina Aquilino', country: 'US'" | sudo kafka-console-producer.sh \--broker-list localhost:9092 \
--topic users \
--property parse.key=true \
--property key.separator=,

As you can see, the new user is also listed in the Consumer program.
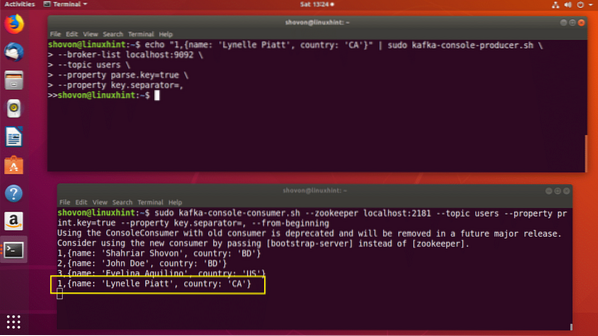
You can also add many users to the same Partition. Just make sure the key is the same.
Let's add another user to the Partition with key 1:
$ echo "1,name: 'Lynelle Piatt', country: 'CA'" | sudo kafka-console-producer.sh \--broker-list localhost:9092 \
--topic users \
--property parse.key=true \
--property key.separator=,

As you can see, the new user is added to the correct Partition of the users Topic.
I can keep adding random users to the users Topic and they will be send through the correct partition as you can see from the screenshot below.
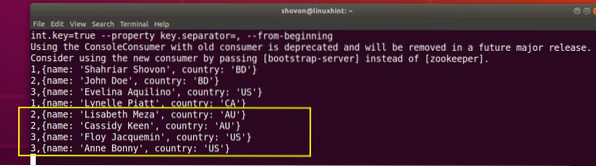
So that's how Partitions in Apache Kafka works. Every Partition is like a Queue, the first message you send through that partition is displayed first, and then the second message and so on in the order they are sent.
If you're a Java developer, you can use Java programming language and Apache Kafka Java APIs to do interesting things with Apache Kafka Partitions. For example, you can assign different Partition for different chat rooms for your instant messaging app as messages must be displayed on the order they are sent.
So that's all for today. Thank you for reading this article.


