In this article, we shall show you the command-line way and GUI way of creating an archive (zip format) and extracting an existing zip file.
For the tutorial, we are going to use Ubuntu 18.04. If, for any reason, the zip is not installed, you can install it using the following command. You also need to install unzip at the same time as, without it, you will not be able to retrieve your files from the zipped content. Typically, both the tools come pre-installed in Ubuntu.
Zip and Unzip Files on Ubuntu
Launch the Terminal and enter the following command:
sudo apt install zip unzip
To zip a file using the command line, you need the zip command. The syntax of the command is as below.
zip zipname filename1 filenmae2 filename3… filenameN
The parameters include the zip name that you are going to create, followed by the file names. Let's see an example to get a better understanding.

As you can see from the screenshot above, we zip three files - file1, file2, and file3. Once the command is executed, it stores the data into the filename specified. In this case, all three files are zipped into myzip.
You can also zip a folder along with a file name. Let's see the syntax as below.
zip myzip1 filename1 filename2 folder1 folder2
Now, let's take a look at the way to zip the files using the Graphical user interface (GUI).
First, you need to move to the folder using your desktop environment or GNOME. In our case, we are going to use GNOME.
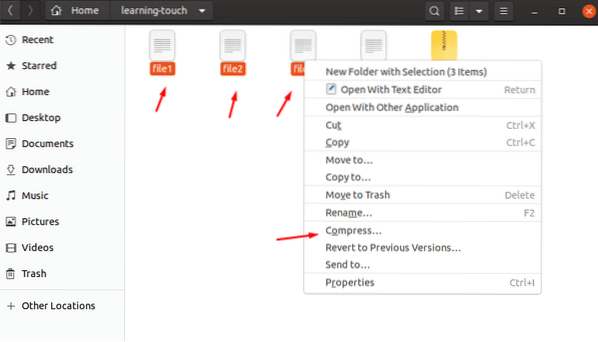
Once there, now select the files you want to zip and then right-click on it. There you will find an option of “compress.”

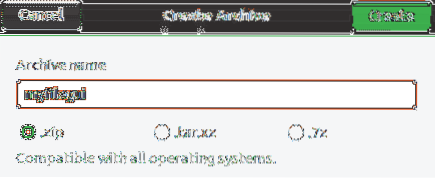
Once you click it, you will see a window, “Create Archive” popup. There, you can choose the filename and then also select the compression algorithm that you want to use to compress the selected file. You have the option to choose from zip, tar.xr, and 7z. For simplicity, we are going to use “zip.”

It should create your zip named “myfilegui.”
Unzipping
Unzipping files can be done using the unzip command. It is similar to zip command. However, in this case, you only need to put the zip file name as the argument.
The name of the command is as below.
unzip zipname.zip
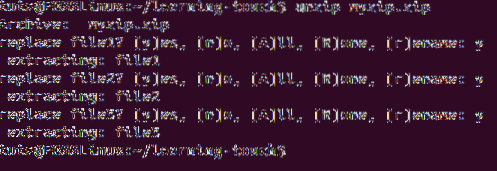
Let's try to unzip the files that we zipped in the above section.

We unzipped the files in the same folder, and that's why it gave you the options to say Yes, No, All, None, and Rename.
But, what happens if you use another format, such as tar? In that case, you need to use the method described in the tar command.
gunzip command lets you work with different formats, including .z, .Z, .taz, .tgz, _z and others. Now, let's take a look at the uncompressing compressed files using GUI.
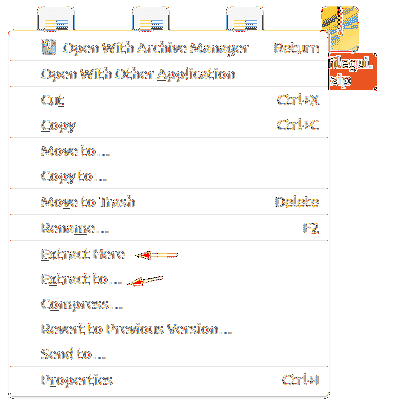
As usual, you need to go to the folder where the files are saved. There, you need to right-click the file and click on extract here. If you do so, then it will create a folder similar to the name of the zip file and then extract the contents into there. However, if you choose “Extract to,” then you can select the folder where the extracted data are stored.

Conclusion
It takes us to the end of our guide on how to zip and unzip files in Ubuntu. The command-line route is useful when you want to create an archive or decompress an archive quickly while operating on a remote PC. The GUI way is always accessible from the context menu right-click so that Windows and macOS migraters to Linux feel at home.
 Phenquestions


