Getting started with Anaconda
To explain what is Anaconda, we will quote its definition from the official website:
Anaconda is a free, easy-to-install package manager, environment manager and Python distribution with a collection of 1,000+ open source packages with free community support. Anaconda is platform-agnostic, so you can use it whether you are on Windows, macOS or Linux.
It is easy to secure and scale any data science project with Anaconda as it natively allows you to take a project from your laptop directly to deployment cluster. A complete set of features can be shown here with the official image as well:
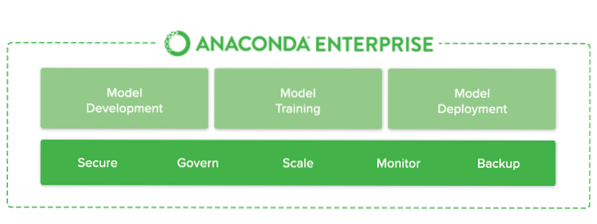
Anaconda Enterprise
To show in brief what Anaconda is, here are some quick points:
- It contains Python and hundreds of packages which are especially useful if you are getting started or experienced with Data Science and Machine Learning
- It comes with conda package manager and virtual environments which development very easy
- It allows you to get started with development very fast without wasting your time to setup tools for Data Science and Machine Learning
You can install Anaconda from here. It will automatically install Python on your machine so you don't have to install it separately.
Anaconda vs Jupyter Notebooks
Whenever I try to discuss Anaconda with people who are beginners with Python and Data Science, they get confused between Anaconda and Jupyter Notebooks. We will quote the difference in one line:
Anaconda is package manager. Jupyter is a presentation layer.
Anaconda tries to solve the dependency hell in python-where different projects have different dependency versions-so as to not make different project dependencies require different versions, which may interfere with each other.
Jupyter tries to solve the issue of reproducibility in the analysis by enabling an iterative and hands-on approach to explaining and visualizing code; by using rich text documentation combined with visual representations, in a single solution.
Anaconda is similar to pyenv, venv and minconda; it's meant to achieve a python environment that's 100% reproducible on another environment, independent of whatever other versions of a project's dependencies are available. It's a bit similar to Docker, but restricted to the Python ecosystem.
Jupyter is an amazing presentation tool for analytical work; where you can present code in “blocks,” combines with rich text descriptions between blocks, and the inclusion of formatted output from the blocks, and graphs generated in a well-designed matter by way of another block's code.
Jupyter is incredibly good in analytical work to ensure reproducibility in someone's research, so anyone can come back many months later and visually understand what someone tried to explain, and see exactly which code drove which visualization and conclusion.
Often in analytical work, you will end up with tons of half-finished notebooks explaining Proof-of-Concept ideas, of which most will not lead anywhere initially. Some of these presentations might months later-or even years later-present a foundation to build from for a new problem.
Using Anaconda and Jupyter Notebook from Anaconda
Finally, we will have a look at some commands with which we will be able to use Anaconda, Python and Jupyter on our Ubuntu machine. First, we will download the installer script from the Anaconda website with this command:
curl -O -k https://repo.anaconda.com/archive/Anaconda3-5.2.0-Linux-x86_64.shWe also need to ensure the data integrity of this script:
sha256sum Anaconda3-5.2.0-Linux-x86_64.shWe will get the following output:

Check Anaconda integrity
We can now run the Anaconda script:
bash Anaconda3-5.2.0-Linux-x86_64.shOnce you accept the terms, provide a location for installation of packages or just hit Enter for it to take the default location. Once the installation is completed, we can activate the installation with this command:
source ~/.bashrcFinally, test the installation:
conda listMaking an Anaconda Environment
Once we have a complete installation in place, we can use the following command to create a new environment:
conda create --name my_env python=3We can now activate the environment we made:
source activate my_envWith this, our command prompt will change, reflecting an Active Anaconda environment. To continue with setting up a Jupyter environment, continue with this lesson which is an excellent lesson on How to install Jupyter Notebooks on Ubuntu and start using them.
Conclusion: Install Anaconda Python and Jupyter Notebooks for Data Science
In this lesson, we studied how we can install and start using the Anaconda environment on Ubuntu 18.04 which is an excellent environment manager to have, especially for beginners for Data Science and Machine Learning. This is just a very simple introduction of many lessons to come for Anaconda, Python,Data Science and Machine Learning. Share your feedback for the lesson with me or to LinuxHint Twitter handle.


