This article will explain how to run Ubuntu 20.04 from a USB stick. The article will also explain how to install Ubuntu on a USB drive to make the drive persistent. The primary topics covered in this article include the following:
- How to Prepare a Live USB
- How to try Ubuntu from a USB stick (without installing the OS)
- How to install Ubuntu on a USB stick
Requirements
- An ISO image of Ubuntu 20.04
- 2 USB drives
- A computer system
Note: We have performed the procedure discussed in this article on a system running Ubuntu 20.04 LTS.
Prepare Live USB
Follow the steps below to prepare a live USB drive:
1. Download the Ubuntu 20.04 LTS ISO file from the Ubuntu official Downloads page.
2. Insert the USB drive into your system. The USB drive must be a minimum of 4GB.
3. To make a Live USB in your Ubuntu system, open the Startup Disk creator application. If you are using a Windows system, use Rufus, and for macOS, use the Disk utility. In this example, we are working on an Ubuntu system, so we will use the Startup Disk creator application.
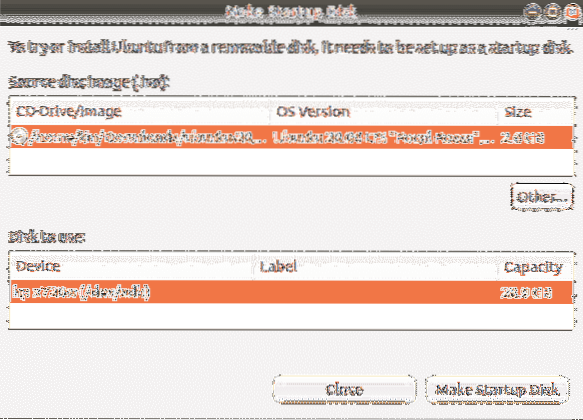
To launch the Startup Disk creator, hit the super key on your keyboard and search for the application using the search bar that appears. When the search result appears, click on the Startup Disk creator icon to launch the application. Under the Source disc image(.iso) section in the Startup Disk creator application, click on the Other button to insert the Ubuntu .iso file. The Disk to use section will automatically detect and add your plugged-in USB drive.
4. Click the Make Startup Disk button to start creating a bootable USB drive.
Wait for a little while, and the bootable media will be created. You will see the following message. Click the Quit button to close the notification.

Run Ubuntu from USB
Once you have a bootable USB, you can take it with you anywhere and run the OS from it without installation. However, remember that you cannot store files and data on the USB live image. If you want to save files and data on the USB drive, you will first need to install Ubuntu on the USB and create persistent storage.
Note: If the system you are using already has an OS installed, you should be sure to make a backup of all your data.
Try Ubuntu
If you want to just try out Ubuntu OS without installing it, follow the steps below:
- Insert the bootable USB on your system and boot your system from it.
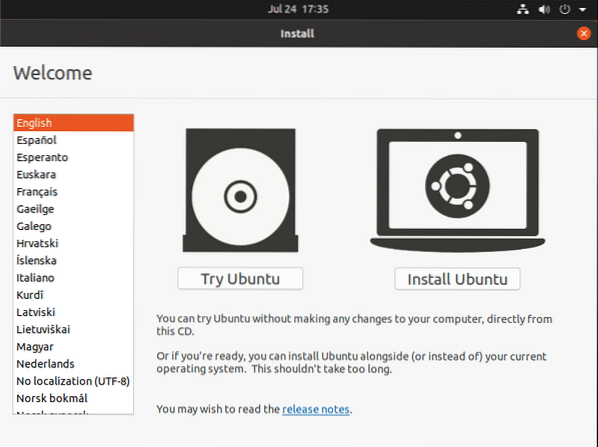
- After the boot is finished, the following window will appear.
- Select the Try Ubuntu option, after which the Ubuntu live session will be started.

Now, you can try using Ubuntu from the USB drive and get more familiar with its GUI layout and appearance.
Install Ubuntu
If you want to keep files and data persistent in the Ubuntu OS, you will need to install it on your USB drive. The following are the steps required to do so:
1. Insert the bootable USB on your system and boot your system from it.
2. After the boot is finished, the following window will appear. Select the Install Ubuntu option.
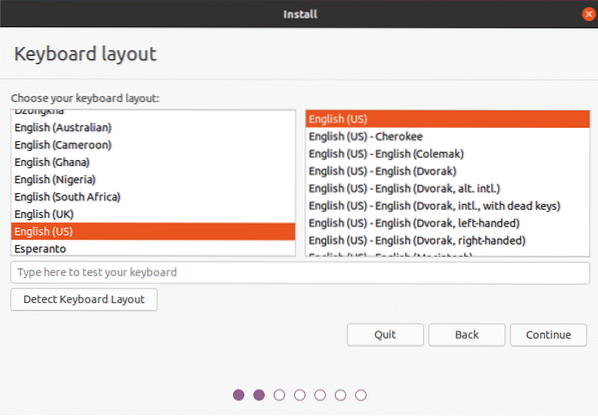
3. Once you have selected the Install Ubuntu option, you will see the following window. Select the keyboard layout and click Continue.
4. Select the Normal Installation or Minimal Installation option, based on whether you want the fully-featured Ubuntu OS, or you just want the basic features, respectively.
Uncheck the Install third-party software for graphics and Wi-Fi hardware and additional media formats check box. Then, click the Continue button. You can choose to download the updates during installation of the OS by checking the Download updates while installing Ubuntu box.

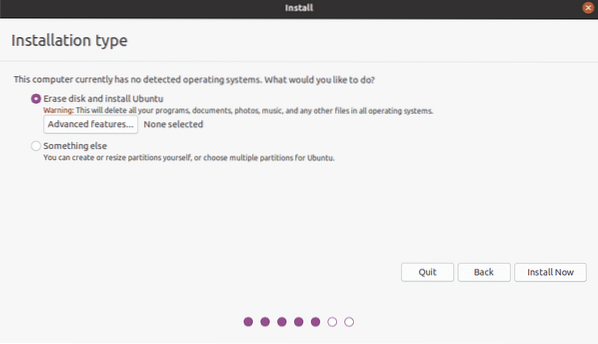
5. Next, in the Installation type window, choose the Something else option and click the Install Now button.
6. Identify the USB drive on which you want to install Ubuntu. In my case, it is /dev/sdb with one partition, as the size of my USB drive is 32 GB. We will delete the old partition and create new ones.
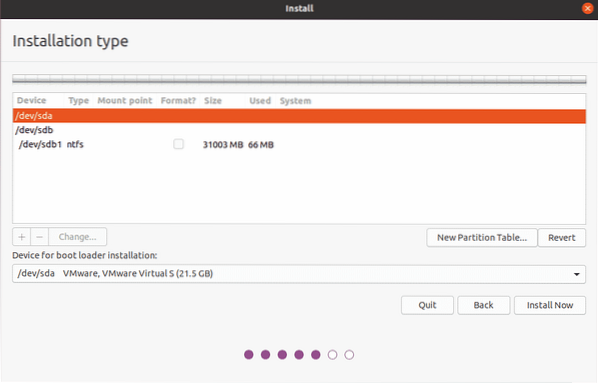
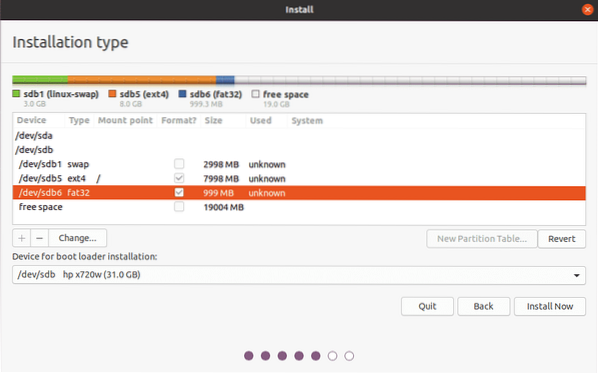
Select the USB drive from the Device list at the top and click the New Partition Table button. Then, click the + button to open the Edit partition window and create three partitions, one by one:
1. A swap partition of a size slightly larger than the system's RAM. Choose the “swap” selection in the Use as option.
2. A FAT32 partition with any size greater than 512 MB.
3. A root partition of a size not less than the 4 GB minimum. You can use all the remaining space on your USB drive for the root partition. Choose the “ext4” selection in the Use as option and set the mount point to “/.”
Under the Device for boot loader installation, make sure that you have selected the USB drive. Then, click the Install Now button.
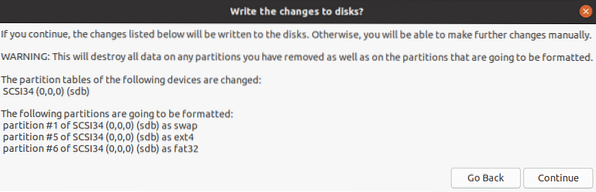
4. A window will appear asking you to confirm the changes. Click Continue to proceed with the installation process.
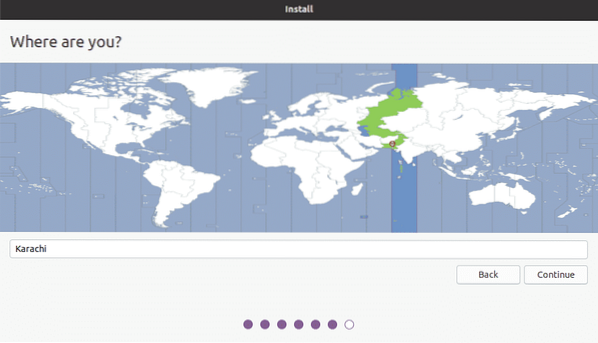
5. Select the region where you live and click Continue.
6. The system will ask you to create a username, system name, and password. Provide the required information and click Continue.

Now, the installation will be started. Once the installation is completed, you will see the following message.
Click the Restart Now button to restart the system.
Conclusion
That is all you need to know to run Ubuntu 20.04 from a USB stick. Now, you will no longer need to tie to a specific machine to run Ubuntu OS. Simply plug the USB drive into any machine, boot from it, and enjoy the entire Ubuntu OS from the USB. I hope you liked the article and find it helpful for your needs.


