If you are an app developer, you should probably read this post. A new capability has been added to windows Azure today called Windows Azure Mobile Services in an effort to provide super easy way to build out your app ideas and back them with cloud storage.
We know mobile applications gain more power and connect better when paired with services running in the cloud; hence the service. Using it as a platform, developers will have at hand a chance to store data in the cloud and integrate user authentication into their applications using preferred credentials (Facebook, Twitter, etc). Moreover, they will be able to send out push notifications to clients.
Having said that, for using the service a user need to create a Windows Azure account that has the Windows Azure Mobile Services feature enabled. If you do not have the one, create a free trial account and enable preview features. It's a matter of few minutes! Also, In order to develop using the Azure Mobile Services platform, one needs to download Visual Studio 2012 Express and the Mobile Services Managed SDK.
Using Windows Azure Mobile Service
There is a nice tutorial at the Windows Azure site, that shows you how to add a cloud-based backend service to a Windows 8 app using Windows Azure Mobile Services. The first step is to create a mobile service. So let's see how to do it first.
Create a Mobile Service:
For creating a new mobile service follow the steps below.
- Log into your Windows Azure account and find and click the 'New' option. The option should be visible at the bottom of the navigation pane.

- Once done, under the 'New' menu you will notice 'MOBILE SERVICE' option. Click to expand it and then select 'Create'.
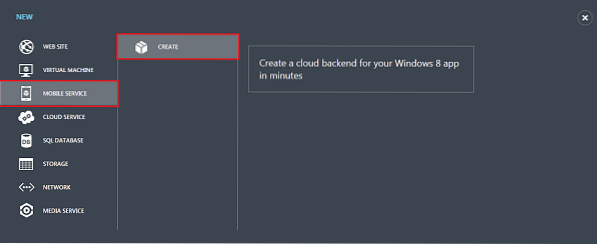
- Next, a dialog will be displayed with the following message - 'Create a cloud backend for your Windows 8 app in minutes.'
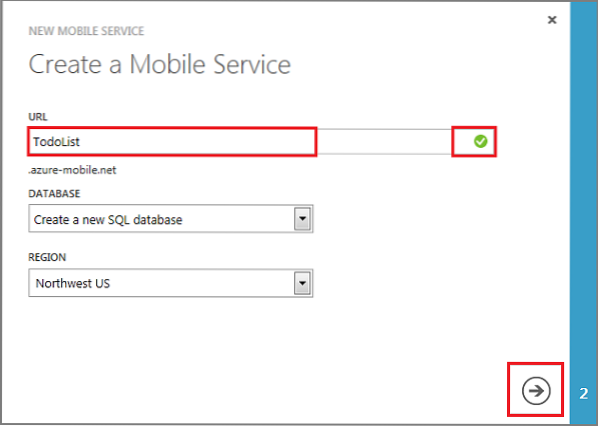
- Then, in the 'Create a mobile service page', type a sub domain name for the new mobile service in the URL text box and wait. Later, click the right arrow button (highlighted in green) to go to the next page.
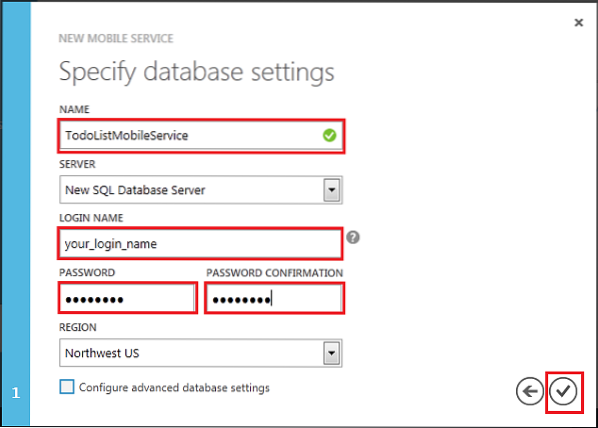
- A new page with the heading - 'Specify Database Settings' is displayed here. Fill in the details as shown in the screen-shot below. Do not forget to click the check button in the end.
- Now, you have successfully created a new service. The next step is to create a new app. Let's proceed further!
Create a New App:
This will help you create a new Windows 8 app that is connected to your mobile service. To do this,
- Login to your Windows Azure account again and click 'Mobile Services' option. Then, choose the mobile service you just created.
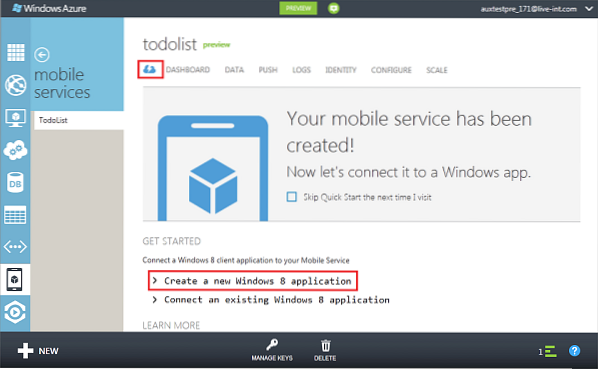
- Now, choose 'Create a new Windows 8 application' option as shown above to display the steps for creating Windows 8 app connected to your mobile service.
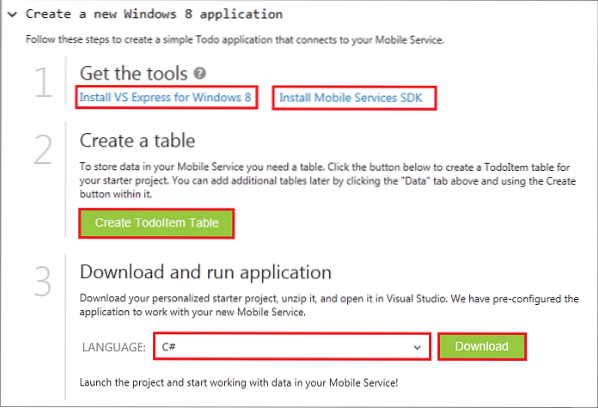
- After completing the third step save the compressed project file to your local computer, and remember where you save it.
Running Windows App:
To run your Windows app,
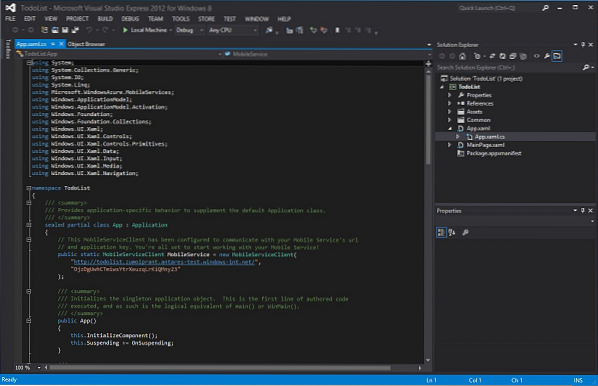
- Go to the location where you saved the compressed project files, expand the files and open the solution file in Visual Studio 2012 Express for Windows 8.
- Then, Press the F5 key to start your project again.
- Suppose you have not finished the task but would like to complete it later, simply add the task to 'Insert a TodoItem' and hit 'Save'.
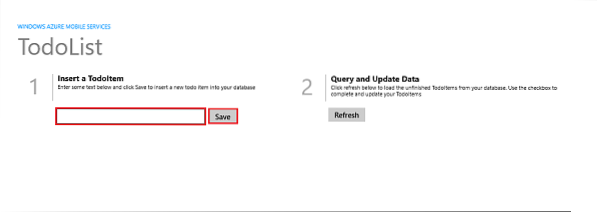
- The action will send a POST request to the new mobile service hosted in Windows Azure which in turn will return the stored items and display them in the second column in the app.

Image Credits and Source: Windows Azure Mobile Service Page.


