Setting up your virtual device
Note: Ignore this step if you are installing Debian on a physical computer. In such case start reading from “Debian 10 Buster Net Install”
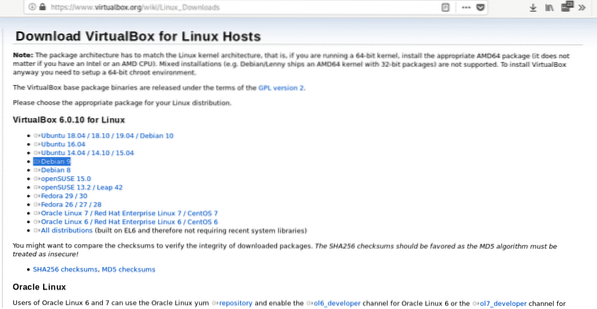
To get started download Debian Net Install disk from https://www.debian.org/CD/netinst/
For 64 bit computers your direct link is https://cdimage.debian.org/debian-cd/current/amd64/iso-cd/debian-10.0.0-amd64-netinst.iso , you can also download it via BitTorrent.
Install the .deb package by running:
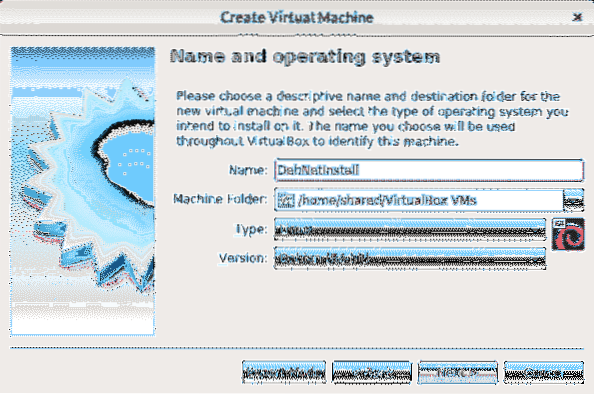
dpkg -iLaunch VirtualBox, set your virtual OS name, type, distribution and architecture, in this case we select Linux and Debian, you can choose 64 or 32 bits according to your hardware.
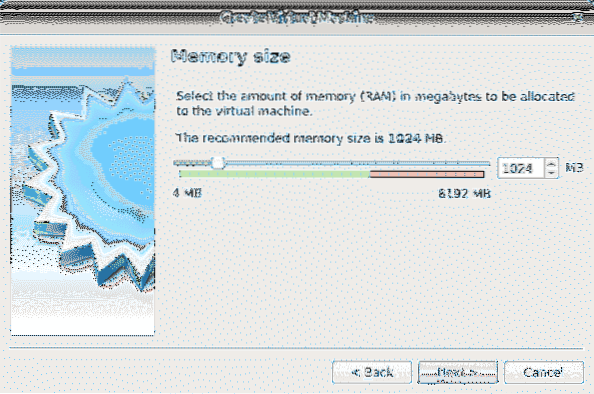
In the second step you define que memory size, take into consideration your physical device will lack the amount you assign your virtual device while working. You should decide the memory size according to the use you'll give to the virtual device and according to your hardware capability.
After defining the memory create a virtual hard disk, select the second option.
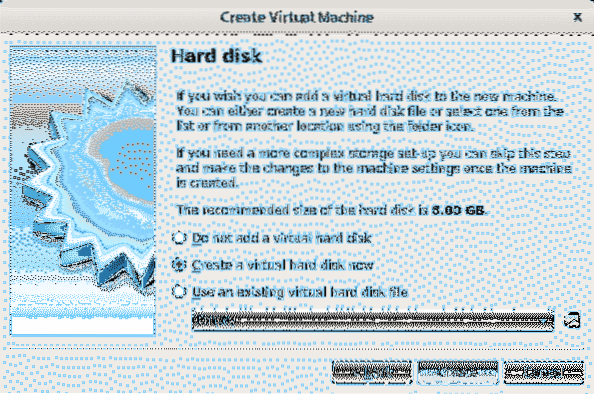
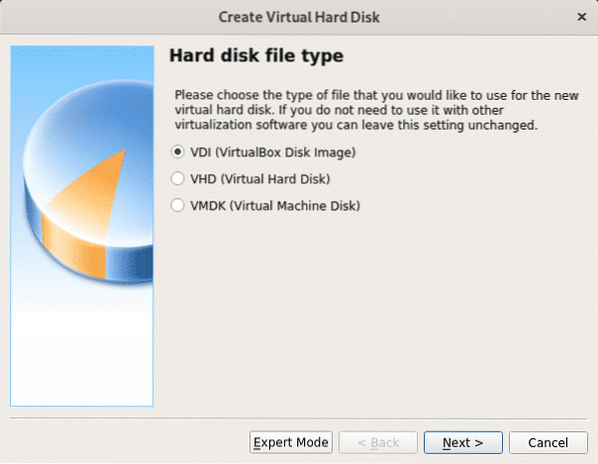
As hard disk type leave VDI and press Continue.
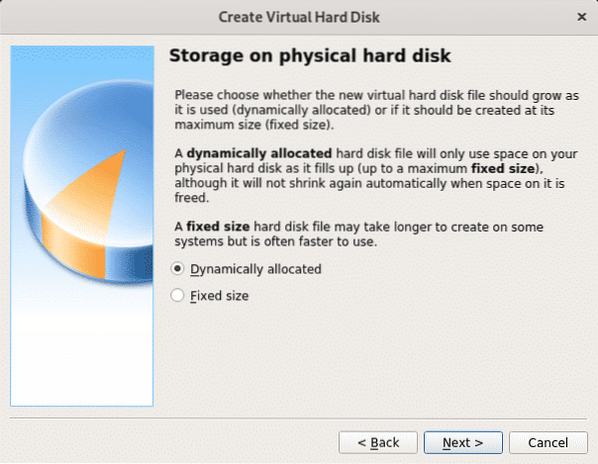
In this step you can define a fixed size for your virtual device, you can also leave it dynamic which means the virtual OS will use the free space of your hard disk upon need, in the next step you will be able to limit the maximum amount the virtual system can use, but only the needed space will be used in contrast to the fixed space option which will reserve the whole defined size for the virtual system without being available for the physical device (Host OS). In my case I left the default option Dynamic.
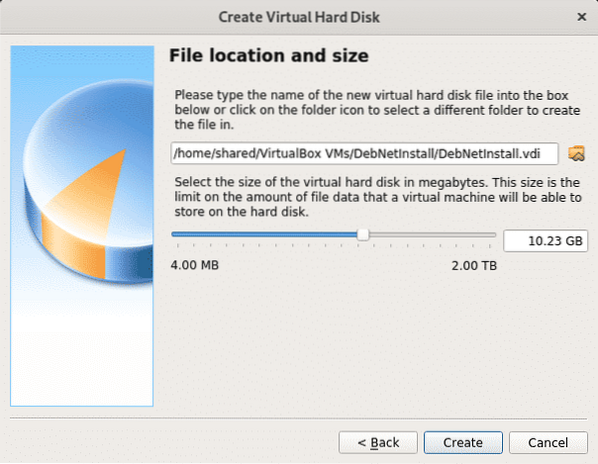
As said before here you define the maximum size the virtual OS can use. After defining it press Create and your virtual PC will be ready to start installing Debian.
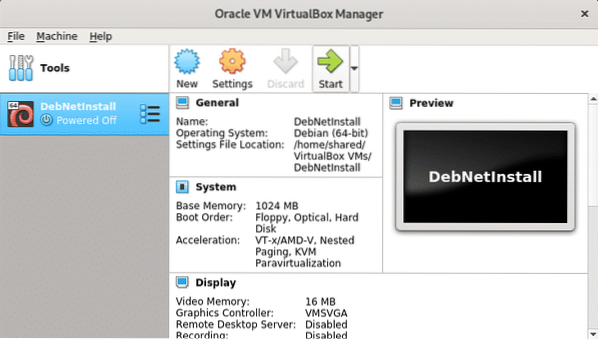
After finishing you'll see the virtual computer you created will be listed on VirtualBox, now just press Start to select our Net Install iso image you downloaded in the first step.
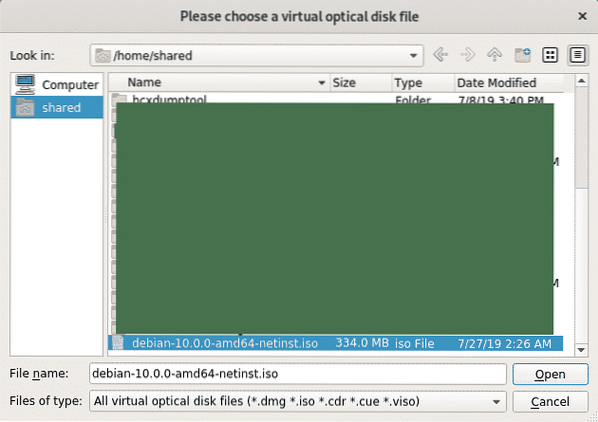
Now press on the folder icon to browse your computer.
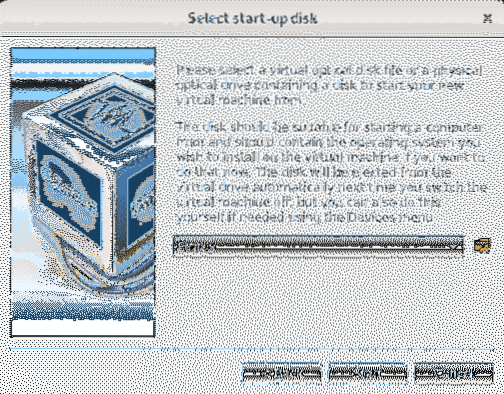
Select the ISO image and press Open.
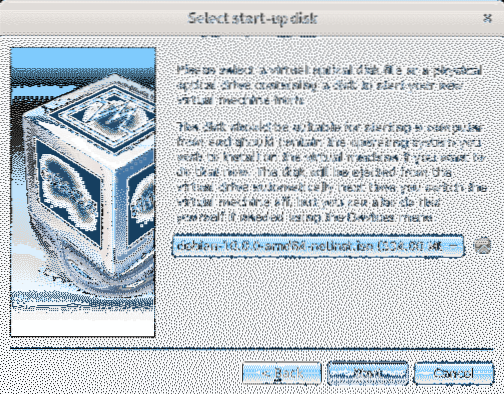
Once selected press Start.
Debian 10 Buster net install
To get started download Debian Net Install disk from https://www.debian.org/CD/netinst/
For 64 bit computers your direct link is https://cdimage.debian.org/debian-cd/current/amd64/iso-cd/debian-10.0.0-amd64-netinst.iso , you can also download it via BitTorrent.
Burn the ISO image or create a booteable USB stick. For instructions on creating a booteable USB read this tutorial. Then boot your computer giving priority to the device hosting your installation disk.
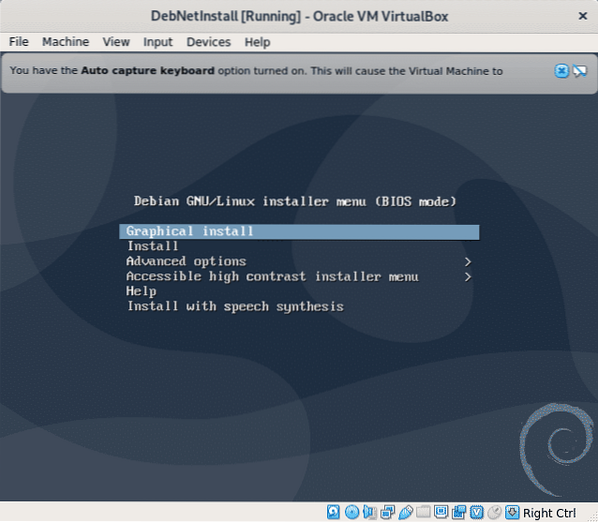
Once you boot your installation disk select Graphical Install.
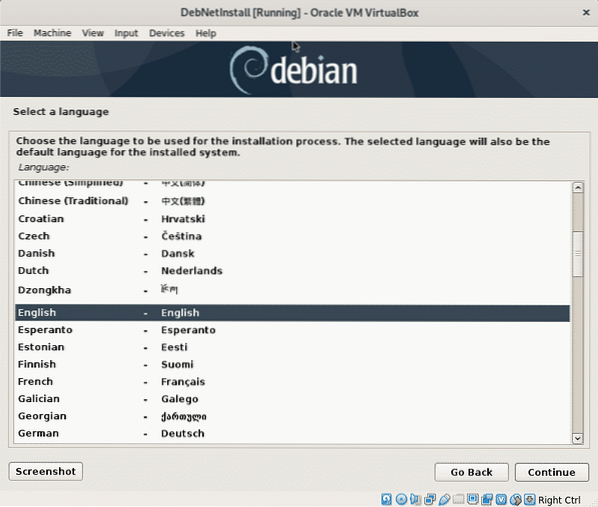
In the next step select your preferred language.
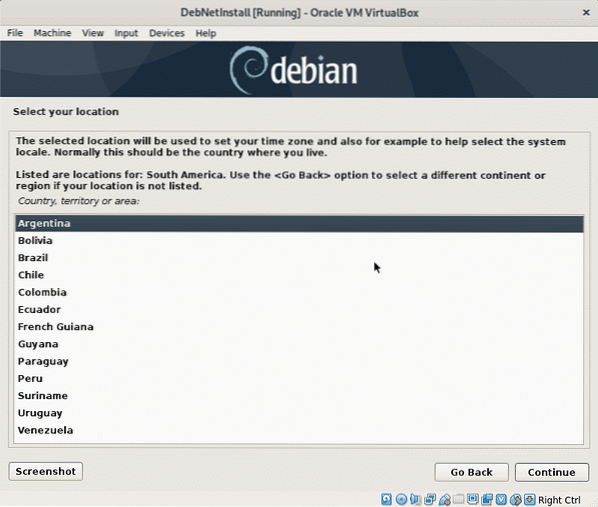
Now select your location, which will define your timezone.
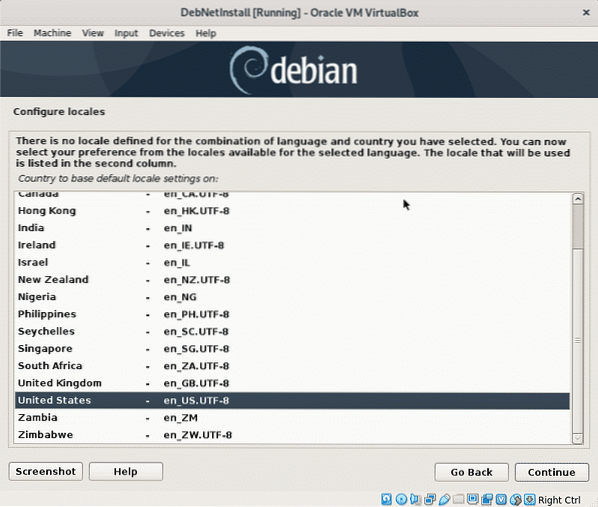
In this step you need to select your locale, this is important because determines the format in which certain information is defined, like time or currency. Usually US En is the best option for non American users due compatibility issues.
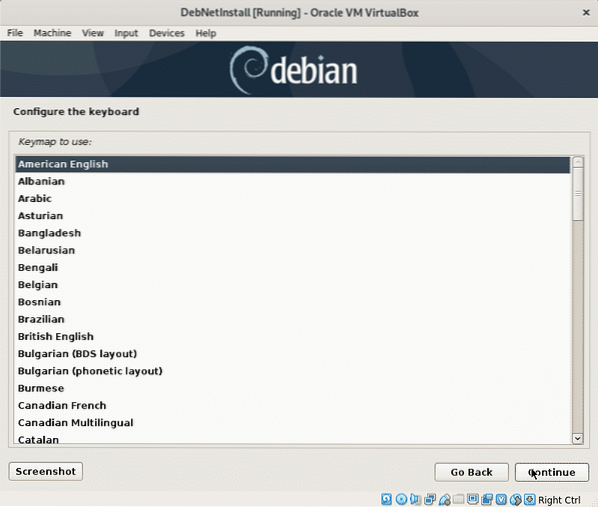
Now you need to select the keyboard map, this should be according to your keyboard origin, for example Spanish keyboards have different locations for some characters.
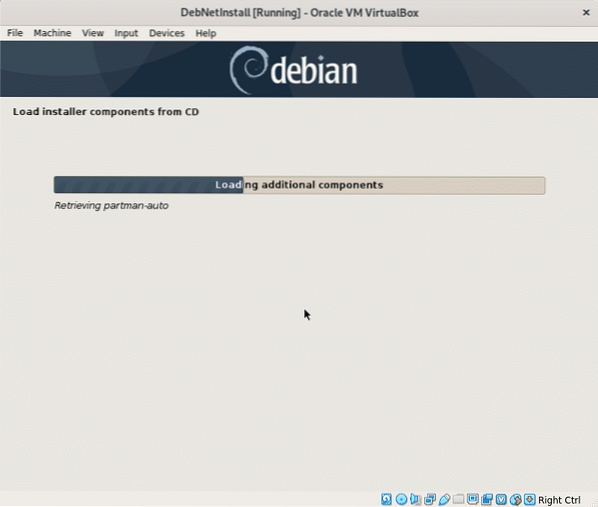
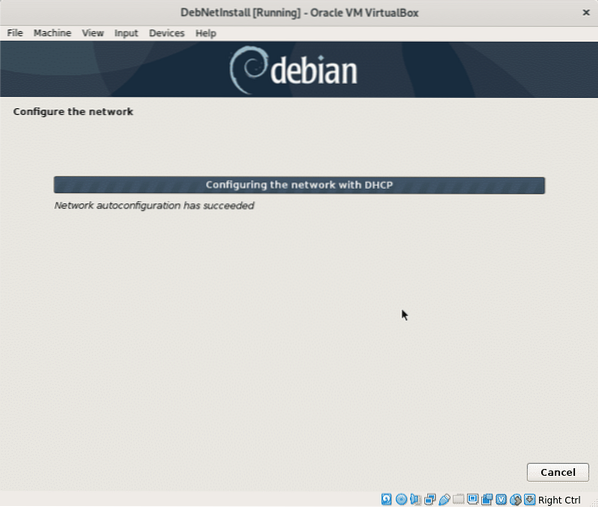
The installer will load the basic components to start the installation and configure the network to access packages in a future step.
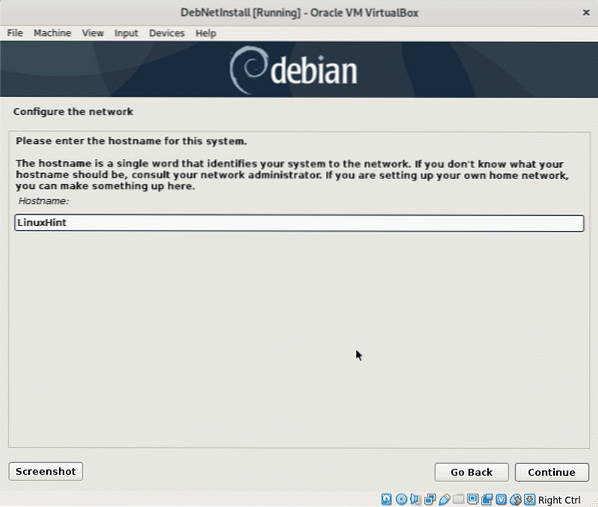
The installation will request a hostname, you can choose it arbitrarily, this will be your computer's name or identificator within the network.
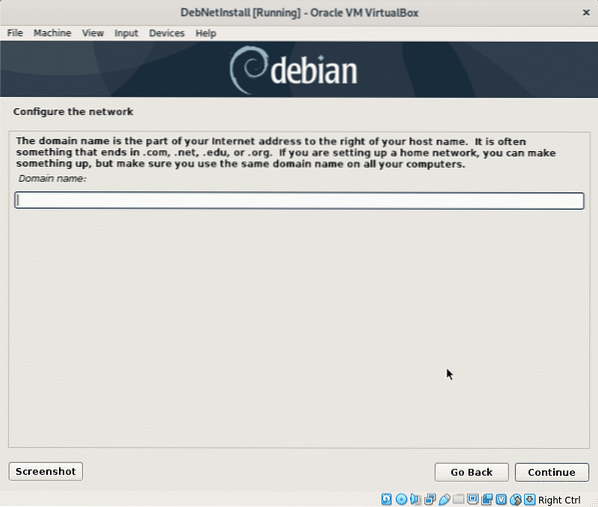
Here you need to set your network domain name, this will be shared by all devices integrating your network, of course you can leave it blank too.
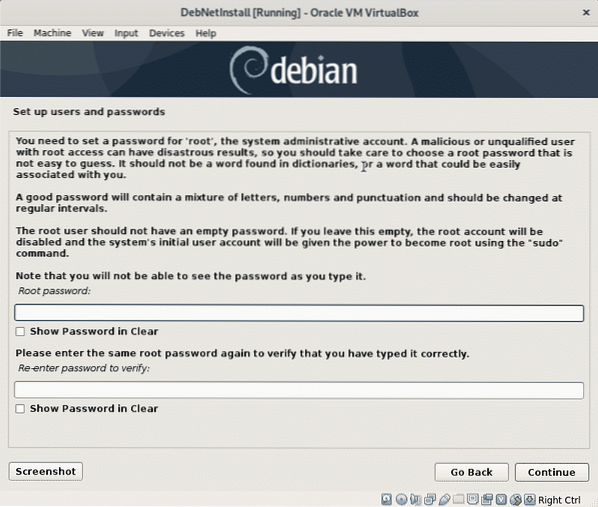
Now set your root password and press Continue.
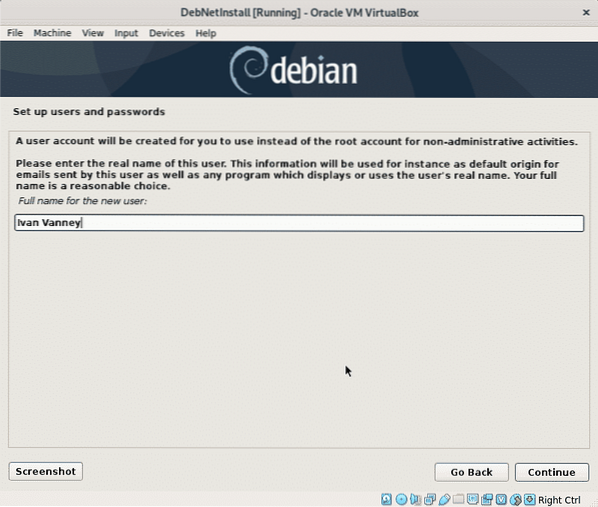
Now we need to define a regular user, first fill the user real name, or any name you want to set and press Continue.
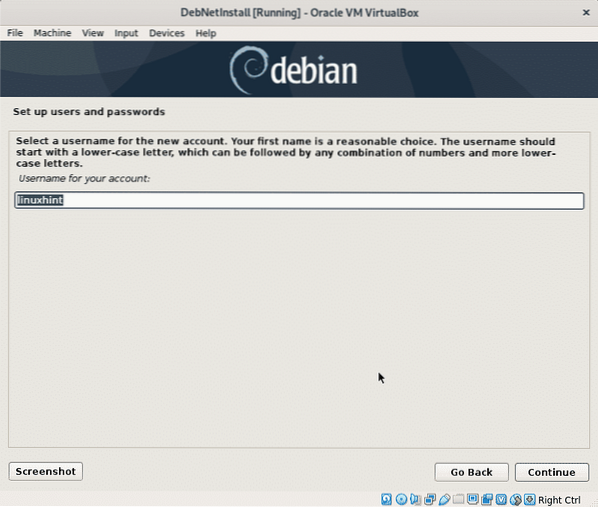
Now set your username and continue.
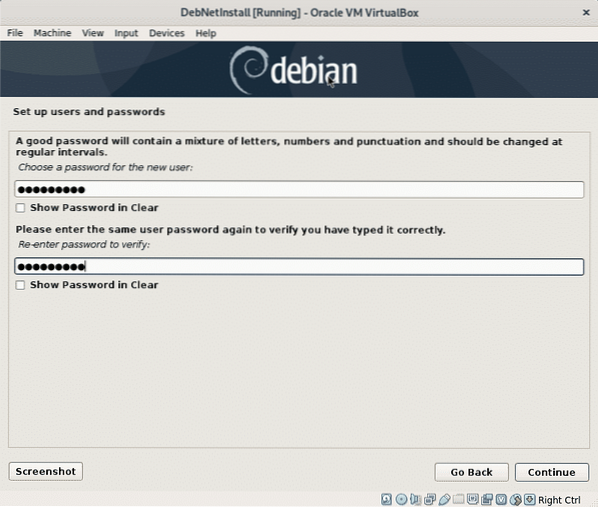
Set the password for the user you just created and press Continue.
The installer will configure some settings according to the information you provided until now.
In this tutorial I won't explain partitioning, therefore I wont select LVM because it requires partitioning to create a /boot. Optionally you can select LVM, in this case I will leave the default option, a guided partitioning which will leave all files under a single partition (and the additional swap partition), if you have an additional OS installed you need to select Manual to avoid removing it, if you are using VirtualBox you should not worry. Press Continue after making your choice.
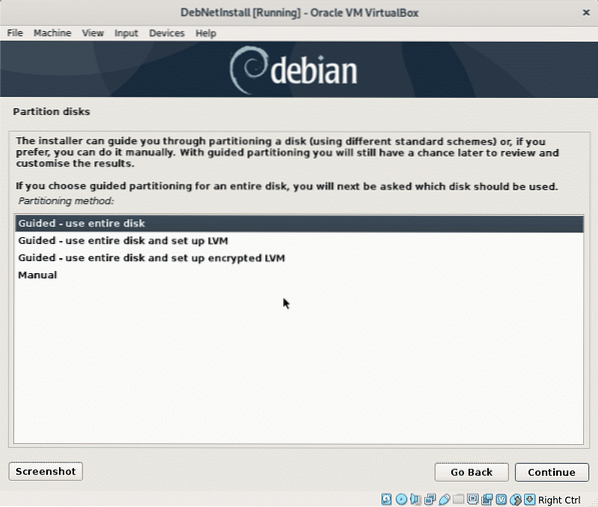
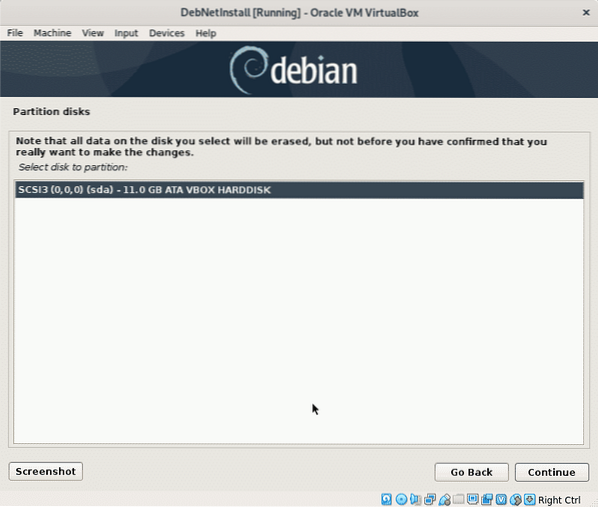
Now the installer will ask for the hard disk in which you want to install Debian, if you are using VirtualBox you'll see the virtual disk you created before. Select your disk and press Continue.
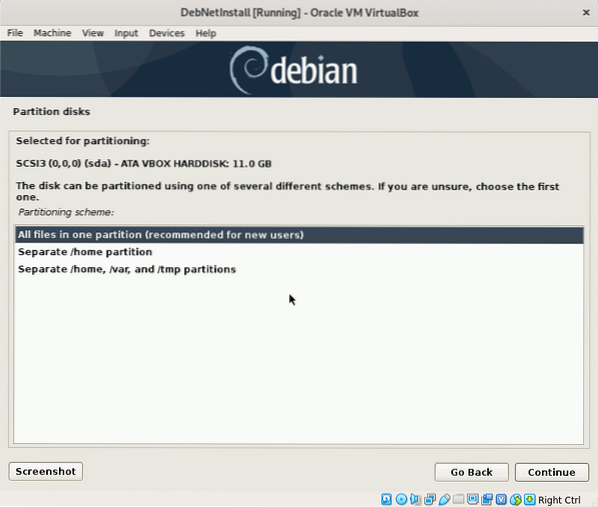
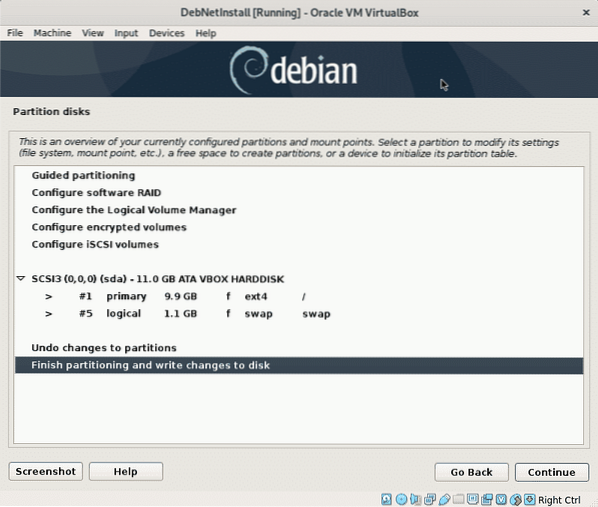
In this tutorial I will leave all files within one partition, the reason to assign independent partitions for each file system is to manage the content easily, for example if you assign a specific partition for your /home directory you can later reinstall another system leaving your /home intact, or you can assign a specific partition for /var preventing logs from hoarding your whole disk.
This tutorial assumes you are new into Linux so I'll leave the default option allowing all directories within a single partition (the root partition /).
Press Continue to write changes on your disk.
Confirm the changes for your disk, Select “yes” and press Continue.

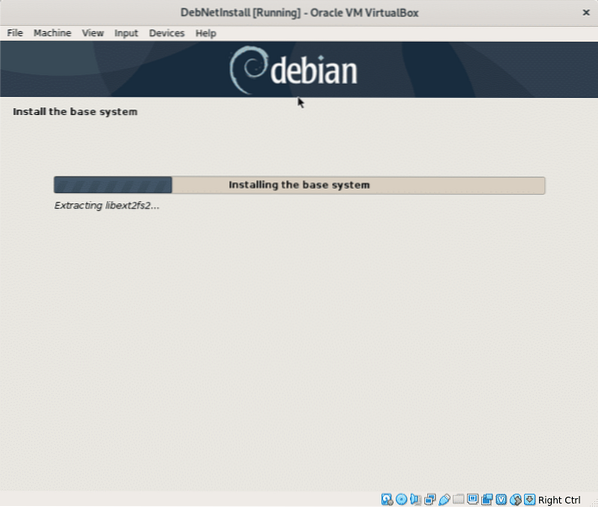
The installer will install needed files to continue the installation process.
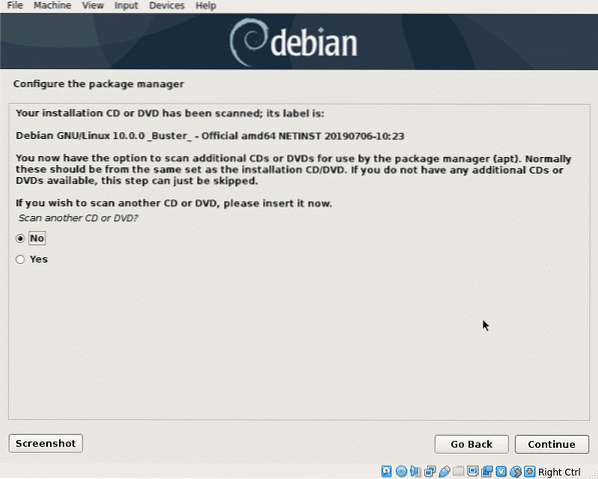
Since we are installing Debian from internet, when asked if to scan for another installation source select “No” and press Continue.
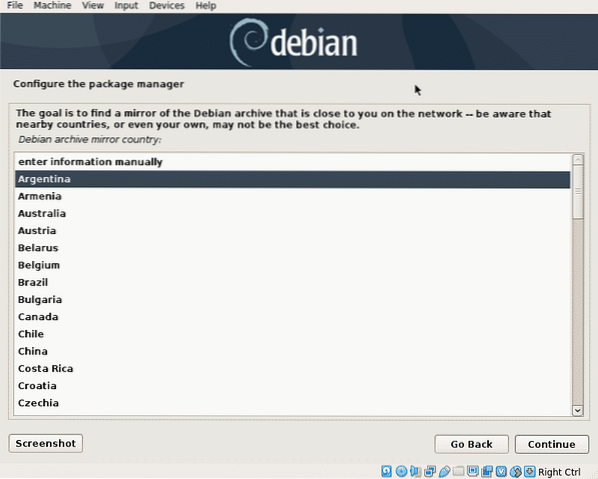
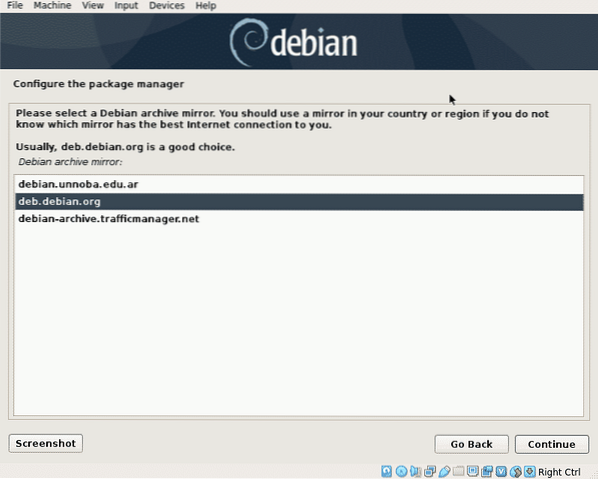
Now the installer will ask for your preferred mirror location, usually near locations are meant to download faster, but developed country servers often are better than local mirrors if hosted in slow servers. Select your desired location and press “Continue“.
Select any mirror you prefer and press Continue.
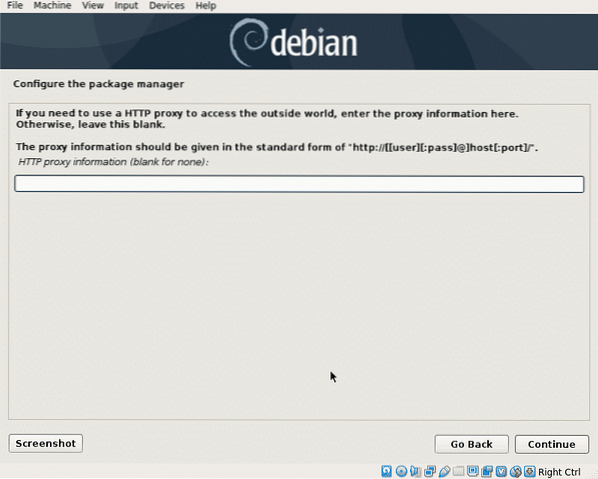
In this step you can define a proxy if needed, if you don't need a proxy to access internet leave it blank and press Continue.
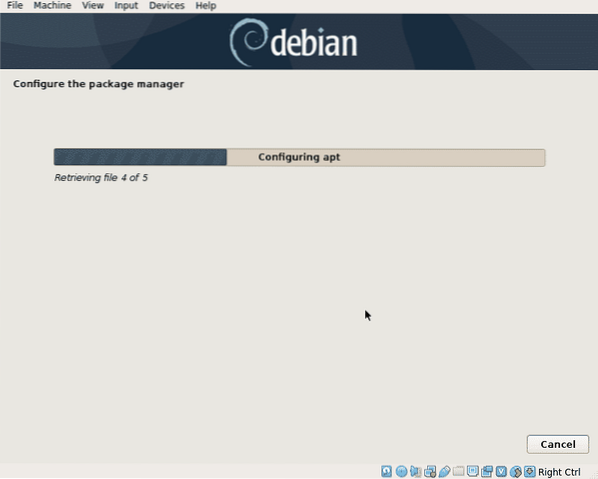
Now Debian will configure the apt packages manager and read the available software to install.

This step only asks if you want to share statistical information with developers, select any option you want and press Continue.
This step only asks if you want to share statistical information with developers, select any option you want and press Continue.

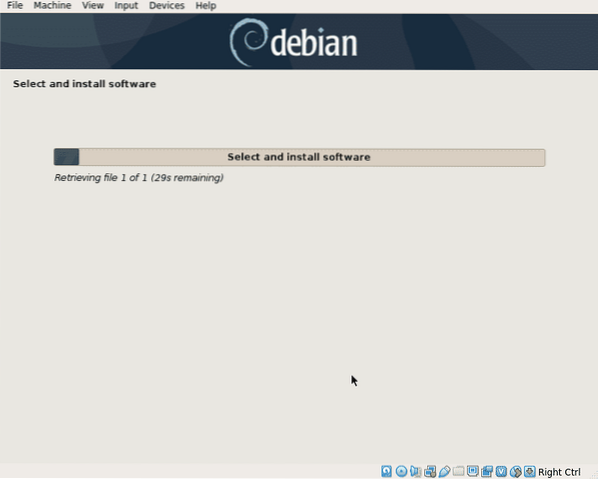
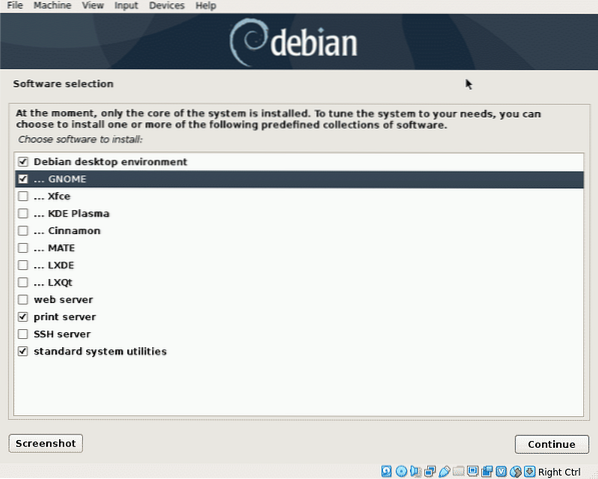
Now you can select all packages you want to be installed, in my case I only added GNOME. Browse the packages, select the ones you want and press Continue.
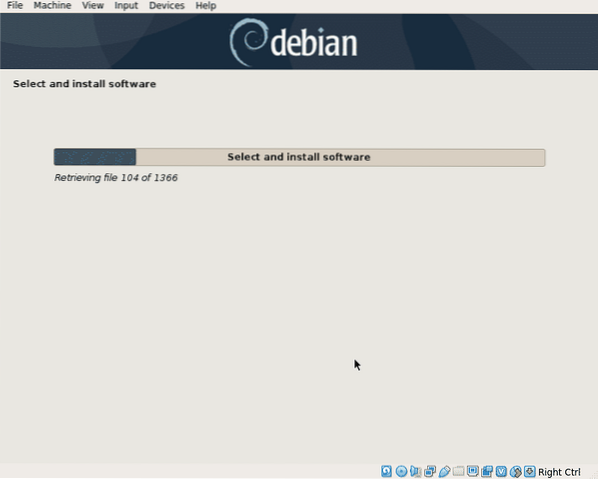
The installer will fetch all packages you selected, this is the longer step which takes several minutes depending on your network connection.
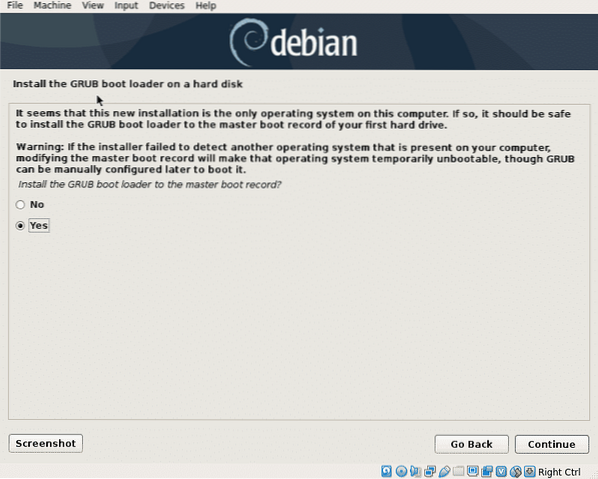
In order to boot you'll need to install the GRUB bootloader, Select “yes” and press Continue.
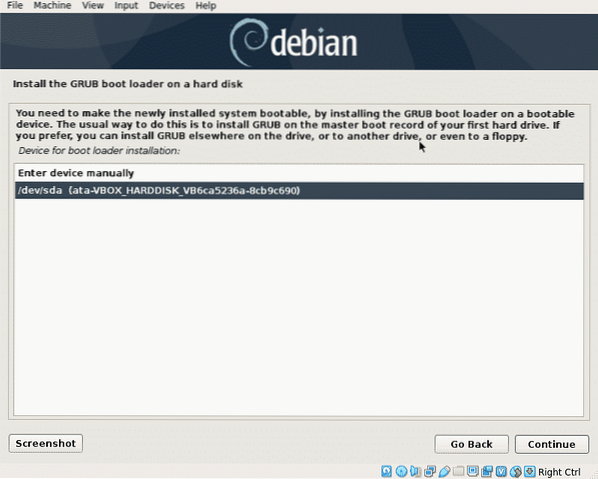
Select the hard disk in which GRUB will be installed, the same disk in which you installed Linux.
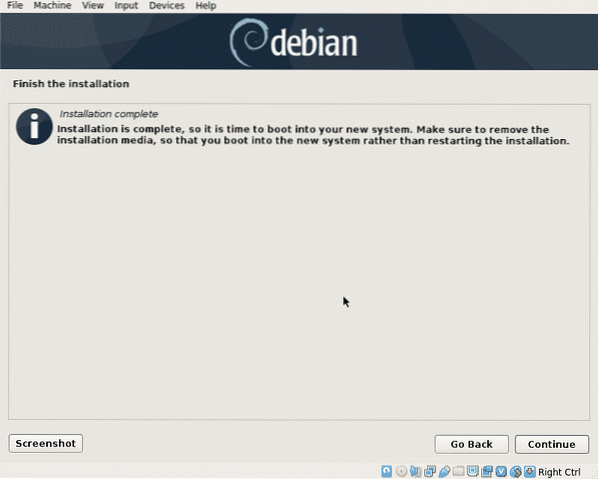
Now Linux is ready to boot, press Continue to end the installation process and to boot your new system.
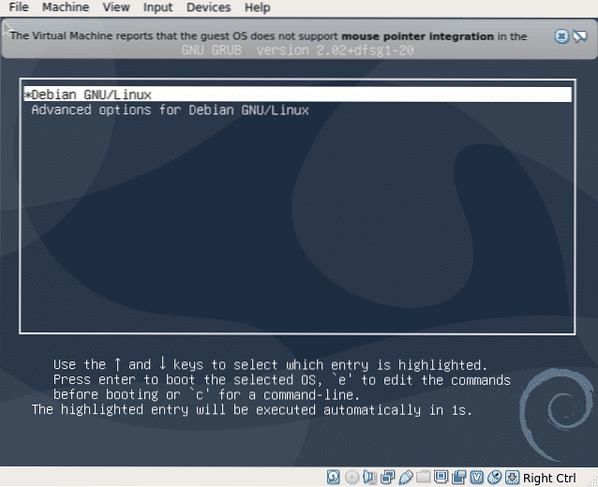
When booting GRUB shows up, press ENTER to boot the system or it will boot automatically after a few seconds.
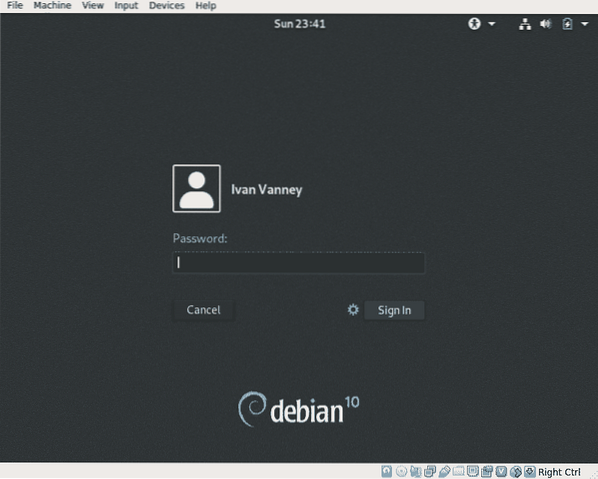
You can login and start using Debian 10 Buster.
Conclusion:
The Net Install process guarantees fresh packages and help us to avoid downloading huge DVDs containing unnecessary software. It is not the best option if you have connection problems, such as a low connection or non free internet but it is recommendable if your connection is good and if you need to install Debian in a single computer, for several devices the typical installation continues being the best option so you avoid downloading same packages many times.
I hope this tutorial helped you to get introduced to Debian, keep following LinuxHint for more tips and updates on Linux.


