To this day, I dread losing my week's long hard work to an unprecedented hard-drive malfunction. It happened to me once, and I'm sure some of you can relate to this. I've learned my lesson since and have always made sure to keep a backup ready.
In this post, you'll see how to back up your ArchLinux system with rsync. For those of you who are unfamiliar, rsync is a free and open-source Linux utility that synchronizes files in a remote computer with an external HDD. For this reason, it serves as a means to secure your files by transferring it to a backup server.
My setup
For the purpose of this demonstration, I'm confining myself to working in a VirtualBox generated VM with ArchLinux. This will be our source, and as the backup destination, I will be using a USB drive. Also, we will be using the Command Line Interface in this tutorial. If you lack experience with CLI, don't feel intimidated. You'll get the hang of it
Also, as a precaution, I'd suggest encrypting the USB drive to create an extra security blanket for the files. And it'd be preferable if the destination has a Linux compatible file system.
I suggest you should follow this tutorial to the end and do this as an exercise on a similar setup before you actually try and create a backup for your system.
The method:
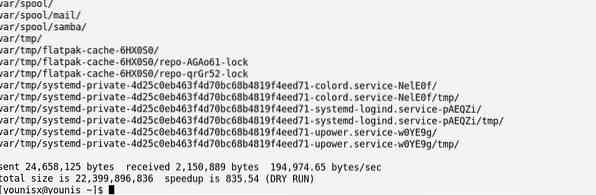
To trigger the backup in the simulated environment, type in the following command:
$ sudo rsync -aAXv --delete --dry-run --exclude=/dev/* --exclude=/proc/* --exclude=/sys/* --exclude=/tmp/* --exclude=/run/* --exclude=/mnt/* --exclude=/media/* --exclude="swapfile" --exclude="lost+found" --exclude=".cache" --exclude="Downloads" --exclude=".VirtualBoxVMs"--exclude=".ecryptfs" / /run/media/younis/younisx/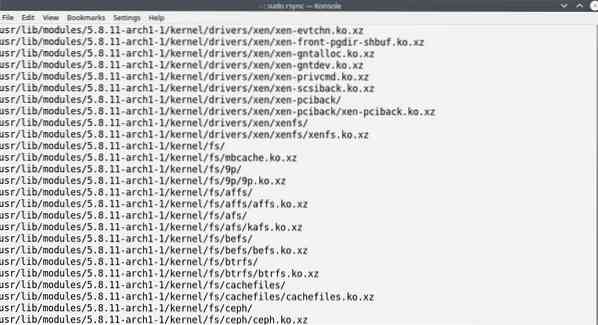
To understand what exactly this command does, let's examine each of the elements present here:
The first two elements are sudo and rsync. sudo, of course, is the whereas sync is the program at use here to create the backup.
What appears to be the next element is actually a combination of four flags.
The option activates the archive mode,
-A is the option to instruct the OS to preserve the access control list,
-X flag is used to keep the security, system, trusted and user attributes,
Whereas -v is the flag you use to get the backup progress.
Together, the -A,-a, and -X flags work to conserve the integrity of the files by maintaining their attributes.
Then there's the -delete option, which instructs to only backup those files which are not already present in the destination(USB in our case).-delete should be used with plenty of precautions, as the updated versions of the files in source replace (overwrites) the older versions in the destination.
The -dry-run option is what's keeping all of this in a simulation.
The -exclude flag is used to leave out some of the folders to be backed-up. In the command above, I'veleft out the /dev/, /proc/, /proc/ /sys/ /tmp/ /run/ /mnt/ and /media folders. This was only to demonstrate, their exclusion (except for /mnt/) isn't necessary, as their contents aren't backed up by rsync automatically.
/- dictates the contents we want to back up
/run/media/younis/younisx is the directory you're backing up to.
Once you've tested the command in the simulation, you can erase the -dry-run option and run it again to actually back up.
Restoring the backup
Now we'll talk about restoring the files from our backup USB drive.
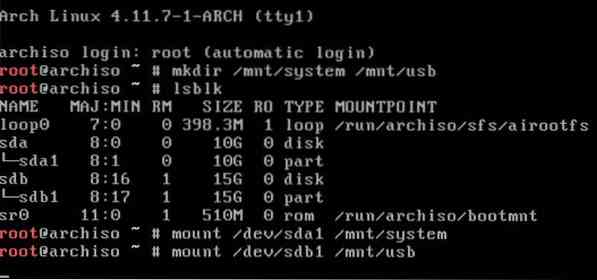
First, we'll boot the system from a Live ISO and plugin and mount the backup USB drive. Then we'll log in to create a folder for the contents on the backup drive and another for the contents present on the HDD.
$ mkdir /mnt/system /mnt/usbThen look for the names of devices interconnected:
$ lsblkMount the file system and the backup by running the following commands:
$ mount /dev/sda1 /mnt/system$ mount /dev/sdb1 /mnt/usb
Then restore the backup with the following command:
The contents of the USB serial drive should be restored on the Hard disk of our system.
Wrapping up
It's always a good idea to back up your data by any means necessary. The method I prescribed with rsync is a surefire way to guarantee your data's well-being from any hardware malfunction.
In this tutorial, you've learned to back up your data on ArchLinux with rsync. Again, it's better to try out the instructions in a virtual environment before you actually attempt to back up your drive.
That's all I have for you today. I hope you've enjoyed following the instructions in this tutorial. We'll follow up with more posts like this; until then, check out some of the other stuff we have here on our blog.


