
Manjaro Linux is based on the independently developed Arch operating system. Arch Linux is already known to be exceptionally fast, powerful, and lightweight distribution.
But Arch Linux is typically targeted to geeks who have some Linux background and exposure to command-line usage. This is where Manjaro Linux pitches in. It gives the user-friendly experience and access to all the AUR software repository.
Manjaro operating system updates are released as a rolling distribution similar to that of Solus. The most significant advantage of rolling distribution is the one-time installation and updates forever functionality. There is no end-of-life version in this kind of development, so you have nothing to worry about upgrades and compatibility issues following it.
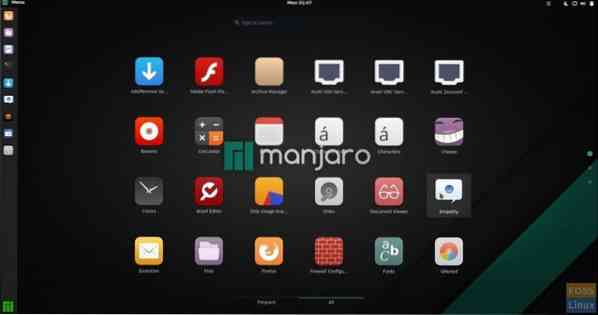
Here is how Manjaro GNOME flavor desktop looks like:
Creating Manjaro Live USB flash drive in Windows
Step 1) Download the Manjaro Live ISO images from the official website. There are three flavors to choose from, including GNOME, KDE, and XFCE editions. For example, I downloaded the GNOME image with file name manjaro-gnome-17.1.2-stable-x86_64.iso. The version number may be different in your case based on when you downloaded it.
Step 2) Download Rufus utility that's used to flash the ISO image to the USB flash drive.
Download Rufus
Step 3) You need a USB flash drive of at least 2 GB capacity. I don't recommend not more than 8 GB because not all PCs can boot through USB drives larger than 8 GB capacity. Note that the flash drive will be formatted during the Live USB drive creation process.
Step 4) Right-click on the downloaded Rufus program and click 'Run as Administrator.'
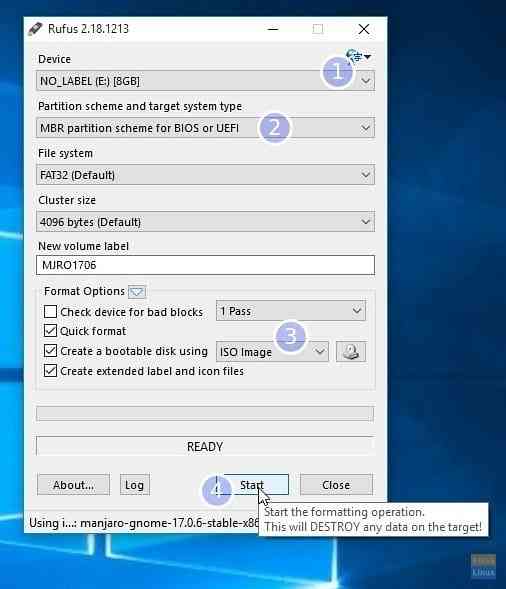
Step 5) Set Rufus settings as follows.
#1 Select the Flash drive
#2 Select partition scheme as “MBR partition scheme for BIOS or UEFI.”
#3 Click on the ISO image icon and select the downloaded ISO file. In my case, I will choose the manjaro-gnome-17.1.2-stable-x86_64.iso file. The file name will appear at the bottom status bar of the Rufus user interface.
#4 Finally, click on 'Start.'
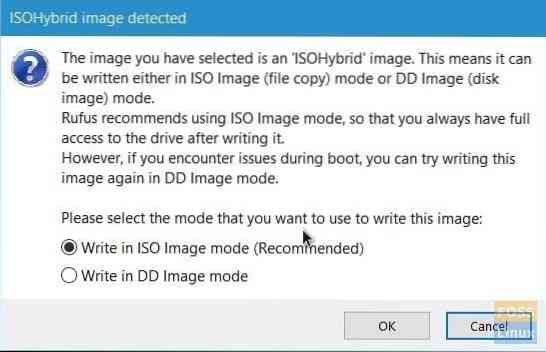
STEP 6: Keep the ISO Image mode to write when you see the following dialog box. Click OK.
STEP 7: Wait until Rufus writes the data to the USB flash drive.
That's it. Your Manjaro Live USB drive should be ready. You can plug it into your PC and boot into it, and test drives Manjaro. The same flash drive also serves as a Manjaro installation media just in case you decided to install it.


