- Pool-based management
- Thin provisioning
- File system snapshots
- Monitoring
Stratisd is the daemon behind Stratis and helps in configuring storage components under the XFS filesystem and device-mapper subsystem. At the moment, Stratis supports LVM logical volumes, hard drives, SSDs, NVMe, and ISCIs storage devices.
Now, let's take a dive and look at some basic key terms
- blockdev: This is a terminology that refers to block devices.
- Pool: A pool can comprise of either a single or several block devices. A stratis pool's size will be equivalent to the sum of the block devices making up the pool.
- Filesystem: A filesystem is a thinly provisioned layer whose size grows as more information or data is added. The size of a filesystem is scaled up automatically by Stratis as data grows almost to the size of the virtual file system.
Stratis is comprised of:
- Stratisd daemon: A daemon that enables a user to manage block devices.
- Stratis-cli: A command-line utility that comes with Stratis.
Installing Stratis on RHEL 8
Having briefly introduced Stratis, what it does and its components, let's now install Stratis on RHEL 8
To install Stratis on RHEL 8, log in as root user and run the command:
# dnf install stratisd stratis-cli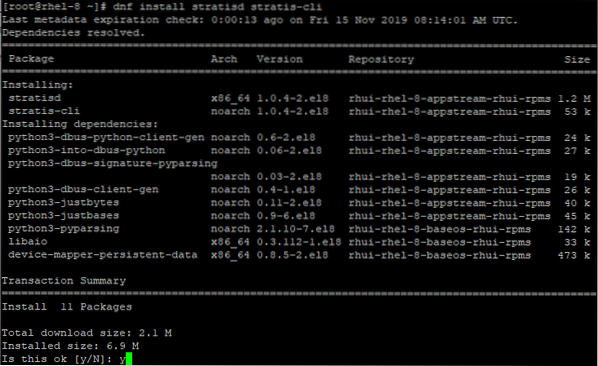
When prompted, type y to proceed with the installation. If everything went well, you should be able to get the output below that confirms that all went well.
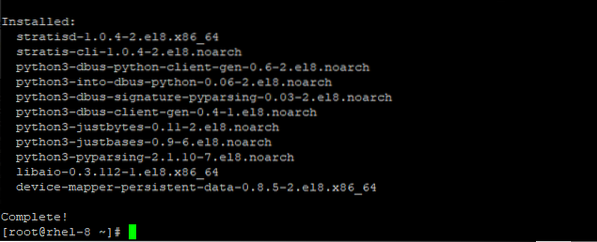
To confirm the installation of the stratis packages, run the command:
# rpm -q stratisd stratis-cli
Starting Stratis service on RHEL 8
To start the Stratis service, execute the command:
# systemctl enable --now stratisdNext, verify the status of Stratis, by running the command:
# systemctl status stratisd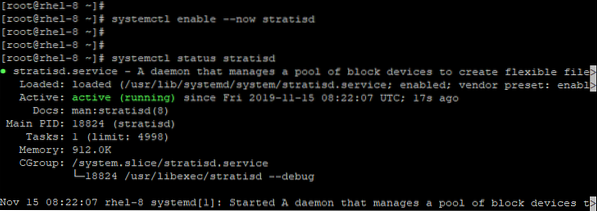
From the output above, we can observe that Stratis is up and running.
Creating a Stratis pool
Before you begin with the creation of a Stratis pool, ensure the block devices on your system have a minimum of 1 GB. Additionally, these devices need to be unmounted and idle. Additionally, stratisd daemon needs to be running. in our setup, there are 5 block devices aside from the primary partition:
- /dev/xvdb
- /dev/xvdc
- /dev/xvdd
- /dev/xvde
- /dev/xvdf
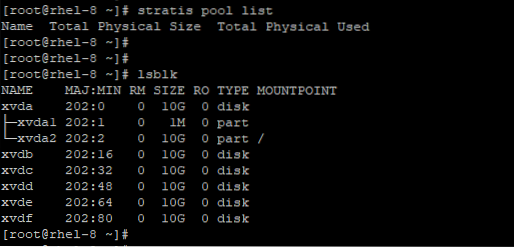
You can have a glimpse of the existing block devices by running the command:
# lsblk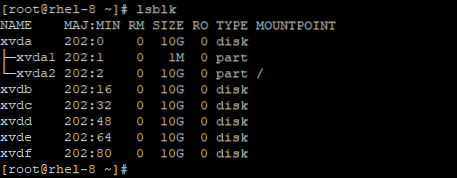
Also, it's crucial to ensure that the block devices do not have an existing partition table.
Confirm this using the syntax:
# blkid -p /For example
# blkid -p /dev/xvdb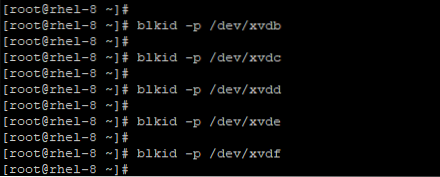
No output implies that no partition table exists on the block devices. However, in case a partition table exists on one of the devices, then you can wipe out the partition using the command:
# wipefs -a /Creating a Stratis Pool from one block device
You can create a Stratis pool from a single block device using the syntax:
# stratis pool createFor example to create a pool pool_1 from the block device /dev/xvdb run:
# stratis pool create pool_1 /dev/xvdbTo list the pool created, run:
# stratis pool list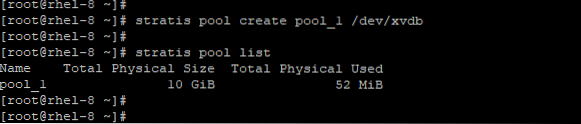
From the output above, we can clearly see that a new pool, pool_1 has been created.
Create a Stratis Pool from multiple block devices
To create a pool from multiple devices, use the syntax below listing all the devices on one line
# stratis pool createTo create a pool from /dev/xvdc and /dev/xvdd run the command:
# stratis pool create pool_2 /dev/xvdc /dev/xvdd/Once again, list the pools available using the command:
# stratis pool listAt this point, you should have 2 pools: pool_1 and pool_2
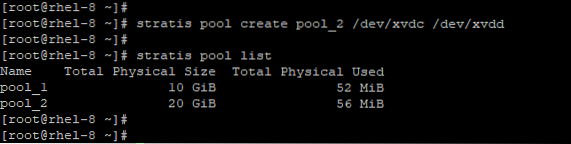
From the output above, we can clearly note that pool_2 is twice the size of pool_1 because it comprises two block devices, each of which has a physical volume of 10 GB.
Creating a filesystem from a pool
From one of the previously created Stratis pools, you can create a filesystem using the syntax below:
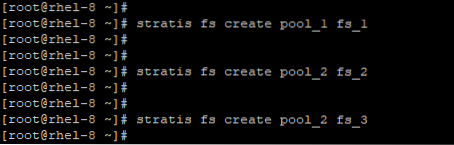
# stratis fs createFor example, to create a file system fs_1 from pool_1 execute the command:
# stratis fs create pool_1 fs_1Also, you can create more than 1 file system from one pool. In the second pool, we will create 2 file systems:
fs_2&fs_3
# stratis fs create pool_2 fs_2
# stratis fs create pool_2 fs_3
Now, to display the new filesystems, execute:
# stratis fs list
To list filesystems in a given pool , use the syntax
# stratis fs listFor instance, to view the file systems existing in pool_1, run the command:
# stratis fs list pool_1
For pool_2 run:
# stratis fs list pool_2
As expected, we have 2 filesystems in the second pool.
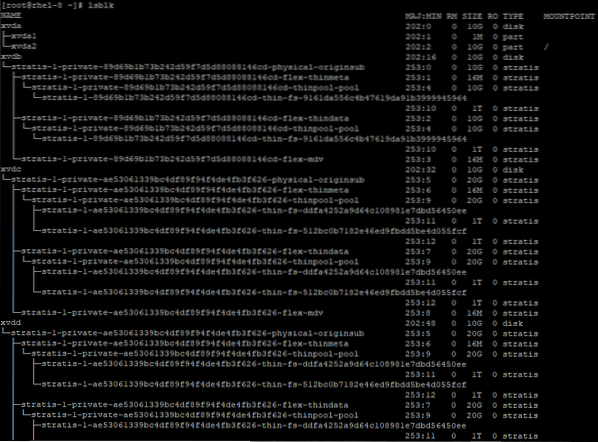
At this point, running the lsblk command will yield output similar to the one below:
How to mount a Stratis filesystem
To access the filesystems, we need to, first of all, mount them. The first step will be to create mount points for each of the filesystems. This is summarized in the table below
| Filesystem | Mount Point |
| fs_1 | /storage |
| fs_2 | /database |
| fs_3 | /backup |
So, create the first mount point for the filesystem in pool_1
# mkdir /storageNext, mount the file system
# mount /Stratis/pool_1/fs_1 /storage
To mount the second filesystem, follow the same procedure:
# mkdir /databaseMount the file system:
# mount /stratis/pool_2/fs_2 /database
And finally for the last filesystem:
# mkdir /backupMount the file system:
# mount /stratis/pool_2/fs_3 /backup
You can confirm the existence of the mount points using the command:
# df -Th | grep stratis
Make stratis filesystems persistent
The filesystems that we have just created will not survive a reboot. In order to make them persistent, we need to add them to the /etc/fstab file.
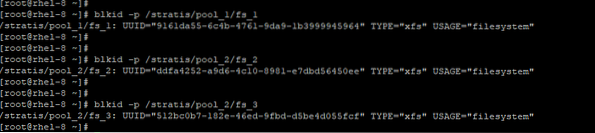
First, let's retrieve the UUID of the filesystems as shown
# blkid -p /stratis/pool_1/fs_1# blkid -p /stratis/pool_2/fs_2
# blkid -p /stratis/pool_2/fs_3
xfs defaults 0 0" | sudo tee -a /etc/fstab
# echo "UUID=ddfa4252-a9d6-4c10-8981-e7dbd56450ee /database
xfs defaults 0 0" | sudo tee -a /etc/fstab
# echo "UUID=512bc0b7-182e-46ed-9fbd-d5be4d055fcf /backup
xfs defaults 0 0" | sudo tee -a /etc/fstab

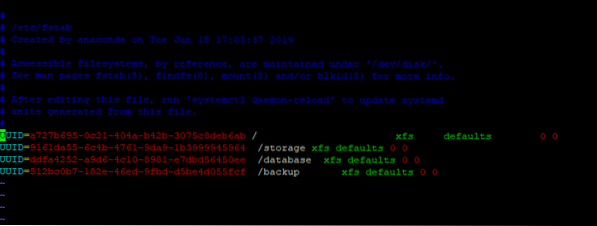
You can confirm the addition of the filesystems to the /etc/fstab as shown:
For the changes to take effect in the effect on the system, run the command:
# systemctl daemon-reloadThen mount all the file systems
# mount -a
Adding a block device to a Stratis pool
To add a block device to an existing Stratis pool, run the command:
# stratis pool add-dataFor example to add the block volume /dev/xvde to pool_1 run the command:
# stratis pool add-data pool_1 /dev/xvdeNow check the size of pool_1
# stratis pool list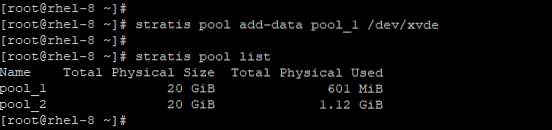
As observed, the size of pool_1 has doubled as a result of the added block device.
Creating a Stratis snapshot
A stratis filesystem is an exact copy or replica of another Stratis filesystem. It contains the same content as the original file system. However, a snapshot can later be modified and differences will thereafter exist between the snapshot and the original filesystem.
Here are a few things you should also know:
- A snapshot of a file system is simply another replica file system.
- You don't need to mount a filesystem to be able to create a snapshot from it.
- A snapshotted filesystem can outlive the original filesystem it was created from
To create a snapshot, use the syntax:
# stratis fs snapshotFor example, to create a snapshot called snapshot_1 in pool_1 run the command
# stratis fs snapshot pool_1 fs_1 snapshot_1This will take about 30 seconds.
To confirm the creation of the snapshot, execute:
# stratis filesystem listIn this case, the command will be:
# stratis filesystem list pool_1
Additionally, you can add the date attribute (-$(date +%Y-%m-%d) to easily identify when the snapshot was created. Let's create another snapshot using the second pool.
# stratis fs snapshot pool_2 fs_2 snapshot_2-$(date +%Y-%m-%d)To list the newly created Stratis snapshot issue the command:
# stratis filesystem list pool_2
From the output above, we can see a snapshot created in pool_2 with a date tag.
How to revert to a previous snapshot using a filesystem
To revert to a previous snapshot using a filesystem, you need to first unmount and destroy the original filesystem.
# umount /stratis/For example, in pool_2 to revert to snapshot_2 unmount the file system fs_2
# umount /stratis/pool_2/fs_2Next, create a copy of the snapshot from the original filesystem
# stratis filesystem snapshotsnapshot fs-mountpoint
The command will be:
# stratis filesystem snapshot pool_2 snapshot_2-2019-11-15 database
Finally, mount the snapshot using the file system mount point
# mount /stratis/pool_2/fs_2 /database
Removing a Stratis snapshot
To remove a Stratis snapshot, first of all, unmount the snapshot.
# umount /snapshot_mountpointTo remove the snapshot created in pool_2, unmount the mountpoint as shown
# umount /databaseNext, proceed and destroy the snapshot:
# stratis filesystem destroyThe command will be:
# stratis filesystem destroy pool_2 snapshot_2-2019-11-15Now try listing the filesystems in pool_2. YOu will notice the snapshot is now gone.
# stratis filesystem list pool_2
Removing a Stratis filesystem
To get rid of a filesystem, first unmount the filesystem using the syntax below:
# umount /stratis/pool/filesystemFor example to remove the filesystem fs_1 in pool_1, first unmount it as shown:
# umount /stratis/pool_1/fs_1Next, destroy the file system using the syntax below:
# stratis filesystem destroy pool fsIn our scenario, the command will be:
# stratis filesystem destroy pool_1 fs_1
To confirm that the file system was successfully removed, run the command:
# stratis filesystem list pool_1
As you can observe, the filesystem no longer exists.
Removing a Stratis pool
Lastly, let's see how you can remove a Stratis pool.
To remove a stratis pool, you need to unmount and destroy any filesystems and snapshot in the pool as we saw in the previous sub topics.
Since there is a snapshot remaining on pool_1 we are first going to remove it by first removing the mount point associated with the snapshot
# umount /storageNext, destroy the file system.
# stratis filesystem destroy pool_1 snapshot_1With the snapshot now removed, remove pool_1 using the command
# stratis pool destroy pool_1
Now list the pools available:
# stratis pool list
To remove pool_2 , let's first list the filesystems
# stratis filesystem list pool_2
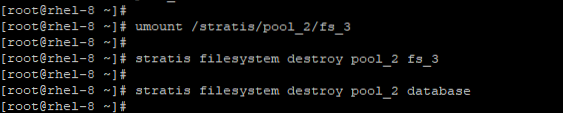
Unmount and destroy the filesystems as shown
# umount /stratis/pool_2/fs_3# stratis filesystem destroy pool_2 fs_3
# stratis filesystem destroy pool_2 database
Next, destroy the pool and list the pools
# stratis pool destroy pool_2# stratis pool list
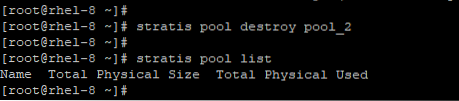
Perfect ! all pools are gone now. We have gone back to where we started out ! You can confirm once again by listing the lock devices using the command:
and how you can use it to manage block devices, create snapshots, filesystems and pools and remove them as well. Your thoughts and feedback are most welcome.
References:
- https://access.redhat.com/documentation/en-us/red_hat_enterprise_linux/8/html/managing_file_systems/managing-layered-local-storage-with-stratis_managing-file-systems
- https://www.tecmint.com/install-stratis-to-manage-layered-local-storage-on-rhel/


