Firstly, download and install Kodi if you don't have it. Read the complete installation process of Kodi from here (https://linuxhint.com/install-kodi-17-xbmc-home-theater-ubuntu/).
Setup Kodi on Ubuntu:
Once the installation is done, launch the application, you will see the following screen:
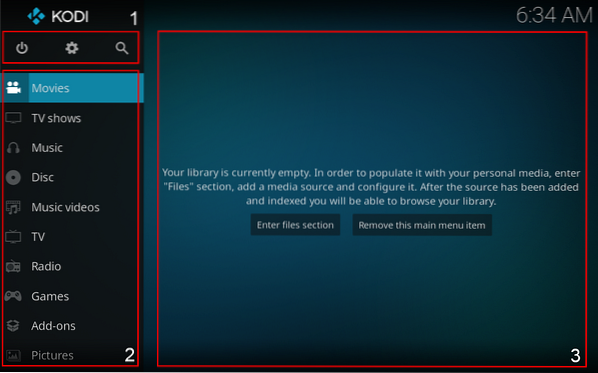
- Standby, Settings, and search buttons.
- It is the menu where you can select the type of media.
- The area where media is displayed. For example, banners of movies and shows.
You can enter the file section and browse the media from your drive, or you can play media from online streaming websites. We need to download add-ons to play media from online sources like YouTube, Vimeo, etc.
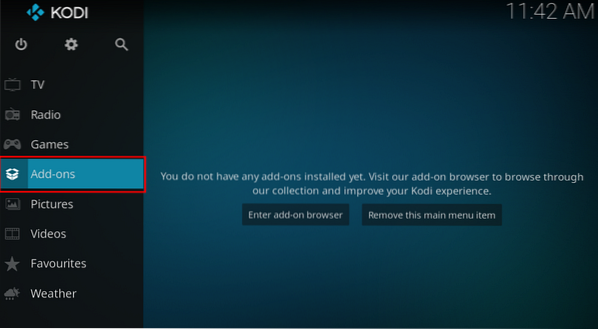
Downloading Add-ons:
To download this add-on click on “Add-ons”, and then “Download Add-ons” there are many add-ons available, but the add-on we are going to download is a popular video streaming add-on called “Vimeo”.
To download the first click on “Add-ons” as shown in the image below:
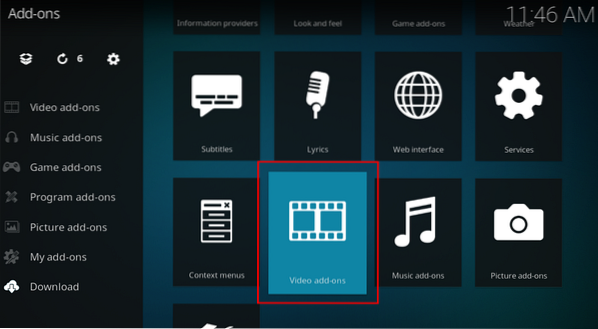
Now you are in the add-ons section. Then scroll down to the “Download” option:

There are different categories of add-ons, like Weather, Game add-ons, Music add-ons, etc. Navigate to the “Video add-ons” as shown in the following image:
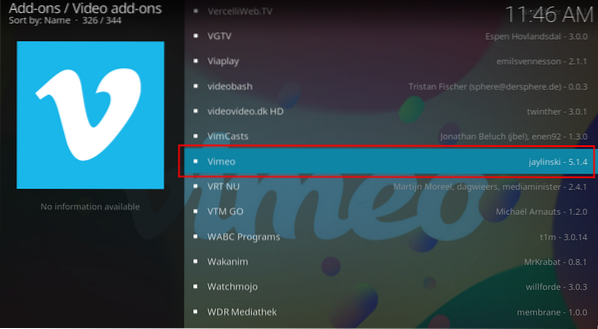
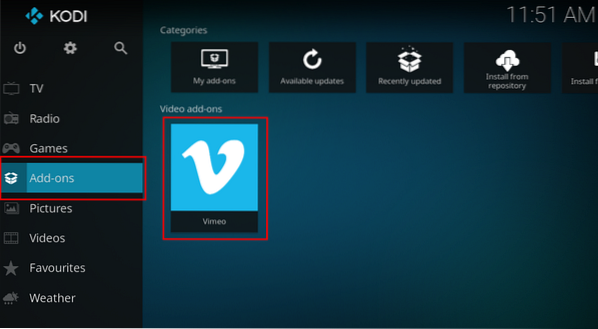
There will be tons of video add-ons. All add-ons are aphetically arranged, search “Vimeo” and click on it:
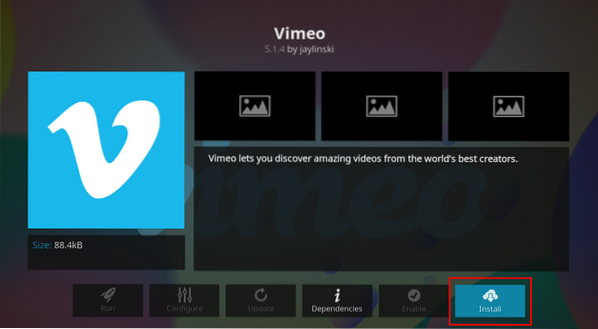
A window will open with the add-on description click on install:
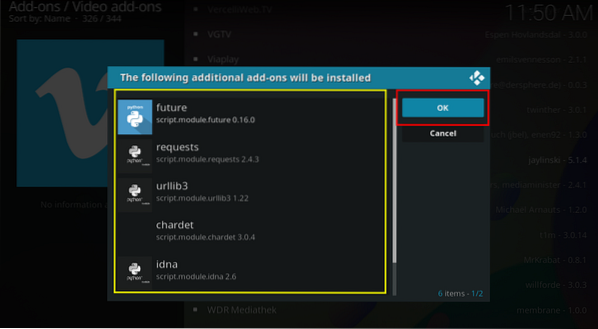
It will prompt ask permission to install dependencies, click “OK” to continue:
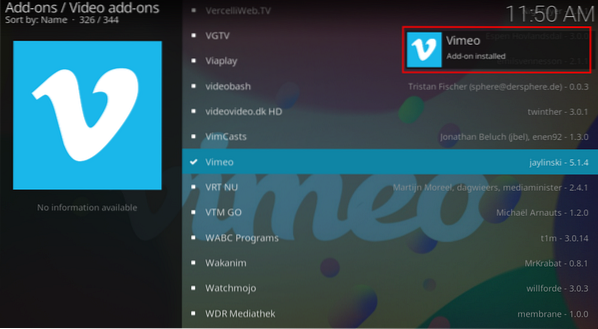
After installation, Kodi will show a notification, and a tick will appear beside that add-on:
Now go back to the main screen, you can see the add-on icon there:
Select and open it. There will be various options such as “Search”, “Featured” and “Settings”, find your favorite video and stream it.
Accessing Media from the local drive:
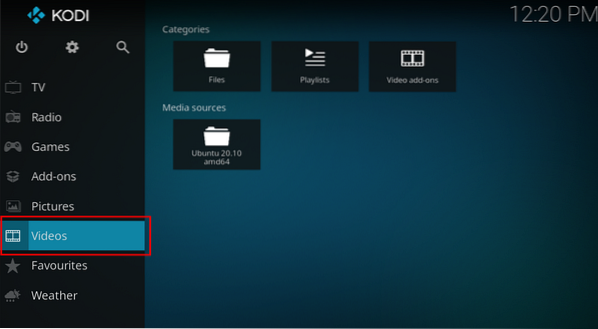
To watch videos from the storage of your device is simple. Just go to videos:
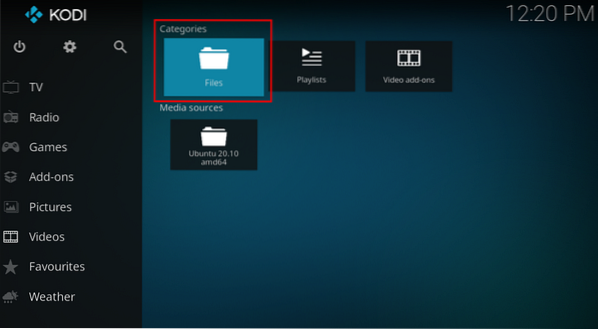
Now open “Files”:
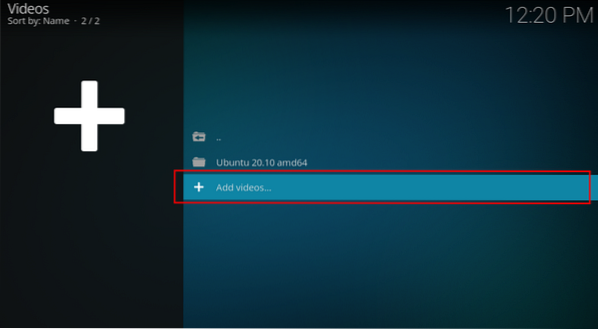
Click on “+ Add Videos” icon:
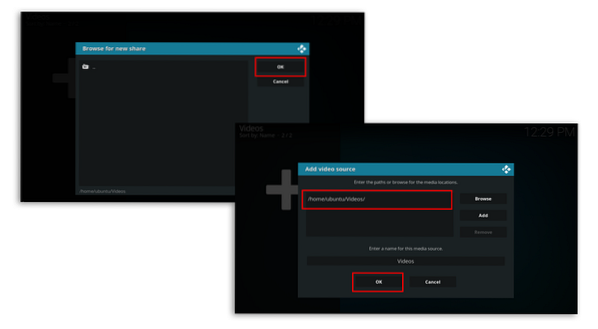
A window will open, click on browse, different paths will open, select your local storage which will be “Home Folder” and navigate the folder where your videos are located. In my case, videos are in the “Videos” folder.

A path will be added, as shown in the following image, click “OK”:
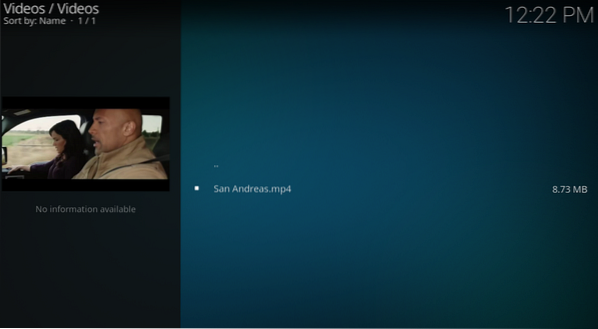
Now you can watch the videos that are in the “Videos” folder of your drive: