Having the capability to SSH into your Guest OS can come in handy when you don't want to use the GUI of your Virtual Machine. Simply start your VM in a headless mode and SSH in and out of it without having multiple windows open in your terminal.
For those who are new to the idea of SSH, we will have a short introduction to the workings of SSH before diving into the setup. Also we would need to discuss the network related settings of your VM to make sure you have access to that VM from anywhere in your LAN.
How SSH-keys works?
Here's simplified model of how SSH works. You create a pair of keys on your local computer. A public key and a private key. Messages encrypted using Public key can be decrypted using the private key and vice versa. These keys are usually stored on your local computer at a path ~/.ssh/id_rsa(private key) and~/.ssh/id_rsa.pem(the public key).
You then go to your remote server, login to a console as a regular or root user, open up the file ~/.ssh/authorized_keysof that server. Here you enter the contents of your public key as it is. Once that is done, you can ssh as that user on the server whose .ssh directory has the authorized_keys, from your local device.
The .pem extension signifies that that file is the public key that you can share with anyone. The id_rsa part just signifies what encryption cipher is being used (in this case it happens to be RSA). The private key can further be protected by a passphrase which you would have to enter, everytime you want to login to a remote server using that private key.
If you have a Mac, Linux or any other UNIX-like system as your local computer you can generate and manage keys using terminal, and you can also SSH into remote servers using the same terminal. For Windows users, I'd suggest use PuTTY or Git Bash the latter being my personal preference. The commands are pretty much the same once you have an SSH client.
SSH-keys Setup
First make sure, if there are no ssh-keys already in your home directory. Check the contents of your home directory's .ssh folder. If in doubt, back up its contents before executing the following command. Programs like Filezilla use SSH keys all the time, without the user's knowledge so this step is rather crucial.
In your local machine, open the terminal and enter the command:
$ ssh-keygenThis will be followed up by the following prompts with values in bracket indicating the default values. Proceed with the prompts and give your keys a secure passphrase.
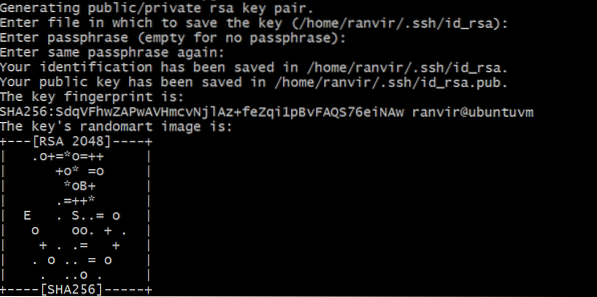
Verify that the keys are created by checking the contents of your ~/.ssh folder.
$ ls -al ~/.sshIf you see files matching the default values displayed in the ssh-keygen prompt then everything has worked fine.

Now open up a console to your Virtual Machine. First check if your VM has SSH server running or not.
$ service sshd status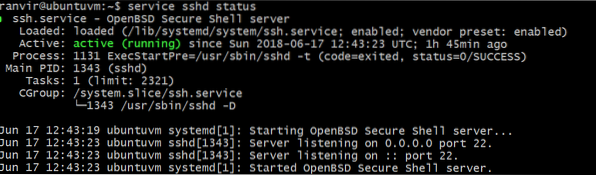
If it is not installed, use your package manager to search and install OpenSSH server. Once that is done make sure that your VM's firewall is open on port number 22. For example, if you are using Ubuntu as a VM, the default firewall ufw should either be disabled or should allow port 22 connections like so:
$ sudo ufw status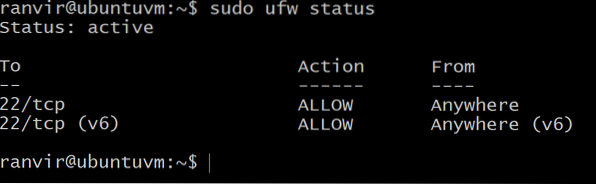
If if is not open at port 22, use the follow command:
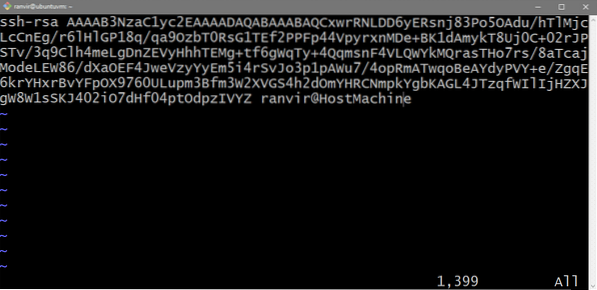
$ sudo ufw allow sshNext open up the file ~/.ssh/authorized_keys on your VM, using your favorite text editor. You may want to enable host-to-guest or bidirectional clipboard for this next step.
Inside this file (at the bottom of the file, if it is not empty) paste in the contents of your public key. The last part where it says your name and the local host where the keys were generated is not that important as the rest of the string.
(Optional) Not using SSH-keys
If you trust your local network, then you can use the less secure method of using your UNIX password, to ssh into your VM. Open up the file /etc/ssh/sshd_config on your VM and replace the line:
#PasswordAuthentication noTo
PasswordAuthentication yes
Once that is in place, restart your SSH server.
$ service sshd restartNow you can use the regular password that you use to login to your VM to ssh into it as well.
Your Virtual Machine and Network
For you to ssh into your VM, both your local computer (the one with the private key) and the VM should be on the same network. So you can reach to that VM's IP address. We will show you how to add the VM to your LAN.
Let's consider the example of a typical home router setup. Your computer, along with other devices, is connected to the home router. This router also acts as a DHCP server, meaning it assigns each device that's connected to it, a unique private IP address. Your desktop gets an IP, so does your phone and your laptop. Only the devices that are connected to this router can talk to one another via their IP addresses.
Enable bridged networking mode in the settings of your VM and the VM will show up as being connected to your home router (or a similar DHCP server) with a private IP. If a second device is connected to the same network (say, to the same home router) then it can be used to ssh into the VM.
Open VirtualBox Manager, select your target VM, open up the Settings → Network and select Bridge Networking instead of NAT.
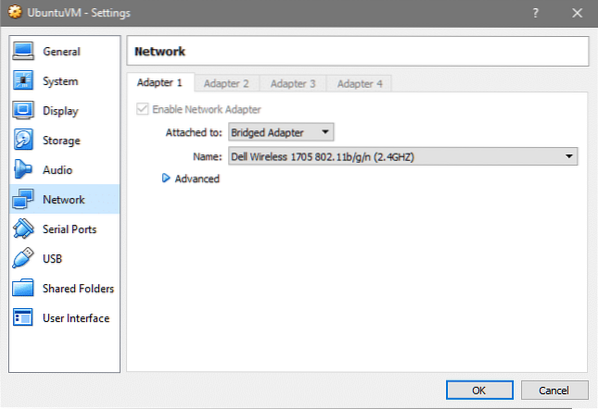
As you can see my host is connected using Wireless so that connection is also shared by the VM, if you are using Ethernet, a different interface name would show up which is fine.
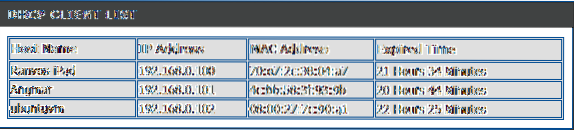
Now, my VM, which is named ubuntuvm, shows up on my LAN setup as following. Check your router settings to see if the same works for you.
Once you know the IP address of your VM, you can SSH into it by running the command:
$ ssh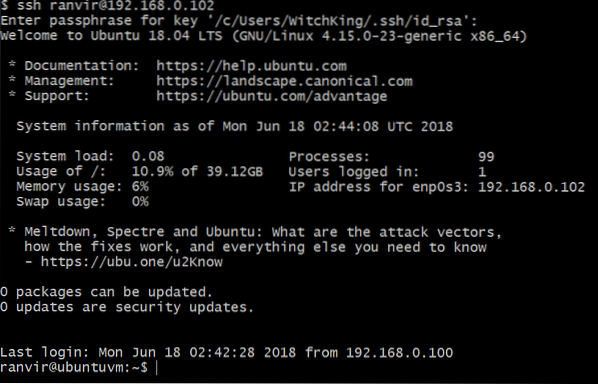
If you have put a passphrase for your private key in the above steps, you would be prompted to re-enter it.
That's it! Now you can start your VMs in headless mode and just ssh into them from anywhere in your house. Hope you found this tutorial interesting, let us know if there's any topic you would want us to cover.


