This guide demonstrates how to use Terraform with Google Cloud platform. This guide assumes, the user has an account in Google Cloud platform and it's ready to use, if not it's possible to create a free trial account with ease for a year. However, Google Cloud requires a valid credit card number to be submitted in order to access its console; hence make sure it's dealt with before proceeding ahead.
Requirements and Conditions
Google Cloud platform consists of a large number of services; hence it's difficult to cover them all in a single guide, and therefore, this guide covers only the Google VM instances section. It demonstrates how to install a Nginx web server in an Ubuntu VM instance in Google Cloud infrastructure.
Since the guide is about terraform, obviously it has to be installed in the system. Additionally, an SSH key has to be generated in order to access the VM instance.
How to Install Terraform on Ubuntu
Terraform can be installed in two different ways. The first method is manual way, which requires the user to download and install it in the system, the alternative and the most recommended way is automated way, which downloads and installs the terraform in the system with a couple of code lines. Follow the following commands to make it happen.
- Install the unzip package in the system to extract the terraform package once it's downloaded.
- Download and install terraform from the given link. Note that at the moment when the article is being written the latest version of terraform is 0.11.10. In the future the version might be a different one. So always pay attention to their official website for getting information of latest terraform package.
- Extract the terraform to the currently active directory. By default, it's the Home directory in Ubuntu.
- Move the terraform to the binary folder. Terraform doesn't have a setup file; hence its binary file has to be placed in the bin file manually.
- Use the following command to access terraform from the command line without specifying its directory.
How to Generate Your Own SSH Key
After installing terraform, the next important step is generating your own SSH public/private key pair to communicate with the VM instance that is about to be created. SSH key pair provides strong security over the traditional password/username authentication; hence following this option is strongly recommended even though it's not mandatory.
1. On Ubuntu shell, type the following command to generate the SSH Key pair.
ssh-keygen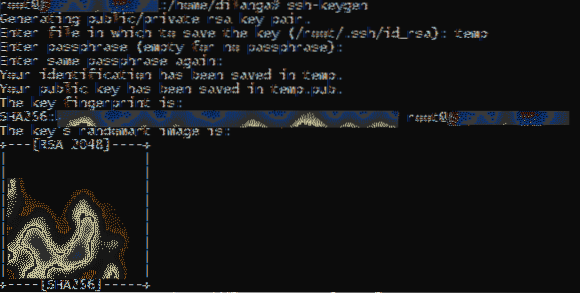
2. At the outset, it asks a name for the key pair, then the passphrase for the ssh key. The public key is created as
Configure the Google Cloud with Terraform
Once aforesaid two segments are completed, go ahead and create a free trial account in Google Cloud. Since creating an account is a simple process, it's not described here. After getting access to the Google Cloud console, follow the following steps to configure Google Cloud with terraform.
- Navigate to the following URL.
https://console.cloud.google.com
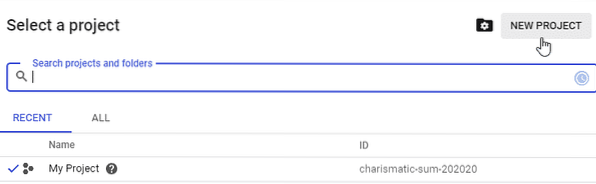
- Click on “My Projects” button in the upper left corner of the console.

- Create either a new project or use an existing project for this guide. The purpose of the “project” is grouping various services in the Google Cloud. The project is the highest node of this services hierarchy, and rest of the services are going under it. A service created under one project is not accessible from another project. Once the project was created, copy and keep its ID in somewhere safe. In the following screenshot, the project id is charismatic-sum-202020, and it may be a different one in your cloud console.
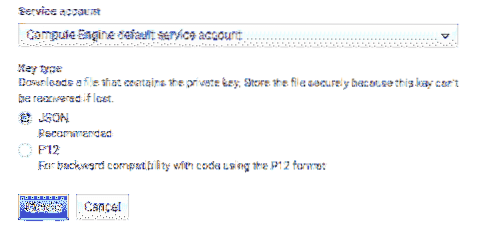
- Navigate to the following web url to download the credential file in JSON format to authenticate the user when connecting with Google cloud platform. This is the administrator account; hence make sure this credential file is safe in a secure location. https://console.cloud.google.com/apis/credentials/serviceaccountkey
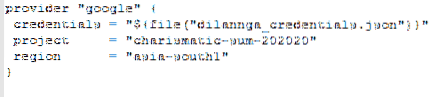
- Create a file and rename it as main.tf. This file is the configuration file for terraform, then use the following code block as its first lines of code. The provider name is for stating the provider to connect with. Terraform supports a large number of cloud platforms; hence the cloud platform's name has to be explicitly stated. Here it's Google, which means it connects with Google cloud platform. Apart from the heading, there are 3 attributes in the block, the “credentials” attribute is for specifying the credential file's name downloaded above, project name is the location in google cloud where the VM instance is created. The id created in step 3 is used as the project name here. Region is the geographical location where the VM instance is created. There are multiple regions. Use this link to refer to all the available regions. https://cloud.google.com/appengine/docs/locations provider "google"
credentials = "$file("CREDENTIALS_FILE.json")"
project = "PROJECT_NAME"
region = "REGION_NAME"
- Use the following command to install plugins for terraform. The following command automatically scans the terraform config file and identifies which plugins to be installed, additionally it also downloads the provider information for terraform. This guide uses Google Cloud platform; hence it downloads Google cloud terraform provider information. The command identifies the provider from the name stated at “provider” keyword in the terraform config file. terraform init
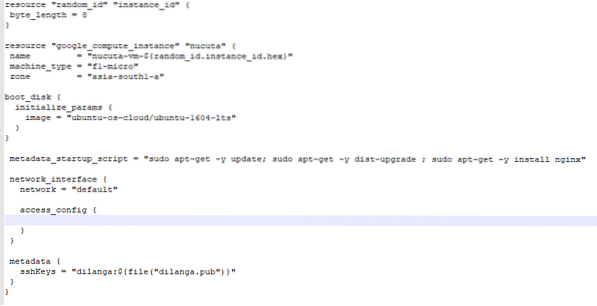
- Use the following two code blocks to define more information for VM instance. From the beginning, it uses the random id plugin to generate a random number with 8 digits, then assigns that number to instance_id variable for using as a prefix for the name for VM instance. In the second code block, it creates a VM instance with the name “nucuta-vm-
. The machine type is the server package that is used to host the VM instance. Refer to this web URL to find the available machine types. https://cloud.google.com/compute/docs/machine-types. Zone is the exact location of the region. There are mainly 3 zones available in each region, a, b, c. Each zone has its own hardware/software configuration. Use this web URL to refer to all the available zones and their hardware configuration. https://cloud.google.com/compute/docs/regions-zones/ resource "random_id" "instance_id"
byte_length = 8
resource "google_compute_instance" "nucuta"
name = "nucuta-vm-$random_id.instance_id.hex"
machine_type = "f1-micro"
zone = "asia-south1-a"
- Use the following code block inside of “google_compute_instance” code block. It specifies the operating system to be used. Use this web URL to find all the available operating systems for google cloud platform. https://cloud.google.com/compute/docs/images. It says image, because the operating systems are stored as “image” files. When the terraform config file is being executed, the image file is extracted, and its operating system is installed in the VM instance just as on a regular computer. The image attribute is in this format, image project/ image family. boot_disk
initialize_params
image = "ubuntu-os-cloud/ubuntu-1604-lts"
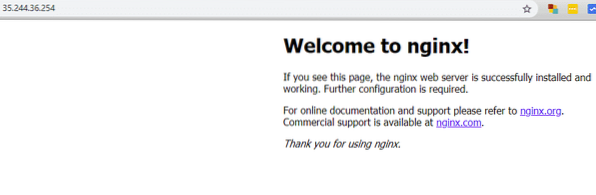
- Use the following code in “google_compute_instance” code block. It specifies the start-up script to run on the newly created VM instance. This script is executed as soon as the VM instance was created. In the following example, it updates the local package information repository with latest information, then it updates all the packages with dist-upgrade, then it installs nginx package. Make sure to use -y flag to make the process non-interactive, meaning it automatically executes and carries out the process without requiring user intervention. metadata_startup_script = "sudo apt-get -y update;
sudo apt-get -y dist-upgrade ;
sudo apt-get -y install nginx"
- Use the following code block in “google_compute_instance” code block. The following code block specifies the network interface, which is used to connect the current VM instance with other VM instances, devices, and networks. Access_config block is used to allocate the VM instance an external IP address to access it from the Internet. network_interface
network = "default"
access_config
- Finally, use the following code block in “google_compute_instance” code block. It specifies the username and public SSH key. Make sure the generated public SSH key is in the same folder as terraform configuration file. The username should be the name of the account from where the SSH key was created, for instance if the account's name is root, then its username is root. metadata
sshKeys = "dilanga:$file("dilanga.pub")"
- The final code block should look like this
- Use the following code block outside of “google_compute_instance” code block. By default, VM instance blocks all the incoming, and outgoing traffic. Since this guide creates a web server, port 80 and 443 have to be opened to allow users to access it over the Internet. From the beginning, name attribute creates a profile in google compute firewall for this rule, the network attribute specifies to which network interface the rule applies, allow block allows the protocols and its ports specified under it. Icmp protocol is used to ping the web server to make sure it's available to public. Pinging is often used by many services to find out the availability of a web site. resource "google_compute_firewall" "default"
name = "nginx-firewall"
network = "default"
allow
protocol = "tcp"
ports = ["80","443"]
allow
protocol = "icmp"
- Use the following code block outside of “google_compute_instance” to print the current VM instance's public IP address. output "ip"
value = "$google_compute_instance.nucuta.network_interface.0.access_config.0.nat_ip"
- Use the following command to verify the config file, and credential file. It also previews how the final outcome looks like once the config file was executed. terraform plan
- then use the following command to execute the config file. terraform apply
- Now use the public ip address on any web browser to access the VM instance's web server.
- Use the following command to access the VM instance over SSH to manage the server. Make sure the private key is in the current directory or specify the path to private key.
- ssh -i
@ 
Conclusion
This should be enough for you to get started. The full config file, main.tf, is shown below. Highlighted texts can be changed according to the user requirements.
provider "google"
credentials = "$file("dilannga_credentials.json")"
project = "charismatic-sum-202020"
region = "asia-south1"
resource "random_id" "instance_id"
byte_length = 8
resource "google_compute_instance" "nucuta"
name = "nucuta-vm-$random_id.instance_id.hex"
machine_type = "f1-micro"
zone = "asia-south1-a"
boot_disk
initialize_params
image = "ubuntu-os-cloud/ubuntu-1604-lts"
metadata_startup_script = "sudo apt-get -y update; sudo apt-get -y dist-upgrade ;
sudo apt-get -y install nginx"
network_interface
network = "default"
access_config
metadata
sshKeys = "dilanga:$file("dilanga.pub")"
resource "google_compute_firewall" "default"
name = "nginx-firewall"
network = "default"
allow
protocol = "tcp"
ports = ["80","443"]
allow
protocol = "icmp"
output "ip"
value = "$google_compute_instance.nucuta.network_interface.0.access_config.0.nat_ip"


