To get your copy of Kali Linux, visit their official site and get a copy which comes with a GUI preferably. We are choosing the stock option, which is listed on the top.
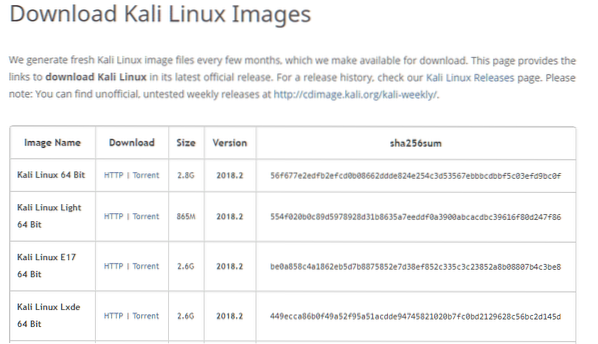
The file is nearly 3 GB in size and it might take a while to download. Once the iso is downloaded, we are ready to install it inside a VM.
Creating a VM
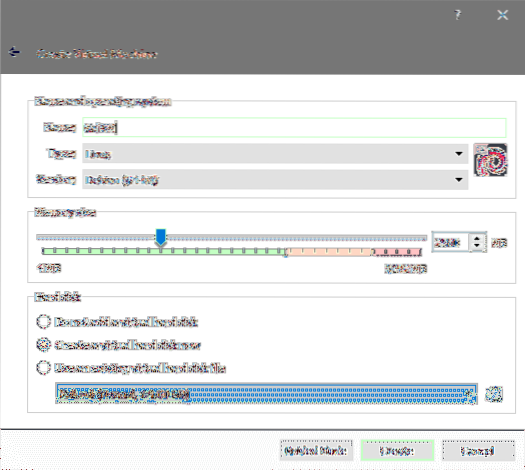
Open VirtualBox manager on your host. Click on the “New” button from the top left corner. In the “Create Virtual Machine” window, give your VM a reasonable name. We are choosing the name “KaliVM”. Select the Type as “Linux” and Version as “Debian (64-bit)”. Also allocate a sizeable amount of RAM to this VM. Anything above 2GB would result in a decent performance. Lastly, for storage select the “Create a virtual hard disk now” option as shown below and click “Create”.
Kali recommends a minimum disk size of 20GB, and for practical purposes you would want something larger than 40GB in size. Select a size that works for you, when creating your Virtual Disk.
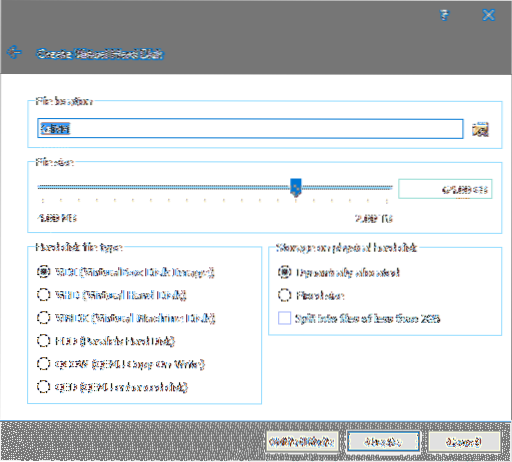
Keep the hard disk file type as VDI and set the it to be dynamically allocated. By doing this, your VM will not take up the entire allocated size at once but would rather grow gradually as and when it needs more space. Click “Create” one last time and the VM is created.
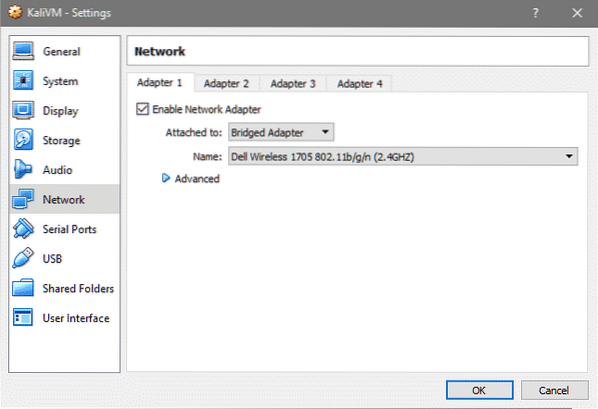
Before starting the installation, you may also want to tweak the VM's settings. Just right click on the VM and select Settings. Go to Systems tab on the Settings menu and there select the Processor tab.
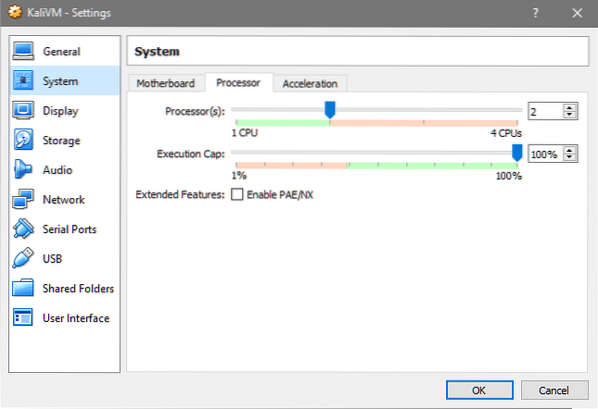
Increase the number of processors to a reasonable amount so the VM performs better. Also, if you plan on using the VM to deal with the traffic flowing through the LAN to which your host is connected, you can go to Network tab and select Bridge Networking so that your VM shows up on your local DHCP server as a physical device like any other desktop, phone or tablet.
That is all there is to VM setup, let's install Kali OS on top of this VM.
Kali Installation
Open up VirtualBox manager and double click on KaliVM to boot it up. Since the Virtual Hard Disk doesn't have an OS installed on it, it is not bootable yet. VirtualBox will prompt us to select a bootable media to boot the VM with.
Using the file explorer window that pops up, locate the Kali ISO file that you downloaded earlier.
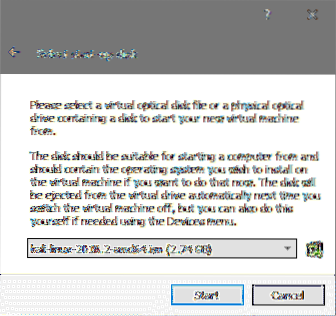
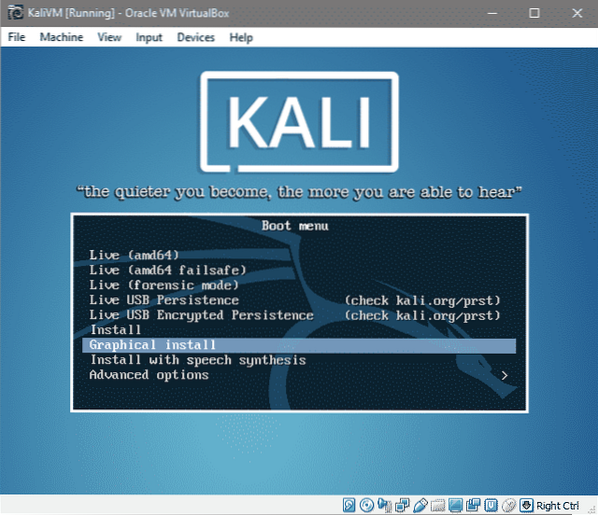
Then click on Start to boot the installation media. In the Boot Menu select the Graphical Install option for a simple and hassle free installation experience and hit Enter.
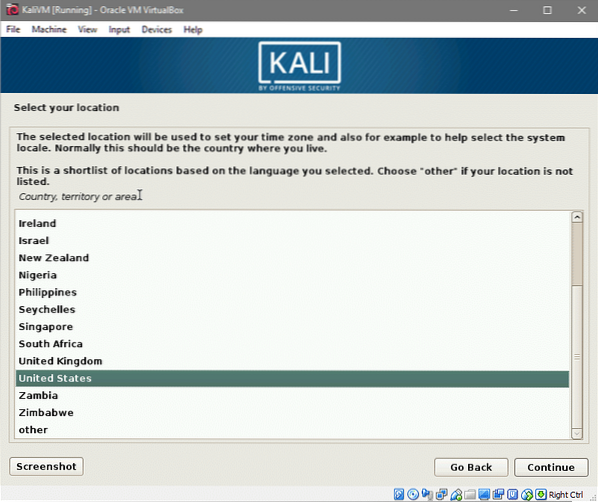
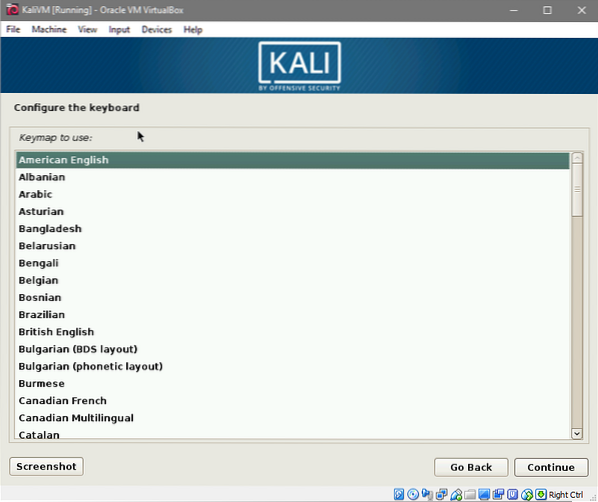
Next few prompts would select language preferences, keyboard layout and your location as shown below:
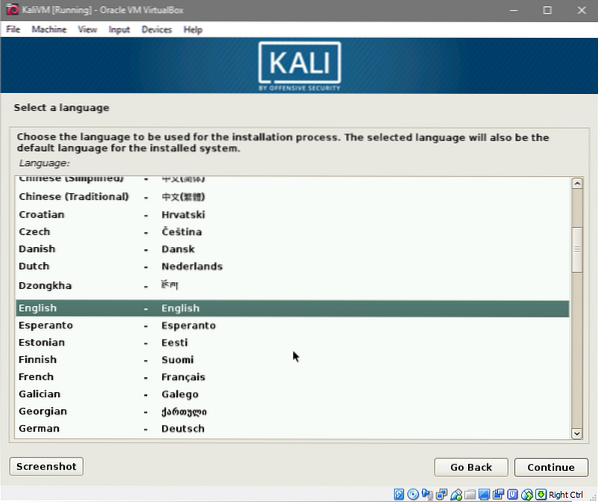
Select your language and click on Continue.
Select your preferred location.
Lastly, select your keyboard layout. If unsure, stick with the American English option.
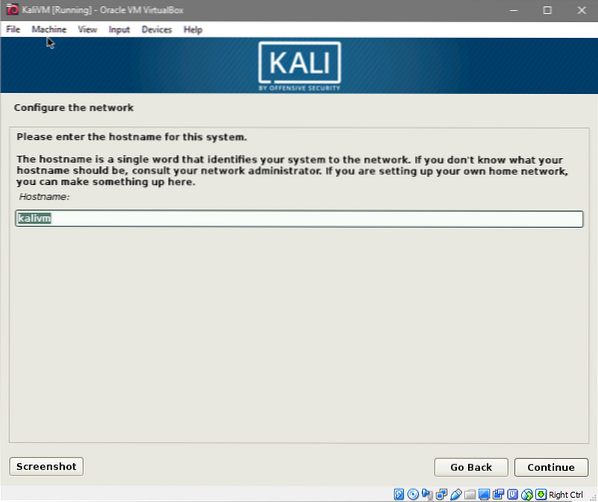
After clicking on Continue some of the installer components and networking configs will get loaded. This might take a while. Once that is done, you will be asked to enter a hostname and a domain name. We are using kalivm as our hostname.
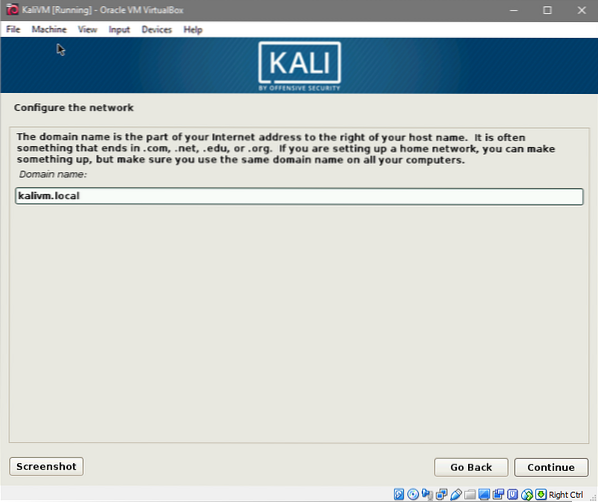
And we are using kalivm.local as the VM's domain name.
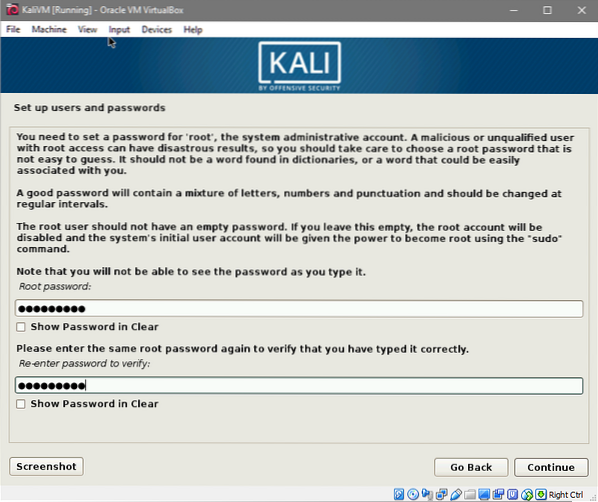
Next you would be prompted for root password. Enter a secure password for your root user and re-enter it to confirm the change and Continue to the next window.
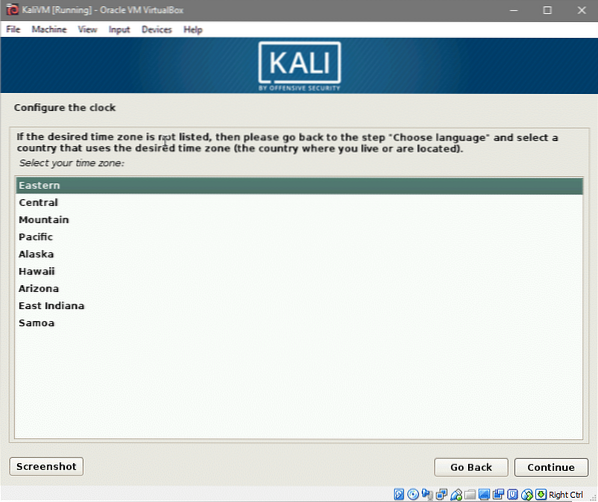
Select the time zone that is relevant to your previously chosen location.
And we can move on to selecting and partitioning the hard disk.
Since we are using a single newly created virtual hard disk, there is no data to be lost in there, additionally, we are not going to dual-boot or use LVM so partitioning is going to be relatively easy.
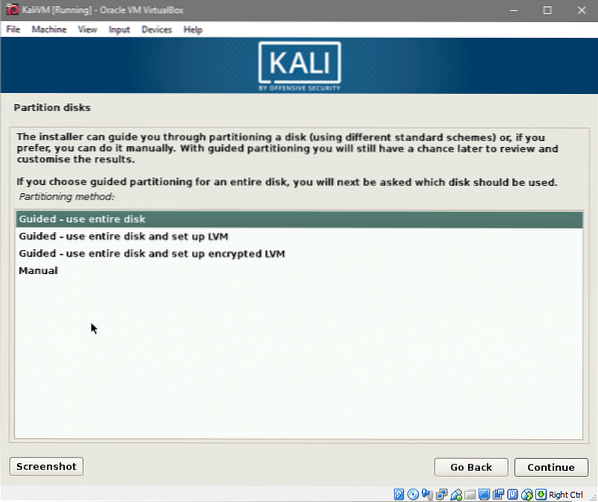
Select the “Guided - use entire disk” option and Continue. You will be shown the information of all the hard disk's connected to the VM (which in our case is only one).
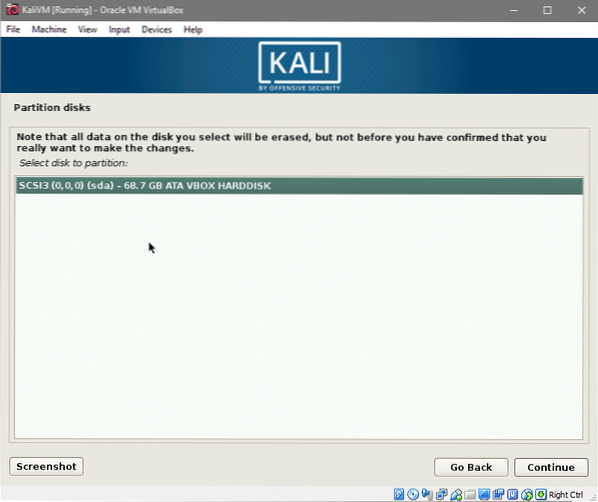
Select the only hard disk that appears there, as shown below:
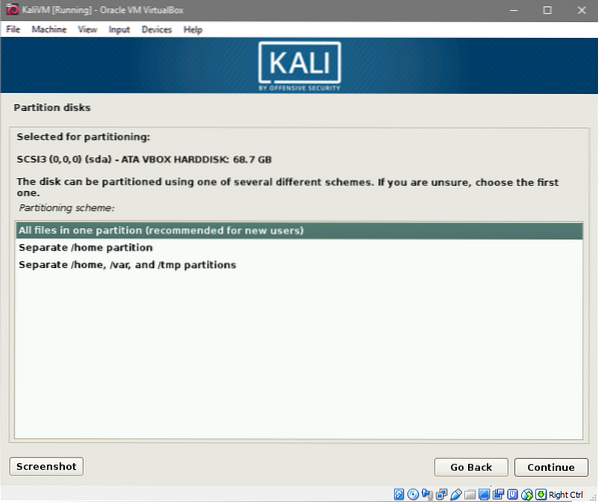
Lastly, select the first option where a single partition (other than a swap partition) would be created.
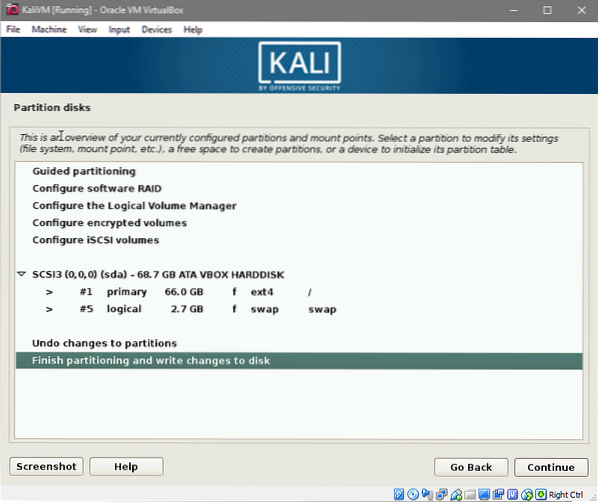
And accept the changes that would be made to your virtual hard disk by click on Finish Partitioning option and Continue.
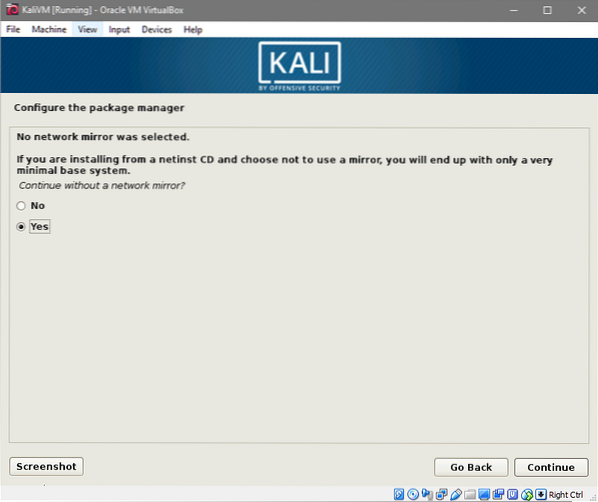
You will be prompted one last time to say “yes” to the changes. Once you do that the installation would begin. This might take a while so be patient. You will be prompted thrice in this process. Once to select a package mirror, to which you should say yes. This helps keep all your apt packages up to date.
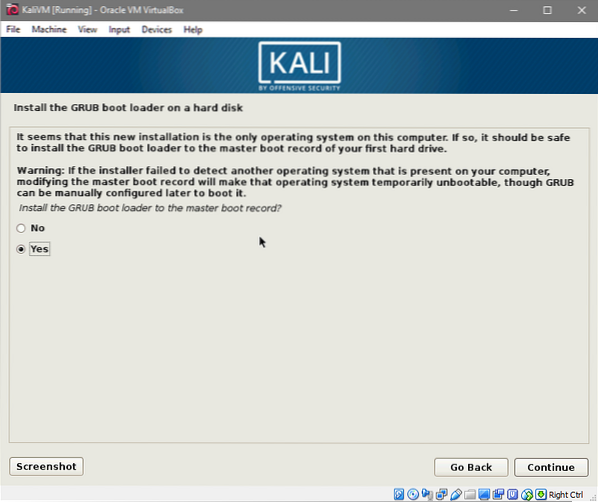
Next would be an option to install GRUB on your local hard drive. Say yes to this as well.
And select your virtual hard disk where the GRUB boot loader would be installed, in the next prompt. Next would be an option to setup a proxy. If you are unsure whether or not you use a proxy, leave it empty.
Once you are done with the installation. It will ask you to remove the live OS media and restart the system. Thankfully, VirtualBox will remove the iso for you so you don't have to worry about that.
Upon rebooting you will be greeted with your new Kali Linux environment. Login as root user with the password you chose before.
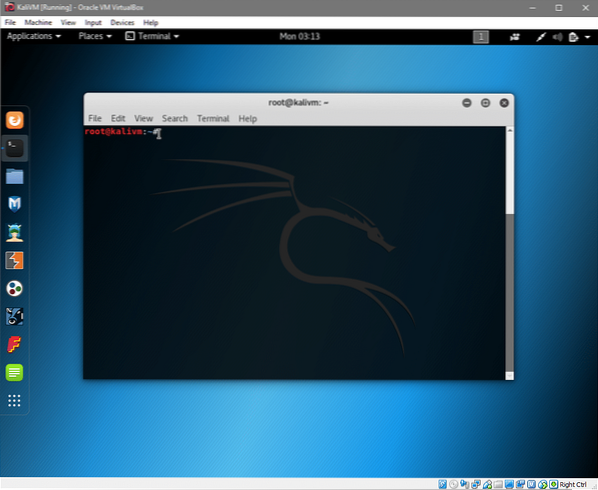
There you go! You are now ready to begin your journey exploring Kali Linux.
Let us know if you found tutorial helpful or if you have any new requests that you might want us to cover.


