MATE desktop
MATE is one of the most popular Linux desktop environments you can enjoy right now. Linux Mint is one of the many distros out there that feature the MATE desktop.
The story of MATE is quite interesting. It's actually the continuation of GNOME 2. GNOME is another big desktop environment to enjoy. But the big change came with the release of v3. It was a completely different design than the classic GNOME 2. It created a big uproar in the community who loved and cared for the classic look.
This is where MATE started its journey. It's a fork of the GNOME 2 with numerous improvements and features added to it. Yet, it still remains true to the original GNOME 2. I believe that some of you who are reading this post happens to be one of those enthusiasts!
Thankfully, the popularity of the MATE desktop continued to rise. Now, more than 20 Linux distros officially support MATE desktop (Linux Mint included)!
Getting MATE desktop on Linux Mint
If you're interested in enjoying the well-known MATE desktop on your Linux Mint system, there are 2 ways of doing that and I will show both in this article.
First Way: Installing Linux Mint MATE
The first strategy is to completely reinstall the operating system. I know that some of you are highly against the idea, but sometimes, it's necessary to keep the system stable. In some cases, the mixture of multiple desktop environments on top of each other can cause different weird glitches and bugs with the themes and others. So, better to be safe.
Actually, installing Linux Mint is nothing so tough. It's super easy with all the simplistic and self-explanatory steps. Be careful, though. Backup all your important data before you're trying to reinstall the OS.
At first, you have to grab the latest Linux Mint ISO (with MATE desktop).
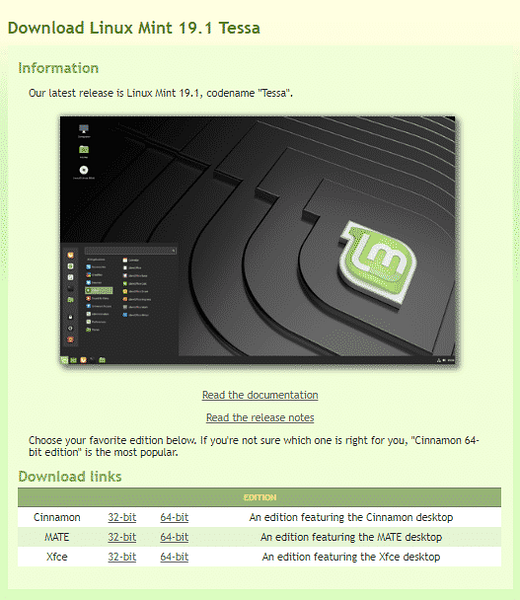
ISO ready? Ensure that the download didn't get corrupted. The best way to do so is by verifying the SHA-256 hash of the ISO. Learn how to check the SHA-256 hash of any file. Here are the SHA-256 hashes for Linux Mint MATE ISO.


Now, it's time to build a bootable USB flash drive for performing the installation. Learn how to create a bootable USB flash drive using ISO using dd. Be careful, “dd” is a very powerful yet very risky tool to work with. Even the slightest mistake can destroy all your favorite collections of music, movie, drama, and everything else! If you're afraid, then Etcher should be the best tool to do the job.
Now, boot into the bootable USB.
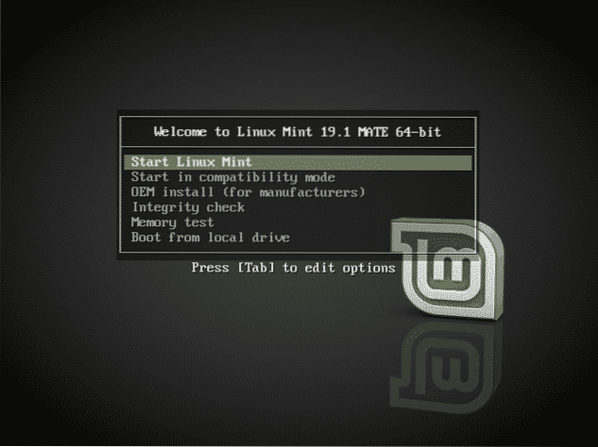
I always recommend booting into live mode first. There are cases when I changed my mind and stayed on the same system. Saved a lot of bandwidth and time. Moreover, it's important to check out whether you're ready to make the shift.
Ready? Launch the installer. The first screen is about choosing the right language for your system. The language will be used everywhere on the new installation.
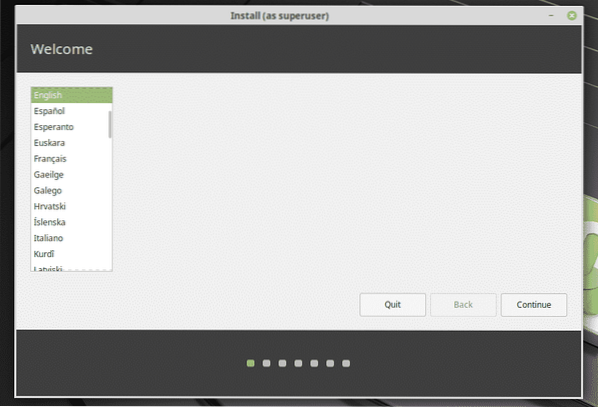
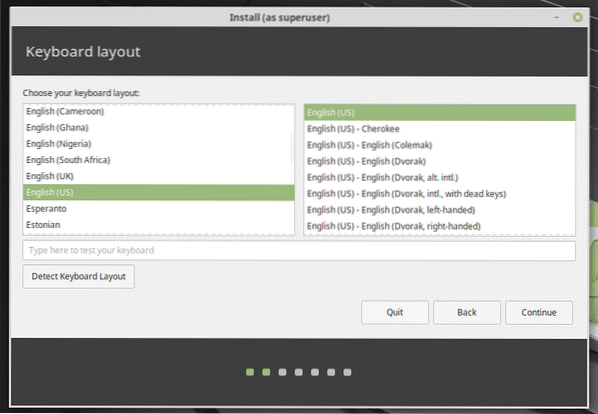
Next, keyboard layout. Don't mess it up. Things went pretty rough when I decided to switch to German layout out of curiosity!
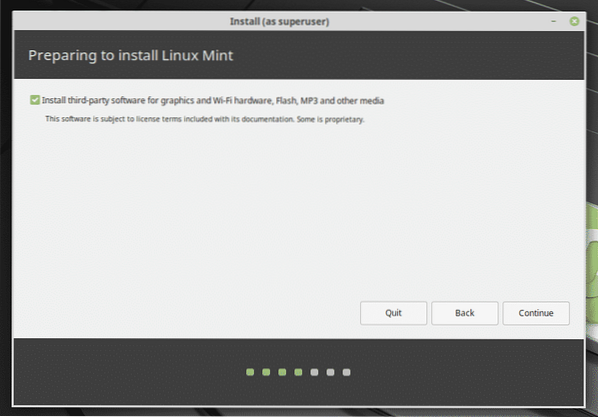
At this step, I always recommend checking the button for installing 3rd-party software and others. This makes life a LOT easier.
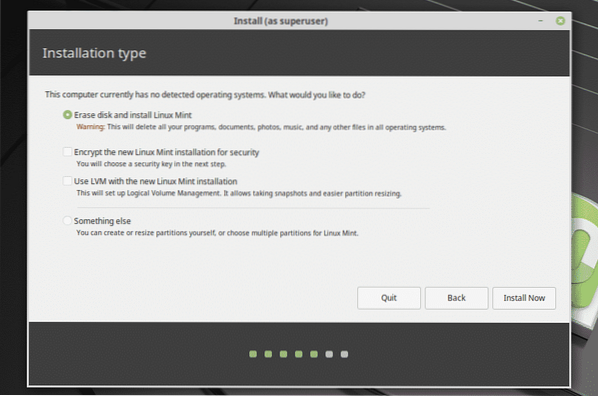
Now, decide which partition you're going to give away to the new installation. Personally, I always recommend having a separate partition with 20GB or more (not higher than 50GB) dedicated to the OS.
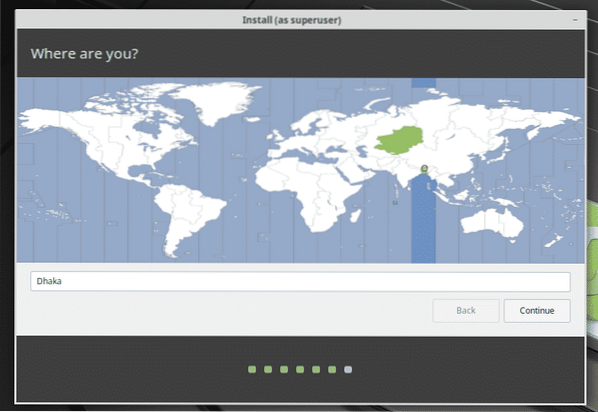
Your location is also important for the system. This will help to decide the time, specific formats and others.
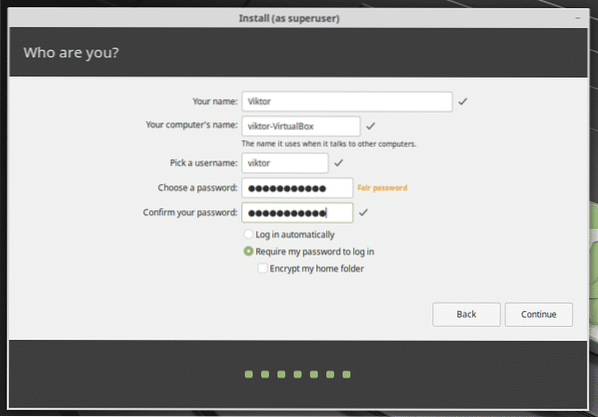
You're required to fill the next form for creating a new user. This user will be able to perform all the admin tasks. The password will be the official password for your system's “root” as well.
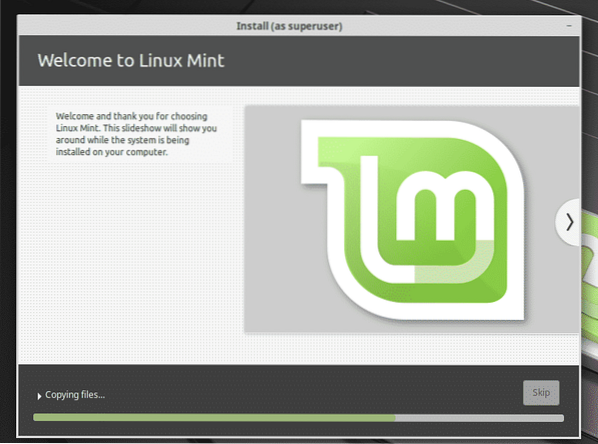
Finally, wait for the installation to complete.
Once the installation finishes, the installation will prompt you for restarting the system. Restart the system now.

Voila! Linux Mint MATE is ready!
Second Way: Installing MATE desktop only
If you happen to already have any other desktop environment than MATE, don't worry. You can either go through the installation of the entire OS or through this short method!
Personally, I'm not a fan of it because of the stability issues, but for everyday users, it should be more than enough. However, your system is going to become heavier. More storage consumption, that's all.
Fire up the terminal and ensure that your system is up-to-date.
sudo apt update
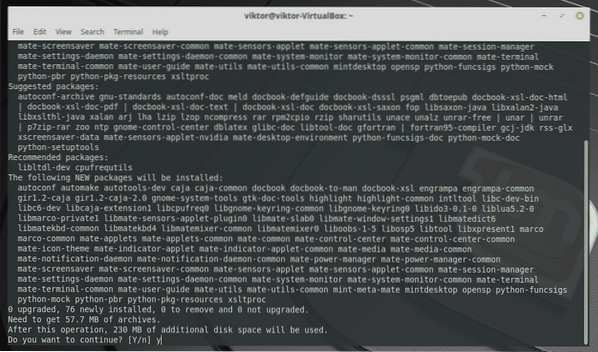
Once everything is ready, run the following command for installing the MATE desktop from the Linux Mint repository.
sudo apt install mint-meta-mate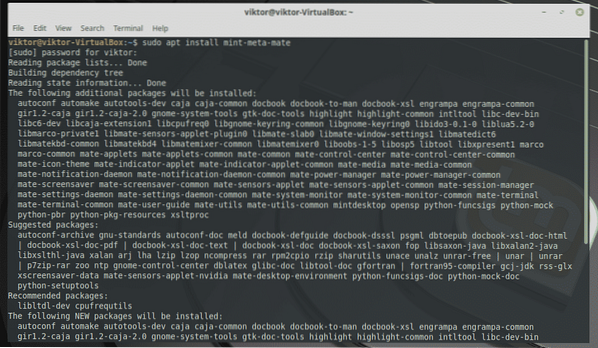
Switching to MATE desktop
Once everything is ready, restart the system and reach the login screen.
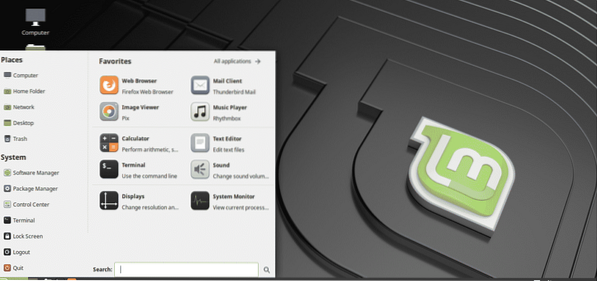
At the login screen, click the button next to the username and select MATE desktop.
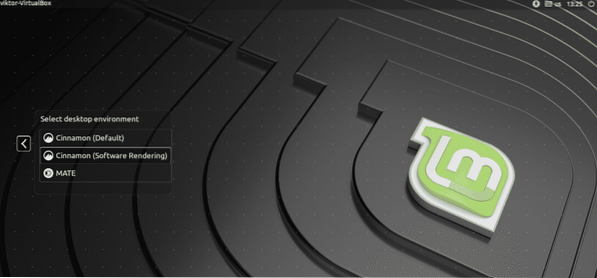
Voila! MATE is the default desktop environment from now on!

Final thoughts
MATE desktop is the perfect solution for traditional metaphors while still being attractive and engaging. Feel free to explore the world of MATE. There are also other ways you can colorize your MATE desktop, for example, the GTK themes. Check out the best GTK themes for Linux Mint.


