The Ansible apt_repository module can be used to add and remove package repositories and PPAs on your Ubuntu hosts with ease. You can also update the APT package repository cache using the Ansible apt_repository module.
This article will show you how to manage Ubuntu package repositories and PPAs using the Ansible apt_repository module. So, let's get started.
Prerequisites
If you want to try out the examples included in this article:
1) You must have Ansible installed on your computer.
2) You must have an Ubuntu host configured for Ansible automation.
There are many articles on LinuxHint dedicated to Installing Ansible and configuring hosts for Ansible automation. You may check these articles out if you need additional information.
Setting Up Project Directory
Before we begin, it will be a good idea to create a project directory structure, just to keep things a little bit more organized.
To create the project directory apt-ppa-repo/ and all the required subdirectories (in your current working directory), run the following command:
$ mkdir -pv apt-ppa-repo/playbooks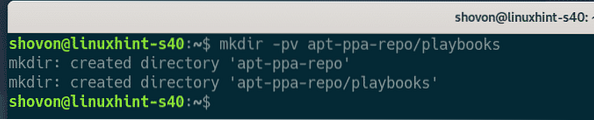
Once the project directory is created, navigate to the project directory, as follows:
$ cd apt-ppa-repo
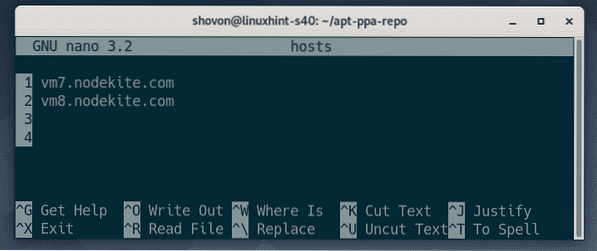
Create a hosts inventory file, as follows:
$ nano hosts
Add the host IP or DNS name (vm7.nodekite.com and vm8.nodekite.com, in my case) of your Ubuntu hosts in the inventory file.
Once you are done, save the file by pressing
Create an Ansible configuration file in the project directory, as follows:
$ nano ansible.cfg
Type the following lines in the ansible.cfg file:
[defaults]inventory = hosts
host_key_checking = False
Once you are done, save the file by pressing

At this point, the project directory should look like the following:
$ tree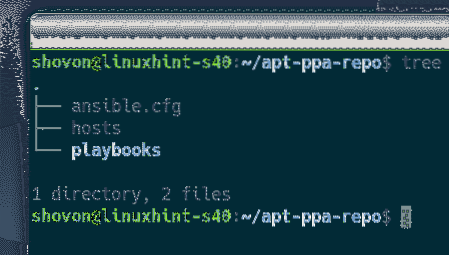
As you can see, the Ansible hosts are accessible. So, we can move on to the next section of this article.
$ ansible all -u ansible -m ping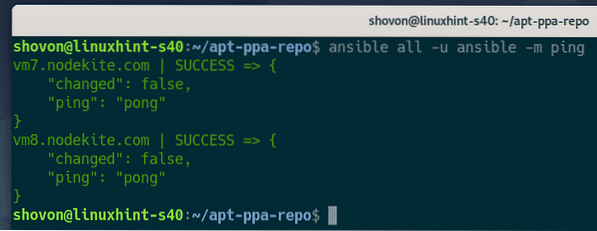
Adding Package Repositories
In this section, I will show you how to add a package repository in Ubuntu using Ansible.
First, create a new playbook called add_repo.yaml in the playbooks/ directory, as follows:
$ nano playbooks/add_repo.yaml
Type the following lines in the add_repo.yaml file:
- hosts: alluser: ansible
become: True
tasks:
- name: Make sure universe repository is enabled
apt_repository:
repo: deb http://archive.ubuntu.com/ubuntu focal universe
state: present
update_cache: True
Once you are done, save the file by pressing
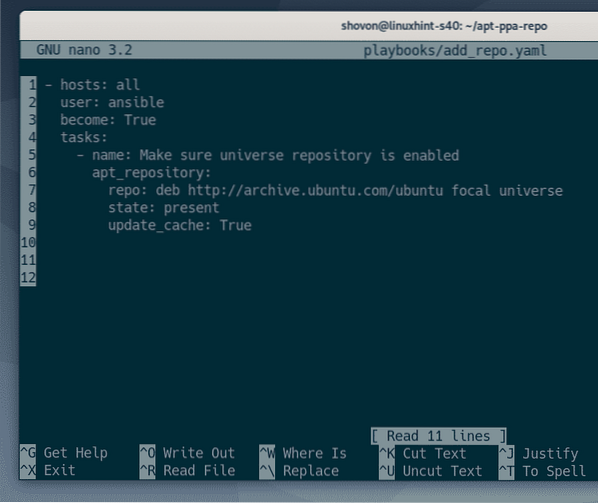
Here, the repo option of the apt_repository module is used to specify the APT package repository line (in my case, deb http://archive.ubuntu.com/ubuntu focal universe) of the package repository you want to add (in my case, the Ubuntu 20.04 LTS official universe repository).
To learn more about the format of the APT package repository line, read the Ubuntu Package Repository Configuration Files section of the article How to Use APT Package Manager in Ubuntu 20.04 LTS.

As I am adding a new package repository here, the state is present.

The update_cache option can either be True/yes or False/no.
If the update_cache is set to True, Ansible will update the APT package repository cache after adding the package repository.
If the update_cache is set to False, Ansible will not update the APT package repository cache.
Here, I want the APT package repository to be updated once the new package repository is added. So, I set the update_cache to True.

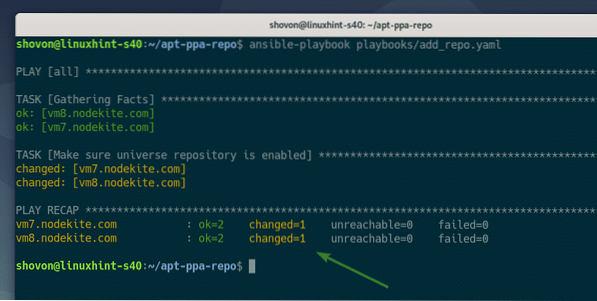
Now, run the add_repo.yaml playbook, as follows:
$ ansible-playbook playbooks/add_repo.yamlAs you can see, the playbook ran successfully.
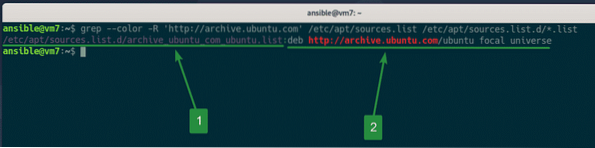
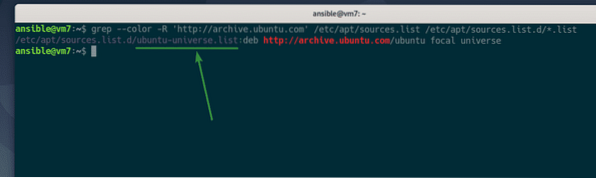
To confirm that the package repository (in my case, the Ubuntu 20.04 LTS universe repository) is added, run the following command:
$ grep --color -R 'http://archive.ubuntu.com' /etc/apt/sources.list/etc/apt/sources.list.d/*.list
As you can see, a new file has been created in the /etc/apt/sources.list.d/ directory (1) and the Ubuntu 20.04 LTS universe package repository has been added (2).
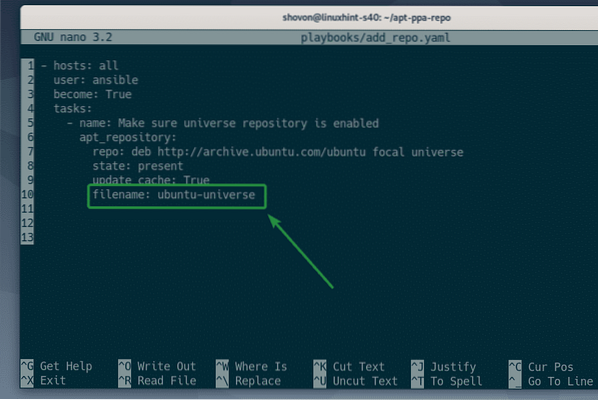
By default, Ansible will automatically generate the a .list file in the /etc/apt/sources.list.d/ directory, depending on the APT repository line.
If you wish to choose a specific file name (i.e. ubuntu-universe.list) for your repository, you can specify a filename using the filename option of the apt_repository module in your add_repo.yaml playbook, as shown in the screenshot below.
Now, run the add_repo.yaml playbook again.
$ ansible-playbook playbooks/add_repo.yaml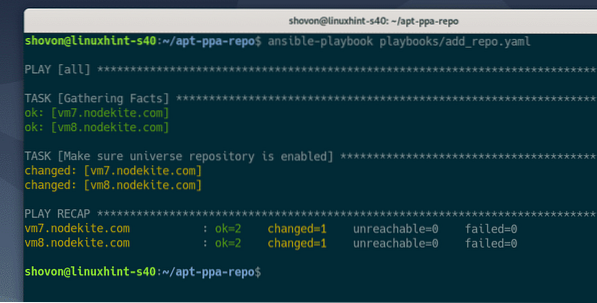
As you can see, the filename is the same name that I specified.
$ grep --color -R 'http://archive.ubuntu.com' /etc/apt/sources.list/etc/apt/sources.list.d/*.list
Removing Package Repositories
In this section, I will show you how to remove an existing package repository from your Ubuntu hosts using Ansible.
The playbook for removing a package repository is almost the same as adding a package repository. So, you can just copy the add_repo.yaml playbook file and modify it a little bit. This is very simple to do.
First, copy the add_repo.yaml file to remove_repo.yaml, as follows:
$ cp -v playbooks/add_repo.yaml playbooks/remove_repo.yaml
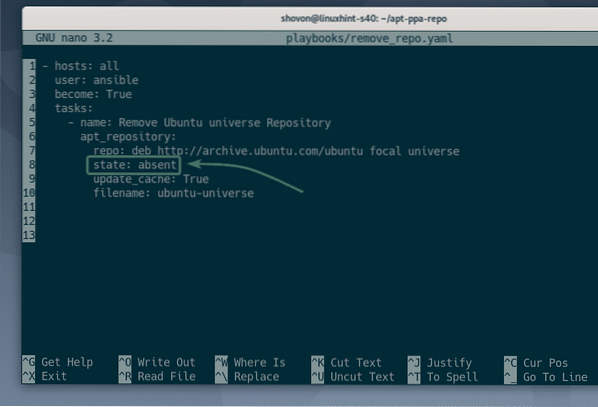
Edit the remove_repo.yaml playbook, as follows:
$ nano playbooks/remove_repo.yaml
Change state: present to state: absent, as marked in the screenshot below. This will be the only change you need to make.
Once you are done, save the file by pressing
Run the remove_repo.yaml playbook, as follows:
$ ansible-playbook playbooks/remove_repo.yaml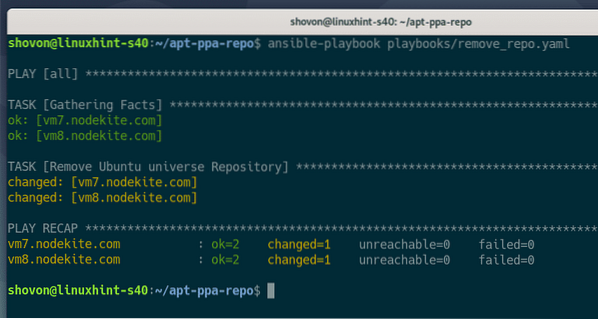
Next, run the following command to verify whether the package repository you want to remove has actually been removed.
$ grep --color -R 'http://archive.ubuntu.com' /etc/apt/sources.list/etc/apt/sources.list.d/*.list
As you can see, the Ubuntu 20.04 LTS official universe package repository I added earlier has been removed.

NOTE: Ignore the error message. This message just means that the /etc/apt/sources.list.d/ directory is empty. If you wish to remove the error message, just add a 2>/dev/null at the end of the command, as follows. The error should be gone after entiring this command.
$ grep --color -R 'http://archive.ubuntu.com' /etc/apt/sources.list/etc/apt/sources.list.d/*.list 2>/dev/null

Adding PPAs
In this section, I will show you how to add a PPA on your Ubuntu hosts using Ansible.
I will add the osomon/nodejs-10.19-focal Node.js 10.19 PPA for Ubuntu 20.04 LTS in my example.
First, create a new playbook add_ppa.yaml, as follows:
$ nano playbooks/add_ppa.yaml
Add the following lines in your add_ppa.yaml playbook:
- hosts: alluser: ansible
become: True
tasks:
- name: Add Node.js 10.19 PPA
apt_repository:
repo: ppa:osomon/nodejs-10.19-focal
state: present
update_cache: True
validate_certs: False
Once you are done, save the add_ppa.yaml playbook by pressing
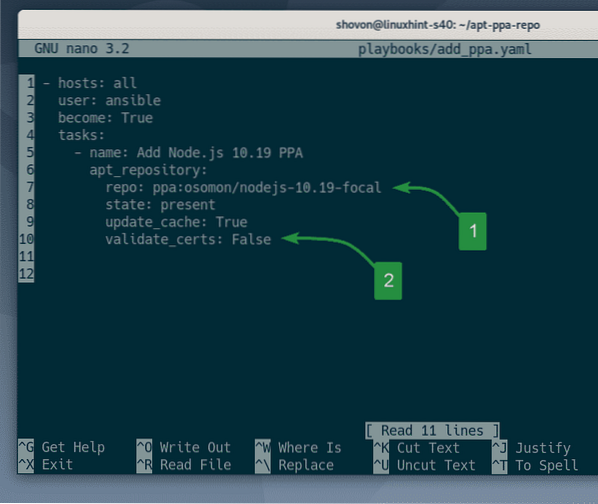
Here, the repo option of the apt_repository module is used to add the PPA osomon/nodejs-10.19-focal (1).
Be sure to add ppa: before the PPA name, i.e. ppa:osomon/nodejs-10.19-focal.

Most of the PPAs use self-signed certificates, so Ansible cannot verify them for you, and they may error out when you run the playbook.
You can set validate_certs to False to skip certificate validation for the PPA you are adding (2). This is what I have done in the example in this article.
NOTE: You can also set validate_certs to False to skip certification validation when adding third-party package repositories.

Run the add_ppa.yaml playbook, as follows:
$ ansible-playbook playbooks/add_ppa.yaml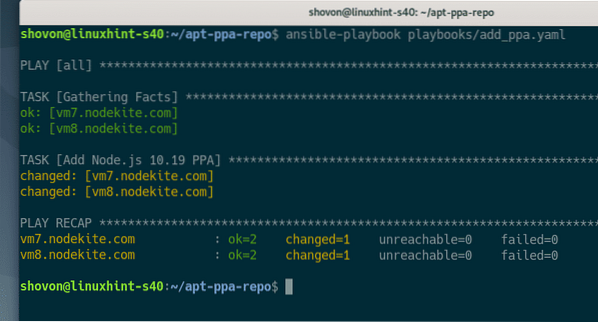
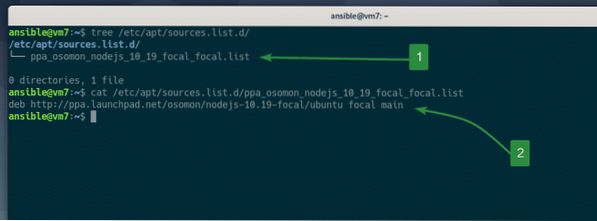
As you can see, a new .list file for the PPA osomon/nodejs-10.19-focal has been created in the /etc/apt/sources.list.d/ directory (1).
By looking at the contents of the ppa_osomon_nodejs_10_19_focal_focal.list file, I can confirm that the PPA has been added (2).
$ tree /etc/apt/sources.list.d/$ cat /etc/apt/sources.list.d/ppa_osomon_nodejs_10_19_focal_xenial.list
Removing PPAs
You can remove PPAs in the same way that we removed package repositories in the earlier section of this article.
Just copy the app_ppa.yaml playbook to remove_ppa.yaml, as follows:
$ cp -v playbooks/add_repo.yaml playbooks/remove_repo.yaml
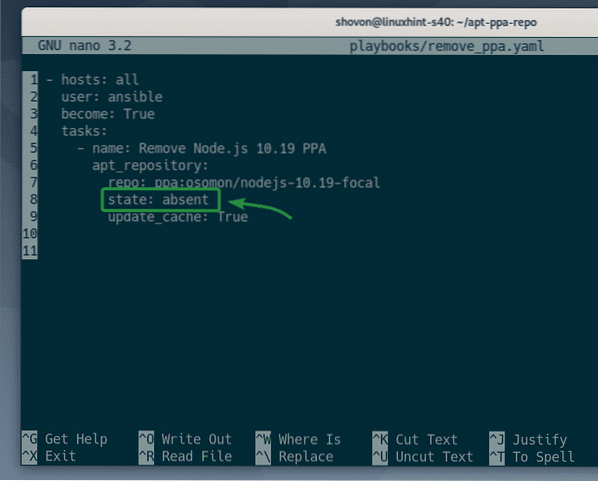
Now, open the remove_ppa.yaml playbook, as follows:
$ nano playbooks/remove_ppa.yaml
Next, change the line state: present to state: absent, as marked in the screenshot below.
Once you are done, save the remove_ppa.yaml playbook by pressing
Run the remove_ppa.yaml playbook, as follows:
$ ansible-playbook playbooks/add_ppa.yaml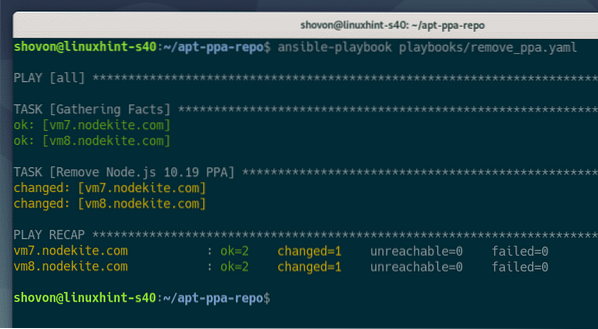
As you can see, the ppa_osomon_nodejs_10_19_focal_focal.list file for the osomon/nodejs-10.19-focal PPA is no longer available in the /etc/apt/sources.list.d/ directory. So, the PPA osomon/nodejs-10.19-focal has been removed.
$ tree /etc/apt/sources.list.d/
Changing PPA Codename
Sometimes, the PPA you are trying to add on your Ubuntu host does not support the version of Ubuntu you are running. In that case, you will have to specify the Ubuntu version codename manually while adding the PPA.
Suppose you are running Ubuntu 20.04 with codename focal and you are trying to add the PPA xyz, but the PPA xyz only supports Ubuntu 16.04 LTS codename xenial. If you try to add the PPA xyz, you will get an error, as the PPA does not have any package for Ubuntu 20.04 codename focal. But, if you specify the Ubuntu 16.04 LTS codename xenial while adding the PPA, you will not receive any error. You may be able to install your desired package from the PPA in this way, even if it does not support the explicit version of Ubuntu you are currently running.
Let's see an example.
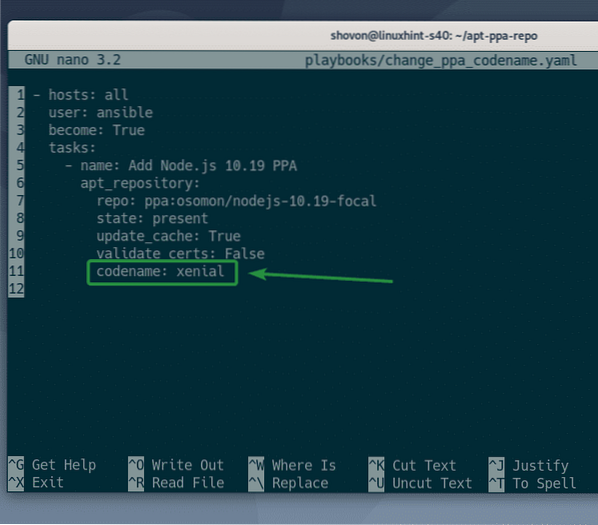
First, copy the add_ppa.yaml playbook file to change_ppa_codename.yaml, as follows:
$ cp -v playbooks/add_ppa.yaml playbooks/change_ppa_codename.yaml
Next, open the change_ppa_codename.yaml file, as follows:
$ nano playbooks/change_ppa_codename.yaml
Here, all you have to do is add the codename option with your desired Ubuntu codename (i.e. codename: xenial), as marked in the screenshot below.
Once you are done, save the change_ppa_codename.yaml file by pressing
Run the change_ppa_codename.yaml playbook, as follows:
$ ansible-playbook playbooks/change_ppa_codename.yamlNOTE: I am getting an error because the PPA I have added here only supports Ubuntu 20.04 LTS. You can just ignore this message.

As you can see, the PPA has been added and the Ubuntu codename xenial is in the APT package repository line.

Conclusion
This article showed you how to manage (add/remove) Ubuntu package repositories and PPAs using Ansible.
The Ansible apt_repository module is used to manage Ubuntu package repositories and PPAs. This article explained all the important options of the apt_repository module of Ansible.
For more information, check the apt_repository official Ansible documentation page.


