The Btrfs filesystem can be resized online (when the filesystem is mounted), but if you want to resize a partition that is added to a Btrfs filesystem, you will have to do it offline (when the filesystem is not mounted). You can grow/expand or shrink a Btrfs filesystem online and grow/expand or shrink a Btrfs partition offline.
The Btrfs filesystem is a multi-device filesystem. If you have multiple devices added to your Btrfs filesystem, then you need to resize specific storage devices attached to the filesystem to resize the filesystem itself. Otherwise, you can directly resize the filesystem (as by default, the only attached storage device will be selected when you perform the resize operation).
In this article, I am going to show you how to grow/expand and shrink a Btrfs filesystem online and a Btrfs partition offline. I will also show how to resize a Btrfs filesystem that has multiple devices attached to it. So, let's get started.
Prerequisites
To try out the examples of this article:
- You must have the Btrfs filesystem installed on your computer.
- You need to have a hard disk or SSD with at least 2 free partitions (of any size).
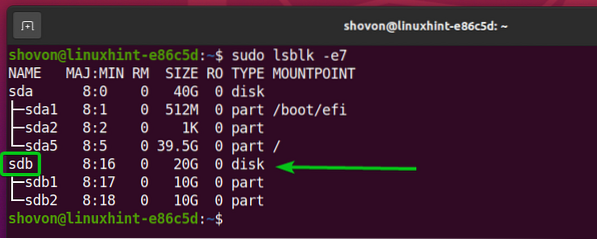
I have a 20 GB hard disk sdb on my Ubuntu machine. I have created 2 partitions, sdb1 and sdb2, on this hard disk. The partitions sdb1 and sdb2 are 10 GB in size.
$ sudo lsblk -e7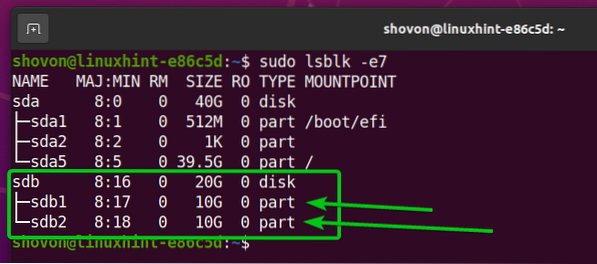
Your hard disk or SSD may have a different name than mine, so will the partitions. So, make sure to replace them with yours from now on.
If you need any assistance installing the Btrfs filesystem on Ubuntu, check my article Install and Use Btrfs on Ubuntu 20.04 LTS.
If you need any assistance installing the Btrfs filesystem on Fedora, check my article Install and Use Btrfs on Fedora 33.
Creating a Btrfs Filesystem
To experiment with resizing a Btrfs filesystem, we need to create a Btrfs filesystem. So, let's create a Btrfs filesystem data on the partition sdb1.
To create a Btrfs filesystem with the label data on the sdb1 partition, run the following command:
$ sudo mkfs.btrfs -L data /dev/sdb1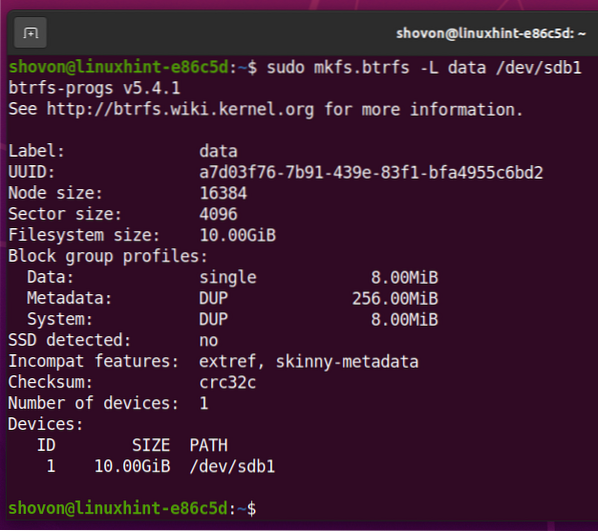
Create a directory /data with the following command:
$ sudo mkdir -v /data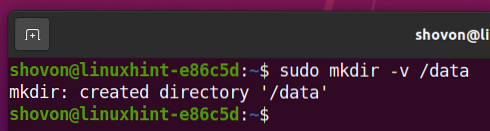
Mount the Btrfs partition sdb1 (that you have created earlier) on the /data directory with the following command:

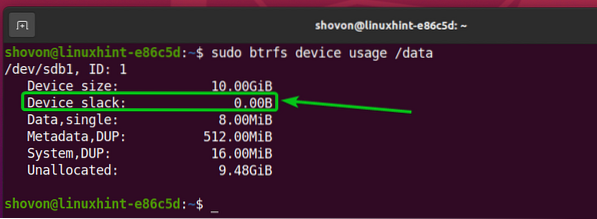
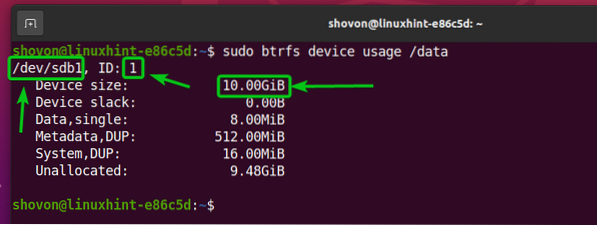
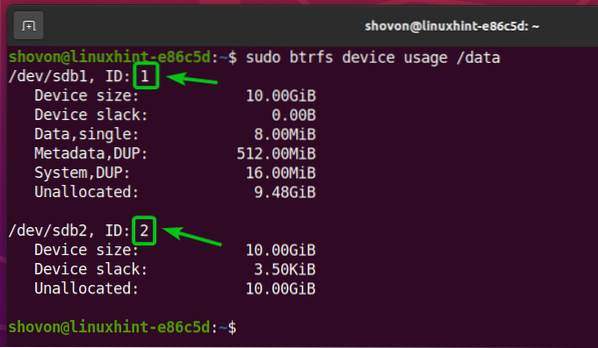
As you can see, the Btrfs filesystem data mounted on the /data directory has only one storage device (sdb1) added to it, and the ID of the storage device is 1.

The size of the filesystem is 10 GB (Device size). Out of 10 GB of disk space, 9.48 GB is not used (Unallocated), 8 MB is allocated for storing data (Data, single), 512 MB is allocated for the filesystem metadata (Metadata, DUP), and 16 MB is allocated for system data (System, Dup).
The entire disk space of the partition sdb1 is on the Btrfs filesystem pool (can be used). So, 0 byte is outside of the filesystem pool ( Device slack).
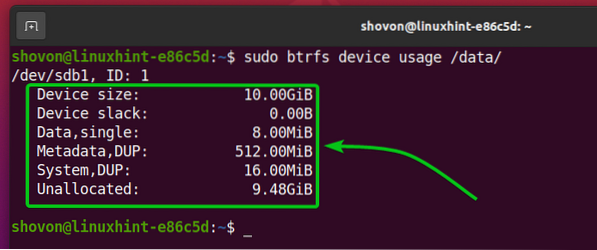
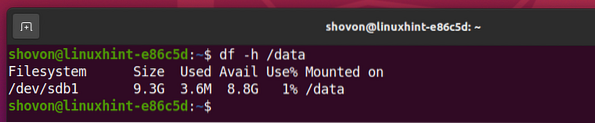
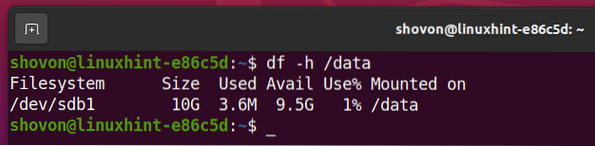
The Btrfs filesystem mounted on the /data directory is 10 GB in size.

Resize a Btrfs Filesystem
You can resize the Btrfs filesystem data that you have created earlier and mounted it on the /data directory online (when it's mounted).
For example, to shrink the Btrfs filesystem mounted on the /data directory, let's say, by 1 GB, run the following command:
$ sudo btrfs filesystem resize -1G /data
As shown in the illustration, the Btrfs filesystem removed 1 GB of disk space from the filesystem pool. You can use the slack space (Device slack) to grow/expand the Btrfs filesystem later.
$ sudo btrfs device usage /data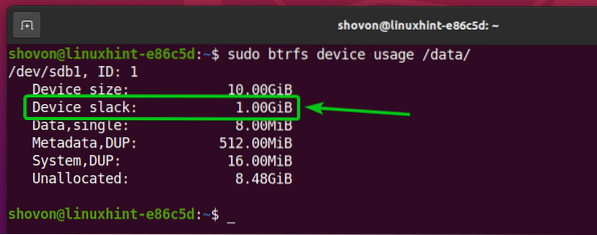
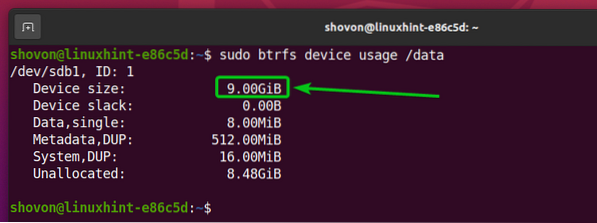
Based on the image below, you can see that the Brtfs filesystem mounted on the /data directory is 9 GB in size. It was previously 10 GB.
To grow/expand the Btrfs filesystem mounted on the /data directory, let's say, by 256 MB, run the following command:

You can see from the picture below that 256 MB of disk space is removed from the Device slack and added to the Btrfs filesystem pool.
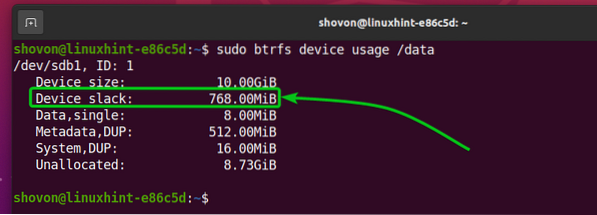
As you can see, the Btrfs filesystem mounted on the /data directory is now 256 MB larger than before.
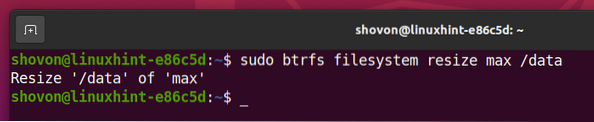
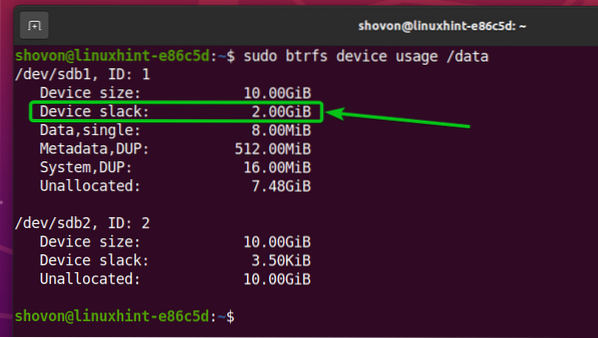
To grow/expand the Btrfs filesystem mounted on the /data directory to the maximum available disk space (in Device slack), run the following command:

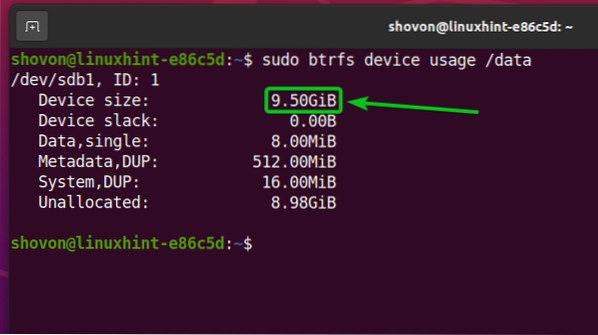
The illustration below shows that all the available disk space from the Device slack is added to the Btrfs filesystem pool. So, the Device slack is now 0 byte in size.
The Btrfs filesystem mounted on the /data directory is now 10 GB in size.

Resize a Btrfs Partition
You can resize a partition that is added to a Btrfs filesystem offline (when the Btrfs filesystem is not mounted).
WARNING: Be careful when you resize a partition that is added to a Btrfs filesystem as you may lose important data from the partition. Always take a backup before resizing.
As you can see, the Btrfs filesystem we have created in this article has one disk partition (sdb1) added to it. The partition is 10 GB in size.
$ sudo btrfs device usage /data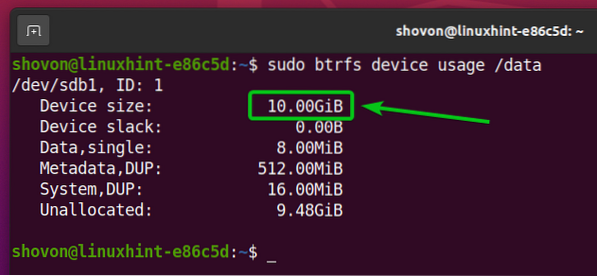
As shown in the image below,the size of the partition sdb1 is 10 GB.
Before you resize the partition, unmount the Btrfs filesystem from the /data directory with the following command:

The name of the disk that contains the partition sdb1 is sdb.
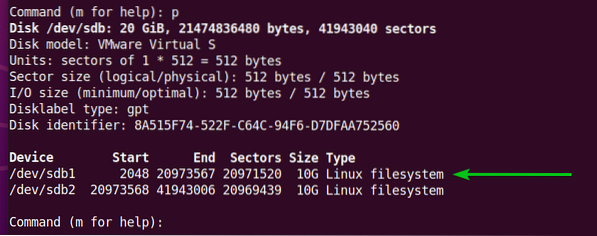
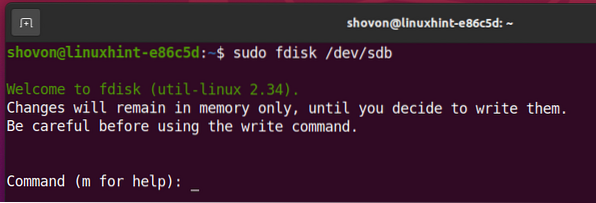
Open the disk sdb with a disk partitioning program like fdisk as follows:

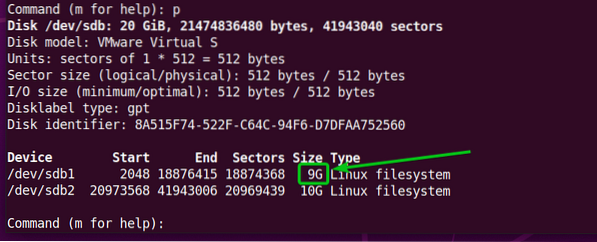
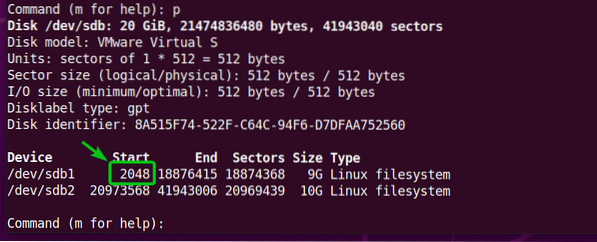
Type in p and press <Enter> to list all the existing partitions of the storage device sdb.
As you can see below, I have two partitions, sdb1 and sdb2, in the disk sdb. Let's resize the first partition (sdb1).
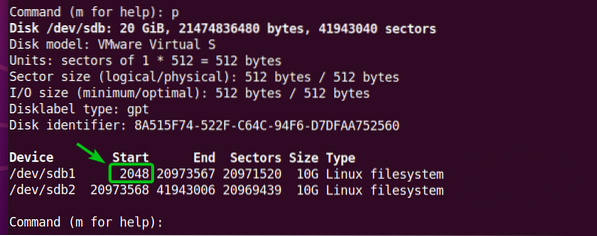
To resize a partition, you have to remove the partition, then add it again. So, you have to remember the start sector number of the partition.
For example, the start sector number of the first partition, sdb1, is 2048, as you can see in the screenshot below.
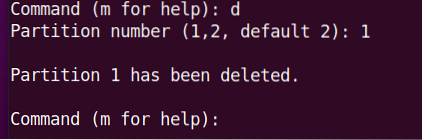
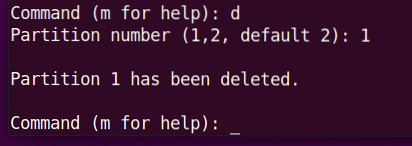
To remove a partition, type in d and press <Enter>.

To remove the first partition (sdb1), type in 1, and press <Enter>. The partition sdb1 should be removed.
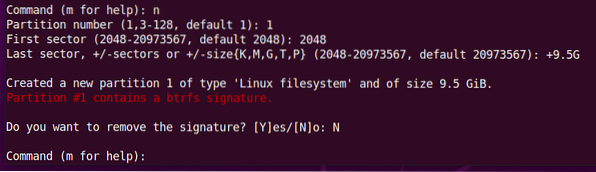
To recreate the same partition, type in n and press <Enter>.

Type in 1 as the partition number and press <Enter>.

Type in 2048 as the first sector number and press <Enter>.

I want to demonstrate the process of shrinking the partition. So, I am going to create a smaller partition than before.
Type in +9G (to create a 9 GB partition) and press <Enter>.
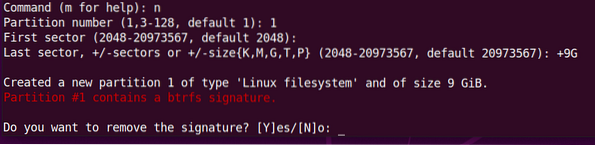
We would want to keep the partition signature, so type in N and press <Enter>.
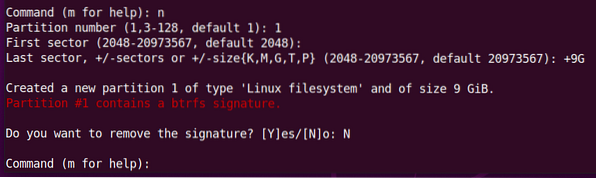
The partition should be created.
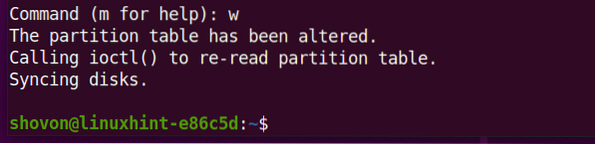
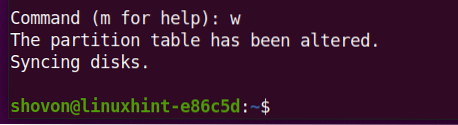
To save the changes, type in w and press <Enter>.
Now, mount the Btrfs filesystem on the /data directory as follows:

Resize the Btrfs filesystem that is mounted on the /data directory for the changes to take effect.

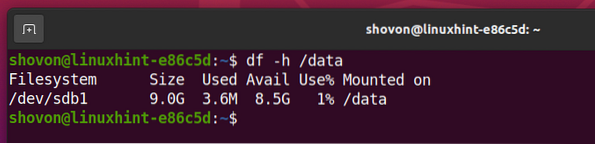
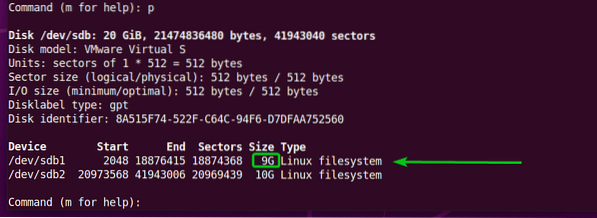
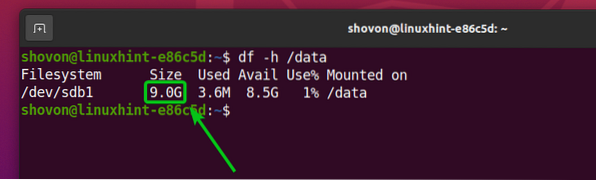
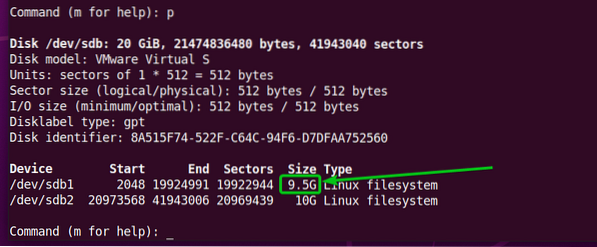
You can see from the image below that the size of the sdb1 partition that is added to the Btrfs filesystem is reduced to 9 GB (from 10 GB).
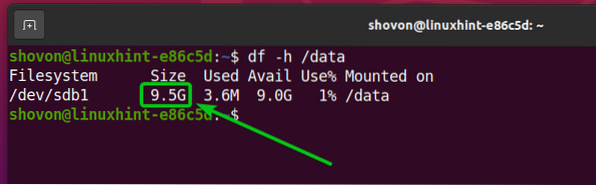
You can confirm the partition size change with the df command as well.
We can grow/expand a partition that is added to the Btrfs filesystem the same way. Let's see how to do that.
Unmount the Btrfs filesystem that is mounted on the /data directory as follows:
$ sudo umount /data
Open the disk sdb with a disk partitioning program like fdisk as follows:
Now, the first partition sdb1 is 9 GB in size.
The start sector number of the first partition, sdb1, is 2048.
To remove the first partition, type in d and press <Enter>.

Type in 1 as the partition number and press <Enter>. The first partition sdb1 should be removed.
To recreate the first partition sdb1, type in n and press <Enter>.

Type in 1 as the partition number and press <Enter>.

Type in 2048 as the first sector number and press <Enter>.

I will increase the partition size by 500 MB. So, the new partition size should be 9.5 GB.
Type in +9.5G and press

As we would want to keep the filesystem signature, let's type in N and press <Enter>.
The first partition, sdb1, should be recreated, and its size increased.
To save the changes, type in w and press <Enter>.
Mount the Btrfs partition sdb1 to the /data directory as follows:

Resize the Btrfs filesystem that is mounted on the /data directory for the changes to take effect.
As you can see, the partition (sdb1) size has increased to 9.5 GB (from 9 GB).
You can confirm the partition size with the df command as well.
Resize a Multi-device Btrfs Filesystem
Btrfs is a multi-device filesystem. It means you can add multiple storage devices or partitions to a single Btrfs filesystem. In this section, I am going to show you how to resize a Btrfs filesystem that has multiple storage devices or partitions added to it. So, let's get started.
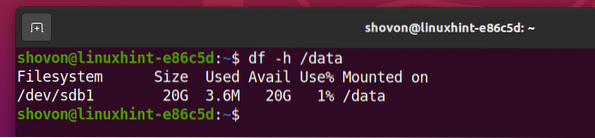
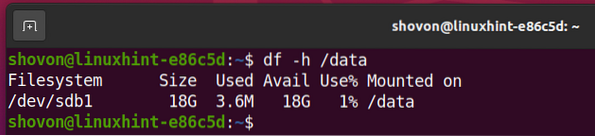
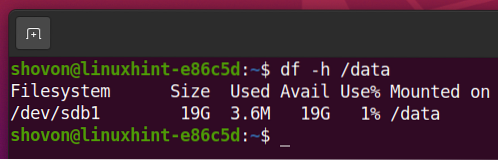
Right now, the Btrfs filesystem that is mounted on the /data directory is 10 GB in size.
$ df -h /data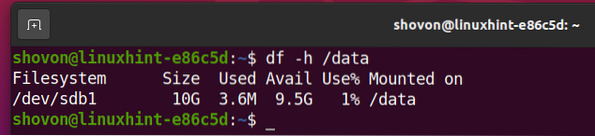
The partition sdb1 (which has the ID 1) is the only partition added to the Btrfs filesystem.
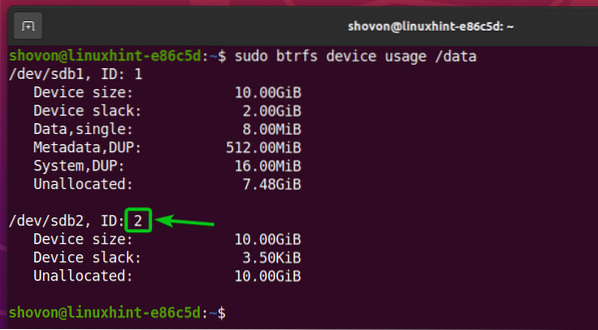
You can add another partition (let's say, sdb2) to the Btrfs filesystem, which is mounted on the /data directory with the following command:

The newly added partition, sdb2, of the Btrfs filesystem, which is mounted on the /data directory has the ID 2, as you can see in the screenshot below.
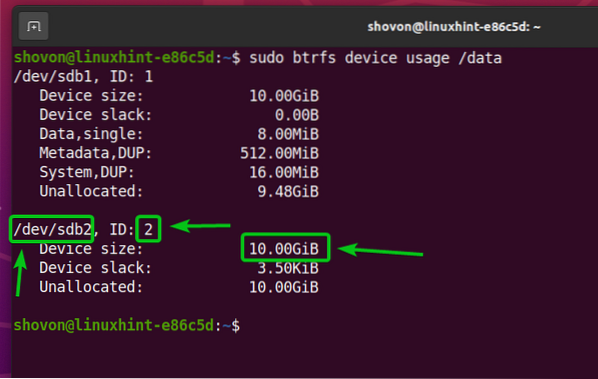
As you can see, the size of the Btrfs filesystem, which is mounted on the /data partition, has increased. The disk space of the sdb2 partition is added to the Btrfs filesystem.
To resize a Btrfs filesystem that has multiple storage devices added to it, you have to specify which partition of the Btrfs filesystem you want to resize. To specify the partition to resize in a Btrfs filesystem, you have to use the partition ID.
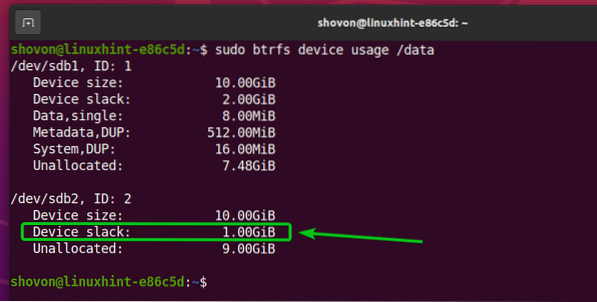
For example, to shrink the partition with the ID 1 by 2 GB of the Btrfs filesystem mounted on the /data directory, you can run the following command:

The 2 GB of disk space is removed from the partition sdb1 of the Btrfs filesystem mounted on the /data directory.
As you can see in the illustration, the Btrfs filesystem is resized (shrank) to 18 GB from 20 GB.
In the same way, you can shrink the Btrfs filesystem partition sdb2 using the partition ID 2.
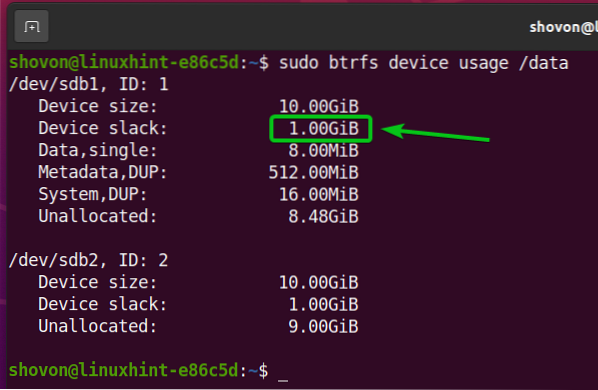
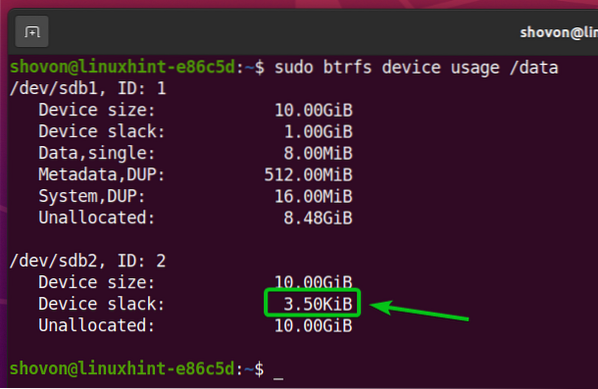
To shrink the partition with the ID 2 by 1 GB of the Btrfs filesystem mounted on the /data directory, you can run the following command:

You can see that 1 GB of disk space is removed from the partition sdb2 of the Btrfs filesystem mounted on the /data directory.
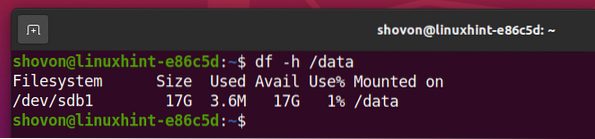
The Btrfs filesystem is resized (shrank) to 17 GB from 18 GB, as shown in the image below.
To expand the partition with the ID 1 by 1 GB of the Btrfs filesystem mounted on the /data directory, you can run the following command:

As you can see, 1 GB of disk space from the partition sdb1 is added to the Btrfs filesystem pool.
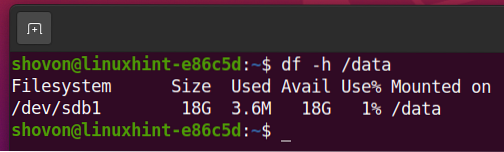
Now, the Btrfs filesystem is resized (expanded) to 18 GB from 17 GB.
To expand the partition with the ID 2 by 1 GB of the Btrfs filesystem mounted on the /data directory, you can run the following command:

You can see that 1 GB of disk space from the partition sdb2 is added to the Btrfs filesystem pool.
The Btrfs filesystem is now resized (expanded) to 19 GB from 18 GB.
Conclusion
In this article, I have shown you how to resize a Btrfs filesystem and the partitions added to a Btrfs filesystem. As well as how you can shrink or grow/expand a Btrfs filesystem and the partitions added to a Btrfs filesystem.