With that said, let's try and setup our own KVM hypervisor on a Debian 9 server .
Enabling VT-x or AMD-V Extensions
Ideally, you will need a clean installation of your favorite Linux distribution on a machine (not a VM) that has a fairly modern CPU. Most modern Intel CPUs support VT-x extensions and, similarly, AMD has its AMD-V extensions. These extensions are “enhancements” built right into the silicon of your CPU which enables faster and more secure virtualization. You have to enable these extensions from inside your motherboard's BIOS/UEFI menu. Refer to your motherboard manual for more information.
If you don't want to sully your perfectly working Linux workstation, you can use a Virtual Machine in the cloud to run these experiments. DigitalOcean, for example, offers virtual machines which has nested virtualization enabled. This allows you to run VMs inside of your cloud hosted VM (this is known as nested virtualization). Obviously, this will be a very inefficient way to practically run a hypervisor but as an experiment it will do just fine. Make sure to get at least 4GB of memory and more than 2 CPUs.
Once you have enabled the said extensions, you can verify that by running lscpu and looking for the Virtualization entry:
$ lscpu… .
Virtualization: VT-x
… .
Now that we have the extensions enabled time to move up further in the stack.
Installing KVM and QEMU
KVM (or Kernel-Based Virtual Machine) consists of a few Linux kernel modules that will take advantage of the CPU extensions we enabled earlier. QEMU on the other hand consists of a bunch of userland programs that provides us with emulation capabilities. As a standalone software QEMU can be used to run programs from one architecture, like ARM, on another like x86_64 and vice versa. It can be used to run anything from a single binary file to a complete operating system.
We will, of course, use it only to virtualize x86_64 operating systems on x86_64 platform. And for that we need just a single package:
$ sudo apt install qemu-kvmYou can verify that package has loaded all the required modules, by running:
$ lsmod | grep kvmkvm_intel 200704 0
kvm 598016 1 kvm_intel
irqbypass 16384 1 kvm
That's all you need, theoretically. But you will soon realize that that's practical. Virtual machines are enormously complex and we require software wrapper to manage all the various demands like networking, filesystem management, etc in a fairly automated (and scalable way). To do this we need Libvirt virtualization library/daemon.
Installing Libvirt
Libvirt is a quintessential part of your virtualization stack. The libvirtd daemon runs virtualization related services in the background. Services that listens to requests like “Create a VM”, “Destroy a VM”, “Create a Network”, etc and executes them in them using the basic Linux utilities like qemu binaries, iptables, etc.
Libvirt is very generalized and it can be used to manage KVM guests, LXC containers and Xen virtualization stack. We will just focus on Libvirt for KVM guests for now. Libvirtd exposes an API that can be consumed by GUI applications like virt-manager or oVirt or command line tools like virt-install, virsh, etc. We can write even our own custom clients that uses the same standard API. We will be using the command line tools, like virsh and virt-install, so as to keep things standardized.
Let's install all these tools:
$ apt install libvirt-clients libvirt-daemon-system virtinstWe will also need another package libguestfs-tools, to help us edit or modify guest VM's hard disks and filesystems.
Great! Now we have installed the entire stack and know how the architecture is laid out. To use libvirt (and related tools) add your user to libvirt-qemu and libvirt groups.
$ sudo usermod -aG libvirt$ sudo usermod -aG libvirt-qemu
Or run the commands as root user.
Virsh and Starting the Default Network
The virsh command line utility is something you will use a lot, when managing your VMs. You can simply type in virsh and drop into the virsh command line interface, or type virsh
The first virsh command we will use will invoke the default network to which a VM may connect:
$ virsh net-autostart default$ virsh net-start default
This will start the default network and will make sure that it is started automatically when the host reboots. To check the details about this default network use the command:
$ virsh net-dumpxml defaultThe xml file can show you the range of possible IP addresses and the how they will communicate with the outside world. Basically, the traffic will come to them via a NAT and they won't be a part of your host's external network. You can use Bridge Networking to expose each VM to the host machine's LAN.
To start a Virtual Machine
To start a virtual machine we need an installation media (like the installation ISO for any operating system) and how many CPUs and how much memory needs to be allocated to the VM, and if it needs VNC. This step is where you can really appreciate a GUI installer like virt-manager, however, we will do it using a rather complex virt-install command.
I like to keep all of my boot media at /var/lib/libvirt/boot and all the VMs and their virtual hard disk at /var/lib/libvirt/images (the default location) this simplifies the organization.
$ cd /var/lib/libvirt/boot$ wget http://releases.ubuntu.com/18.04.2/ubuntu-18.04.2-desktop-amd64.iso
The command above fetches Ubuntu desktop ISO, you can just as easily get CentOS or any other distribution that you desire.
To create a new VM and to boot it run:
$ virt-install --virt-type kvm \--name myVM \
--memory 2048 --vcpus=2 \
--cdrom /var/lib/libvirt/boot/ubuntu-18.04.2-desktop-amd64.iso \
--disk size=40 \
--graphics vnc,listen=0.0.0.0,port=5900 \
--noautoconsole
The above command is, indeed, complicated. I suggest saving these commands in text files and running those as executable scripts whenever you create a new VM. Most of the parameters like virt-type and virt-name are pretty self-explanatory. They are just tedious to write down.
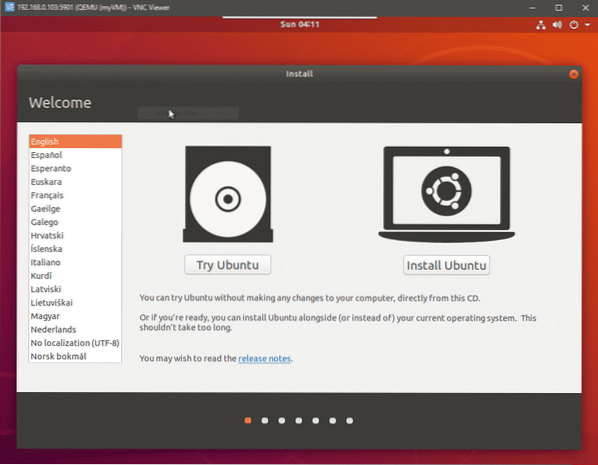
The last option for VNC display will start a VNC server and would allow you to have console access to your VM remotely, by connecting to the host's port 5900. Open a VNC client on your desktop and go to your KVM host's IP at the port 5900. Make sure you reach the host's IP and not the VM's IP. Your VNC will connect to the video output of your VM and you can proceed with the installation.
Where to Next?
From here on you can try pausing, stopping and deleting the VMs. You can also modify the underlying infrastructure by adding pools for storage and configuring bridge networks. All the configuration files, for individual VMs, network interfaces and storage pools are stored at /etc/libvirt/ and /etc/libvirt/qemu.
Sometimes you will have to physically delete the hard disk files saved at /lib/libvirt/images even after removing the VM from libvirt. To automate things further, try to import qcow2 images that most linux distributions like Ubuntu and CentOS. These have the OS preinstalled in them.
Conclusion
Setting this up is nowhere as easy as setting up VirtualBox and the reason behind this is manifold. Most of the stack are complicated because it are designed to be modular and highly scalable. It doesn't make any assumptions as to where you are running the VM. The environment can be a personal desktop or a data center. Working with a GUI can help reduce this complexity to some extent. However, these systems are designed to work with a REST API to connect to your organization's billing systems, monitoring systems, etc. They are almost never touched by a human after being deployed.
That said, automation is the name of the game with libvirt and qemu-kvm. Peruse through the official documentation and write you own cool script to spin up a fleet of VMs and let us know if you found this tutorial useful.


