To build a low cost NAS server with Raspberry Pi 3, all you need is:
- A USB hard drive dock and a SATA 2.5” or 3.5” hard drive. You can also use a USB thumb drive for storage. It's up to you.
- A Raspberry Pi 3 Model B or Raspberry Pi 3 Model B+.
- A microSD card with Raspbian OS flashed. I have a dedicated article on installing Raspbian on Raspberry Pi. You can check it out at LinuxHint.com.
- An Ethernet cable.
- An Android Phone charger for powering up Raspberry Pi 3.
Connecting to Raspberry Pi Remotely:
Now, connect all the required components such as USB thumb drive or USB self-powered hard drive (using a USB hard drive dock), microSD card with Raspbian OS image flashed, Ethernet cable, and micro USB power cable. Finally, power on your Raspberry Pi. Now, connect to your Raspberry Pi via SSH or VNC depending on your preference.
NOTE: Use the username pi and the password that you set while configuring Raspbian for the first time. If you've configured Raspberry Pi headless, then the default password is raspberry.
To connect to your Raspberry Pi via SSH, use GitBash or PuTTY. Both of them are free to download and use. To connect to your Raspberry Pi via VNC, use VNC Viewer from RealVNC. It is free to download and use. Once you're connected, you are ready to move on to the next section.
Installing Samba on Raspberry Pi:
In this article, I will use Samba on Raspberry Pi for file sharing. It allows file sharing using Windows SMB or CIFS protocol. Windows has native support for Samba shares. Samba is available in the official package repository of Raspberry Pi. So, it is very easy to use. First, open up a Terminal and update the APT package repository cache with the following command:
$ sudo apt update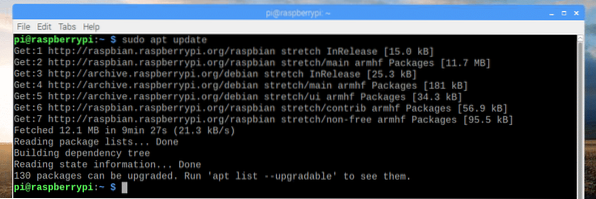
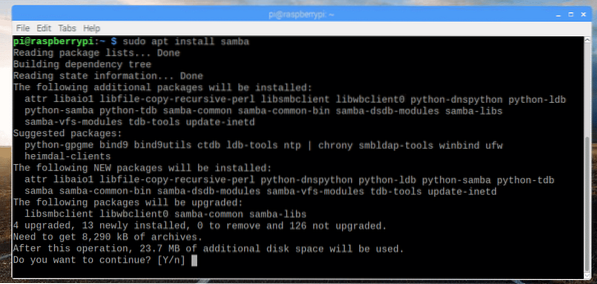
Now, install Samba with the following command:
$ sudo apt install samba
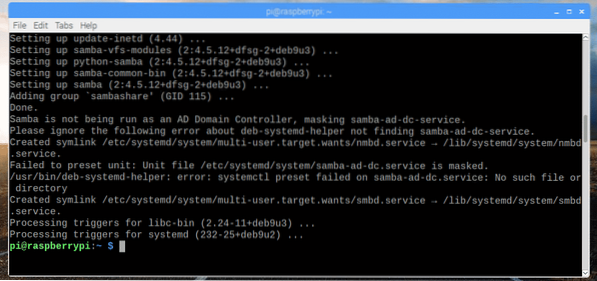
Now, press y and then press
Samba should be installed.
Mounting Storage Devices:
Now that Samba is installed, it's time to mount the USB thumb drive or USB hard drive on your Raspberry Pi. First, connect your USB thumb drive or USB hard drive on Raspberry Pi.
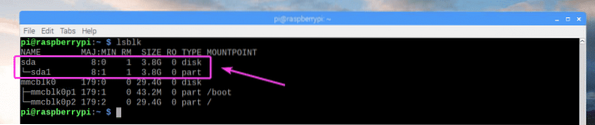
Usually, it will be available in /dev/sda1.
If you're unsure, you can find out what it is for you with the following command:
$ lsblkAs you can see, the block device is sda and the partition is sda1 in my case. So, the partition can be accessed as /dev/sda1.
Now, create a directory (let's call it Media) where you want to mount the USB thumb drive or hard drive with the following command:
$ sudo mkdir /mnt/Media
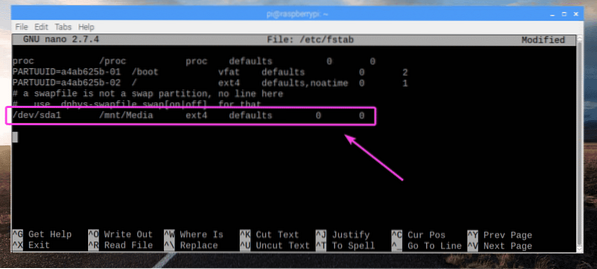
Now, edit /etc/fstab file with the following command:
$ sudo nano /etc/fstab
Now add the line as marked in the screenshot below at the end of the /etc/fstab file. Once you're done, save the file with
NOTE: Here, ext4 is the filesystem format of the USB thumb drive or hard drive you want to mount. It may be different for you. Make sure you put the right filesystem type here.
Now, mount the partition /dev/sda1 to /mnt/Media mount point with the following command:
$ sudo mount /mnt/Media
Your USB thumb drive or hard drive should be mounted in the /mnt/Media mount point as you can see in the screenshot below.
$ df -h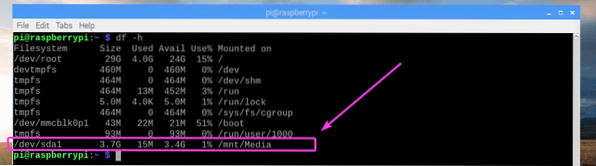
Now, change the owner of the /mnt/Media mount point to pi with the following command:
$ sudo chown -Rf pi:pi /mnt/Media
Configuring Samba Share:
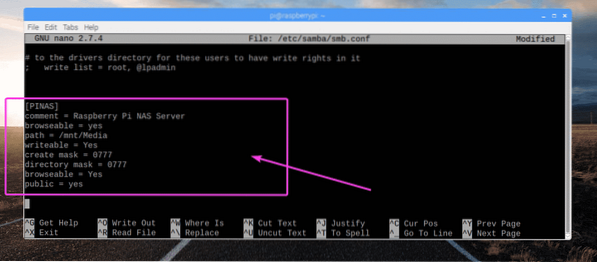
Now, edit the Samba configuration file /etc/samba/smb.conf with the following command:
$ sudo nano /etc/sambab/smb.conf
The /etc/samba/smb.conf configuration file should be opened. Now, at the end of the configuration file, type in the lines as marked in the screenshot below. Once, you're done, save the file.
Now, run the following command to make your existing pi user a Samba user and set a password for the Samba user:
$ sudo smbpasswd -a pi
Now, type in a Samba password and press

Retype the same password and press

A Samba user pi should be added.

Finally, restart your Raspberry Pi with the following command:
$ sudo rebootConnecting to the Raspberry Pi NAS Server:
Now that you've successfully configure the Raspberry Pi NAS server, you can connect to it from your Windows computer and any other devices that has support for SMB/CIFS protocol. First, check the IP address of your NAS server. It is the same as the IP address of your Raspberry Pi. If you remember it, skip to the next instruction.
$ ip a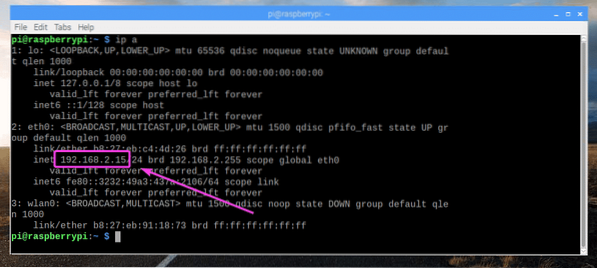
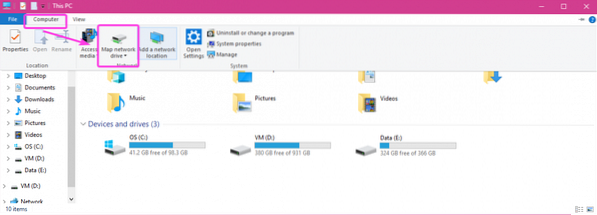
Now, from your Windows computer, click on Computer tab and then click on Map network drive as marked in the screenshot below.
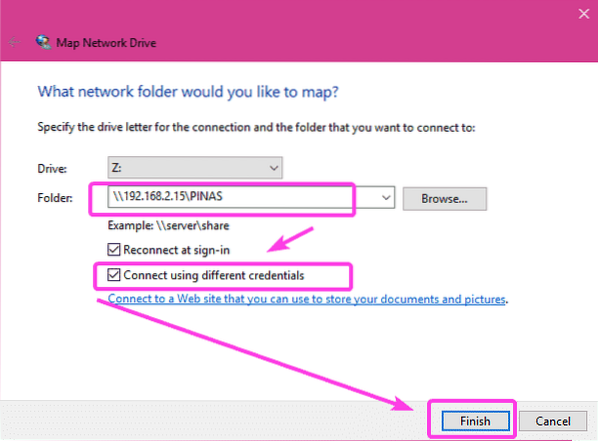
Now, type in the NAS Folder address, make sure Connect using different credentials is checked. Then, click on Finish.
Now, type in the username pi and the Samba password that you set a little while ago for the user pi. Then, click on OK.

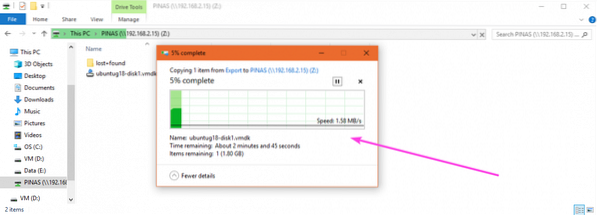
Your NAS storage should be mounted as you can see in the screenshot below.

As you can see, I can copy files to the NAS.
So, that's how you create a cheap NAS server with Raspberry Pi. Thanks for reading this article.


