Why bother?
Hashicorp, the company behind Vagrant maintains a repository of many Vagrant Boxes which are preconfigured virtual machine images off of which you can generate any number of VMs locally. It solves two problems:
- Because everyone starts off with the same image, developers can get rid of It-works-on-my-machine excuse, where a certain app would work perfectly on one machine, but not another. Everyone develops on different machines but runs on the exact same configuration of virtual machine.
- You don't have to do repeated installation of Virtual Machines if you decide to get rid of old ones. Vagrant takes care of the entire installation and setup of your VM. Everything from allocating storage and memory to creating users setting up permissions.
In many ways, it is similar to Docker images and it solves similar problems, with the key difference being that it uses VMs instead of containers making it, decidedly, heavier and slower alternative. However, Virtual Machines come with their own advantages like better networking stack and more flexibility in terms choice of file system, etc allowing Vagrant to fill up a particular niche of the portable VMs.
So let's get started!
Pre-requisites
First and foremost requirement is the installation of VirtualBox after which you should install Vagrant. If you have VirtualBox already installed just get the latter. Installation process may differ widely depending on what OS your host is running, so I urge you to consult the official docs for that:
- Get VirtualBox here
- Get Vagrant here
Additionally, if you are using Windows you would need an SSH client, you may want to install Git Bash which works perfectly well on Windows with the default installation options.
1. Vagrant Boxes
Vagrant Box is the term for Virtual Machines that are managed by Vagrant. You can get Vagrant boxes which contain just the operating system like Ubuntu, CentOS, etc. Or they might contain preconfigured LAMP stack, MEAN stack or other software installation that might make your process of development and testing easier.
For example, if you are writing a WordPress theme, you can get a Vagrant box with core WordPress already running on it. You can share your project folder where you have the contents of your theme with this VM. Check if the new theme is working as you expected. Once you are done with the theme, just destory the box leaving only the project files which you now know would work fine in the real-world.
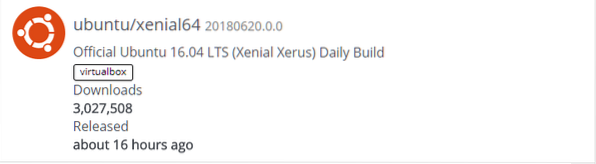
You can explore these boxes here. We are going to start with a plain Ubuntu 16.04 LTS box. You can see it listed as ubuntu/xenial64, if you visit the link above.
Open up your terminal and make a folder for your Vagrant experiments.
$ mkdir vagrant_box$ cd vagrant_box
In this folder, we can initialize our Vagrant environment by running:
$ vagrant init
This places a Vagrantfile inside the folder which is essentially a Ruby script describing the configuration of your Vagrant Box. You don't need to know Ruby to use this file, the syntax is pretty simple. We will cover the essentials as we go along.
Now you can run vagrant up command and because you are running it for the first time, it will have to download the Virtual Machine image from app.vagrantup.com. It might take a long while depending on your internet connection, but once it is downloaded, subsequent vagrant up commands for similar vagrant init ubuntu/xenial64 won't take that long because the image is now locally saved on your computer. Make sure you are in the same directory (vagrant_box) where Vagrantfile was placed earlier.
$ vagrant upAfter this finishes, you can ssh into the box as the user vagrant with root privileges. Just run the following:
$ vagrant sshCongrats! You just logged into your first Vagrant Box. Now that we have it started, let's learn a few basic vagrant commands before we delve into the Vagrantfile. Just type exit and hit
Common Vagrant command
If you wish to stop the running box, run the command:
$ vagrant haltTo restart you can use vagrant up
If you want, you can also use
$ vagrant suspend$ vagrant resume
These will suspend the VM and bring it back up safely. If you make changes in the Vagrantfile and want the changes to show up, use the command:
$ vagrant reloadRemember to run all the command from the same directory where your Vagrantfile is located. You can create more vagrant boxes if you create new directories elsewhere and run vagrant init in them. You will manage them from their respective folders. They can be based upon the same ubuntu/xenial image we got earlier, or you can bring in more image.
To list all the vagrant boxes and their status (running, or stopped), use the command:
$ vagrant global-statusTo remove a vagrant box and all its private contents, from the box's directory (where its respective Vagrantfile is located) run:
$ vagrant destroyThe base image that you downloaded earlier will still exist if you wish to create new boxes later on. If you wish to see all the images that are locally saved, run:
$ vagrant box listTo delete the box image itself, run:
$ vagrant box removeAfter this you will have to download the box again, should the need for it arise.
Inspecting the Vagrantfile
At first glance it may seem that there's a lot of options inside a Vagrantfile. While, that may very well be true, it is interesting to note how much you can accomplish with only a little bit of tweaking.
1. The shared folder
Most vagrant boxes come with shared folders preconfigured. For example, if you inspect the Vagrantfile we created the very first time we ran vagrant init you will notice the entry, which is a commented out line,
# config.vm.synced_folder "… /data", "/vagrant”The synced folder can be accessed by both the vagrant box and the host machine. The first argument after config.vm.synced_folder indicates the path to the folder on the host and the second argument indicates the path where that folder will be mounted on the guest vagrant box. By default, the folder where you created the Vagrantfile is also shared with the vagrant box.
Let's verify this, by ssh-ing into our vagrant box.
$ vagrant sshIn here, list the filesystems.
$ df -h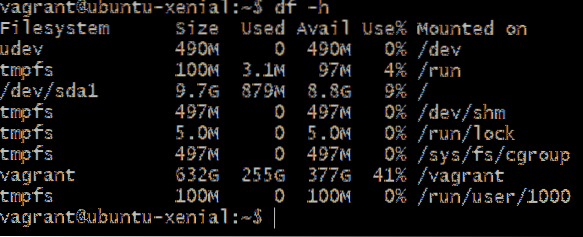
You can see that there is a large file system vagrant mounted on /vagrant path. The reason it is so large, is because the Vagrantfile folder on my host machine is on a partition which is 632GB large and folder over there can grow to that size as well. Since it is the same folder that is being shared with the box, it provides an insane amount of storage.
You can inspect the contents of /vagrant and they are the same that you see on your host, namely one Vagrantfile and another log file.

You can add more shared folder where the comment explaining the shared folder syntax appears.
Like so,

In this case, a folder named SharedFolder is getting added, which is one directory above, hence the double dot before it. This folder is mounted on /var/www/html on inside the box. This is where most web servers like apache and nginx look for the web contents that they want to serve.
You can simply have your project files, your html, css and js in SharedFolder where you work on it on your host machine using graphical text editors like Atom and VSCode . The vagrant box will act as the production grade server which would serve these files up.
Now the question is, how do we see these html files being served as a web page. What host name to enter in the browser?
2. Networking
By default, vagrant provides some helpful configurations. The request sent by your browser to localhost on port 8080 is forwarded to port 80 on your vagrant box. So if you have a web server running on your vagrant box which listens on port 80 (standard http port) then you can see that webpage by visiting http://localhost:8080
On the other hand, you might want to avoid all the localhost port forwarding in which case, you can open up the Vagrantfile and uncomment the following line:
config.vm.network "private_network", ip: "192.168.33.10"Save the changes you made and run vagrant reload to restart the box with new configuration. Now it has a dedicated private ip address 192.168.33.10 which only your host can access. So you can now open up the browser and enter http://192.168.33.10 and you can see the webpages being served on the standard port 80 of http.
Conclusion
As you can see, Vagrant can help you run your applications locally as they would run in production at the same time you can work with them using IDEs and text editors which you would not have on a typical server. Using shared folders and private networking greatly enhances this capability of Vagrant.
Let us know if you have more questions regarding this tutorial, or if there is any other topic that you want us to cover.


