Blender is a powerful 3D creation tool. Blender holds all the attributes that a 3D artist needs. Sometimes a short movie tells a lot than an image. Making 3D scenes in Blender is great, but animating it is another level of mastering this program. So, it is essential to know about adding motion to 3D objects.
Animation is an excellent way to connect and communicate with people; that's why it is vital in the business world. Conveying a message through animation is considerably more appealing than images. Whether it is education or businesses, the film industry, or gaming, animation is being used everywhere.
There are different types of animations:
- Hand-drawn animation
- 2D computer animation
- 3D animation
In hand-drawn animation, all frames are drawn by hands. A small scene of these animations needs thousands of frames drawn by hands. 2D computer animation all usually done on a computer; graphics are drawn in the computer and then animated. 3D animation adds a third dimension to the animation. These animations are expensive to create but look really amazing and realistic.
If you want to create impressive, great-looking 3D animations, then Blender is probably the best tool. It is free software, but don't get yourself fooled. Blender is a powerful program which can do everything that a paid software does.
This article is about making animations and looping them using the Blender tool.
First of all, let's see how to make simple animation in Blender and how to keyframe it:
You will see a default cube, camera, and light when you open Blender. We are going to animate the default cube to understand the concept of animation in Blender, but you can animate any object.
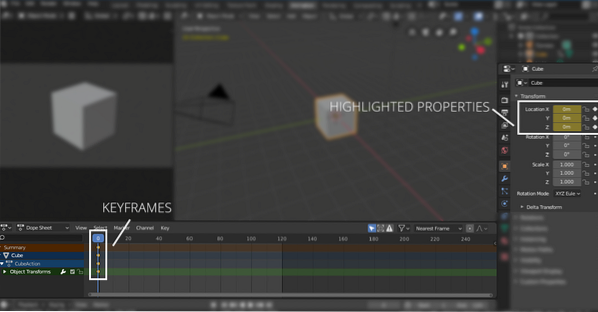
In Blender, various object properties can be keyframed, but the basic parameters are transform parameters that include position, rotation, and scale.
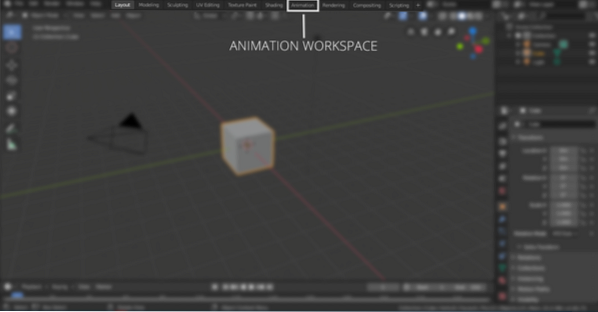
We will begin by animating the position. Enter the “Animation” workspace as shown in the following image:
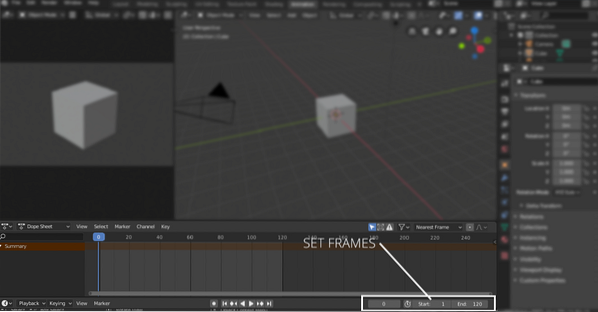
In the animation workspace, there will be a timeline. You can set the first and final frame of the animation. For instance, if the first frame of animation is “0” and the final is “120”, then the animation will be of 120 frames. If the default animation setting is 24 frames per second, then that means the animation will be 5 seconds long. See the following image to set the start and ending frame:
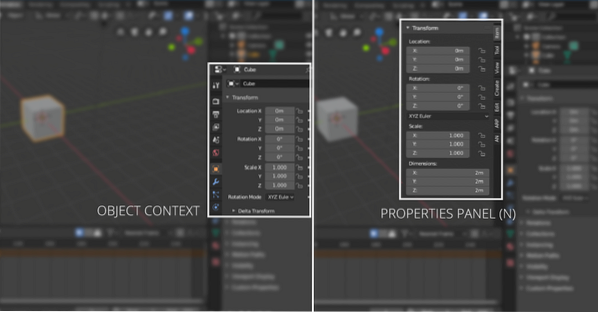
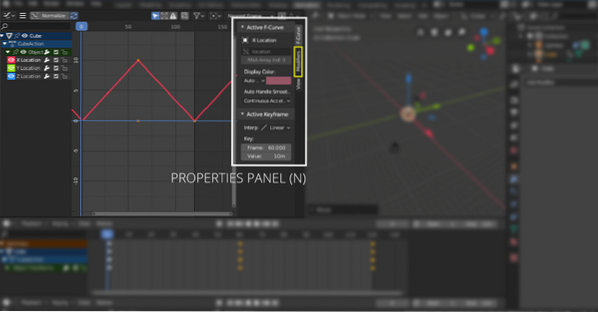
Select the cube to add keyframes. Keyframes can be added from the “Object Context” tab or press ”N” to reveal the properties panel as shown in the following image:
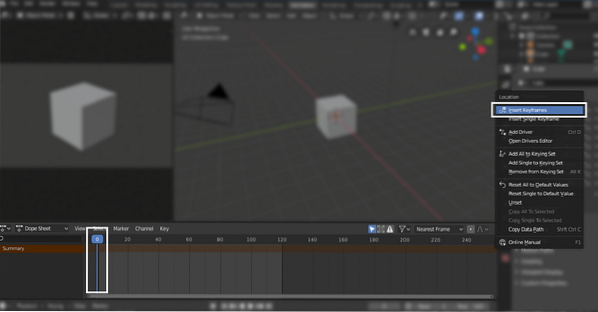
Keep the timeline slider to the frame “0”, right-click on any axis of the location property to add keyframe as shown in the following image:
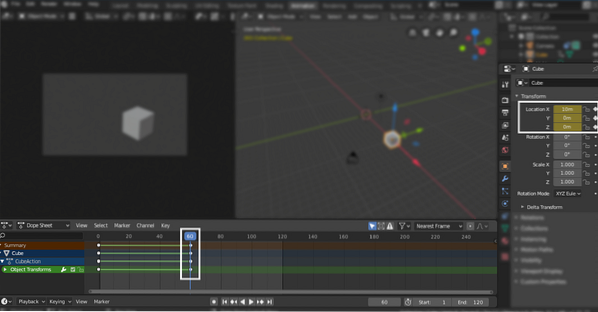
The keyframed property will be highlighted. Now move the timeline slider to the 60th frame and change the value of the x-axis to any number. In this example, it is 10m, as shown in the following image. Again right-click and select insert frames. The keyframes will be added in the 60th frame also.
Now, move the slider to the ending frame (120th) and put “0m” in the x-axis and right click and add keyframe as shown in the following image:
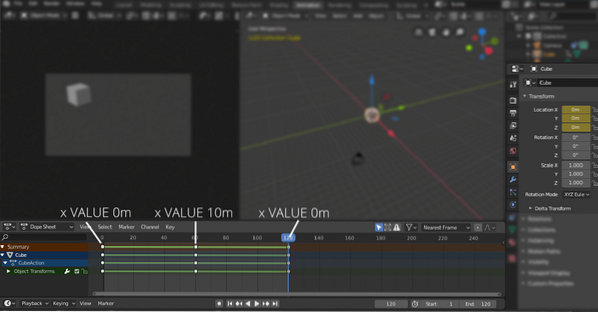
Now the cube will animate from “0m” to “10m” and the back to “0m”.
Similarly, rotation and scale parameters can also be animated.
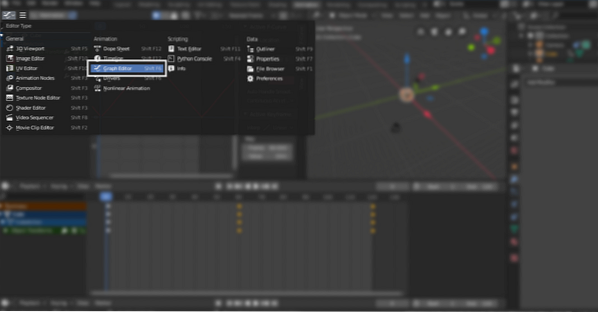
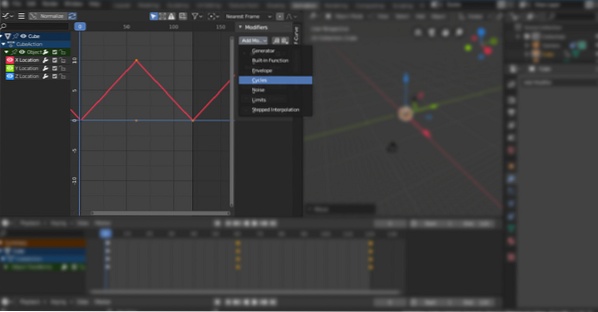
In order to constantly loop it, you can add “Cycles” modifiers. Open the graph editor firstly. See the following image:
Then select the location property to add the “Cycles” modifier. In the above example, we are using the x-axis property, select that and then go to the modifiers menu and choose “Cycles”. It will loop selected keyframes:
Hit the “N” key to open the properties panel. Select “Modifiers”, and then go to the drop-down menu, select “Cycles” as shown in the following image:
So, this is how you animate the objects. But what if you create a scene and want to move the camera around? The good thing is in Blender; you can animate the camera also. The camera can be animated using different methods. You can add paths and make the camera follow it or simply move it along any axis.
Conclusion
Many tools can be used for animation. But Blender is a robust and powerful 3D tool that can be used to create high definition animation and motion graphics. Creating animations is an uncomplicated process. You need to comprehend the basic concepts of keyframing. Many properties can be animated in Blender. It is all about how creative you can become with them.


