Downloading Bacula Enterprise:
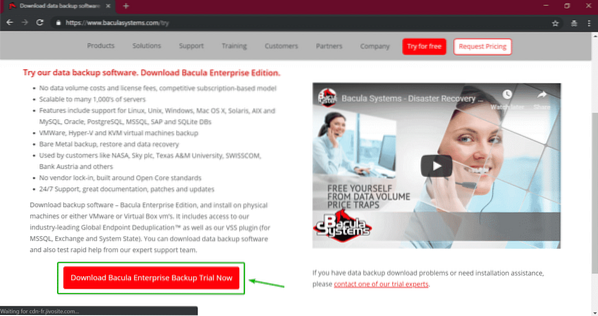
Bacula Enterprise ISO image can be downloaded from the official website of Bacula Systems. To download Bacula Enterprise ISO image, visit the official website of Bacula Systems at https://www.baculasystems.com/try and click on Download Bacula Enterprise Backup Trial Now.
Now, fill in the details and click on Download Trial.

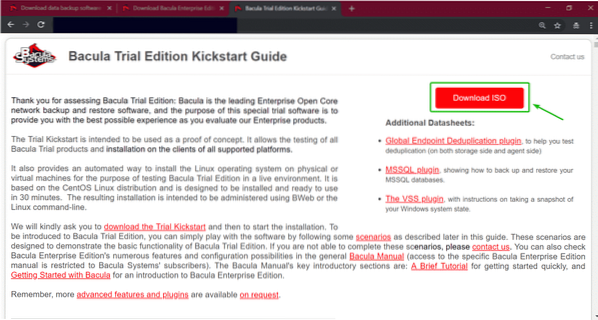
Now, Bacula Systems will mail you a link from where you can download Bacula Enterprise ISO installer image. Open your email and click on the download link. Then, click on the Download ISO button.
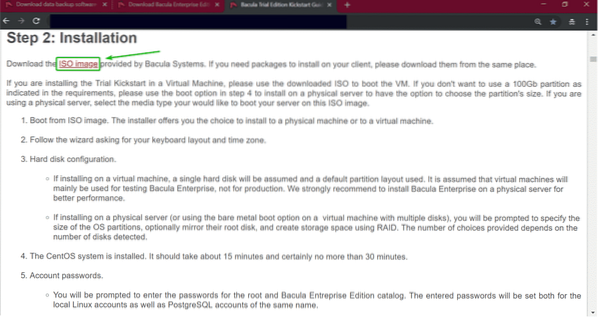
Now, click on the ISO image link as marked in the screenshot below.
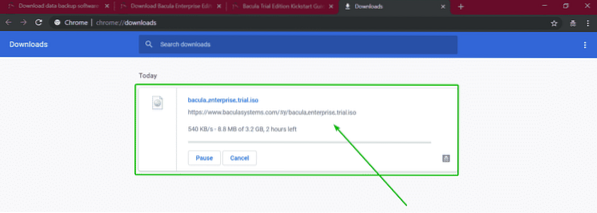
Your browser should start downloading the Bacula Enterprise ISO installer image.
Making a Bootable USB of Bacula Enterprise:
Once you have Bacula Enterprise ISO image downloaded, you can use Rufus to make a bootable USB of Bacula Enterprise. Once you have the Bacula Enterprise bootable USB installer, you can use it to install Bacula Enterprise on your computer/server.
You can download Rufus from the official website of Rufus at https://rufus.ie
If you want to install Bacula Enterprise as a VMware/VirtualBox virtual machine, then you can use the ISO image directly. You don't have to make a bootable USB thumb drive of Bacula Enterprise. Another option is to burn the ISO to disk.
Installing Bacula Enterprise:
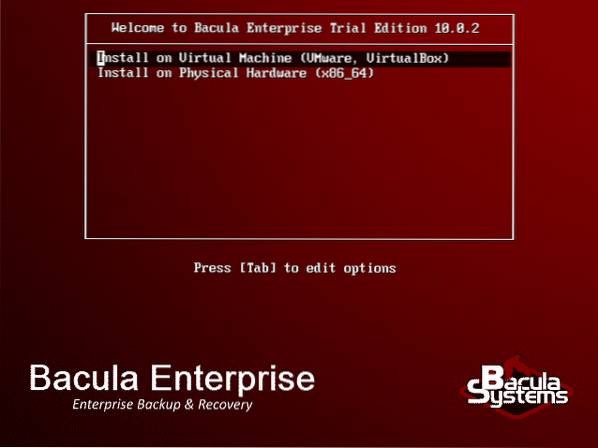
Once you boot Bacula Enterprise from the ISO installer image or the bootable USB thumb drive, you should see the following GRUB menu. Select Install on Virtual Machine if you've booted Bacula Enterprise installer in a virtual machine. Otherwise, select Install on Physical Hardware. Then, press
Bacula Enterprise is loading.

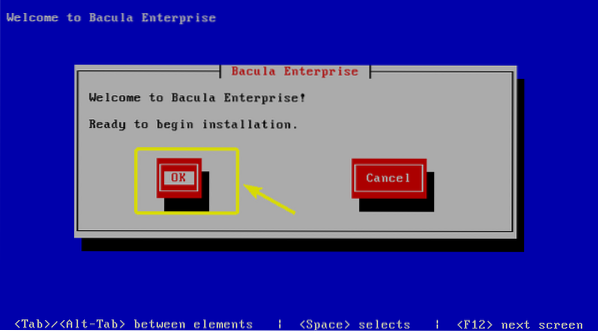
Now, select OK and press
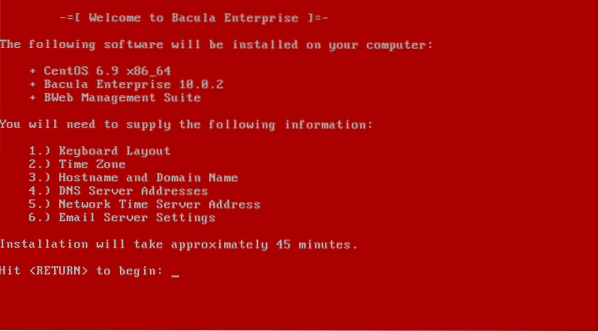
Press
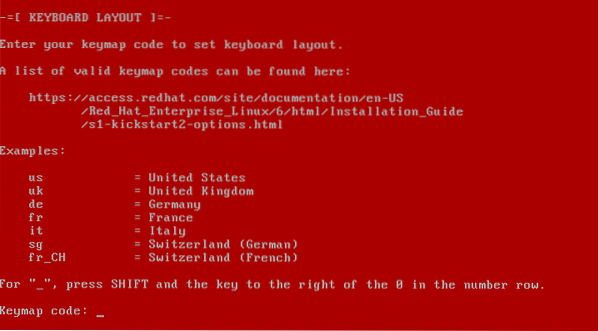
Now, you have to set your keyboard layout. Some keyboard layout keymap codes are given as examples. For example, keymap code us for United States keyboard layout, uk for United Kingdom etc.
NOTE: For more keymap code, visit https://access.redhat.com/documentation/en-us/red_hat_enterprise_linux/6/html/installation_guide/s1-kickstart2-options and scroll down to the keyboard section.
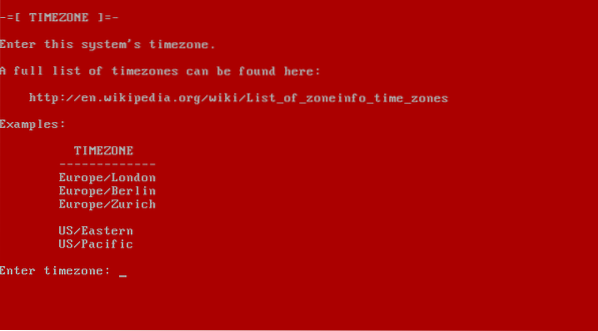
Now, type in the timezone keyword and press
You can find a list of supported timezone keywords at https://en.wikipedia.org/wiki/List_of_tz_database_time_zones
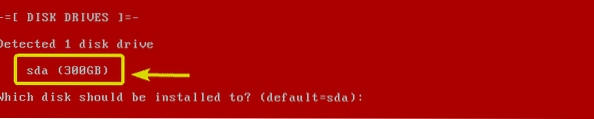
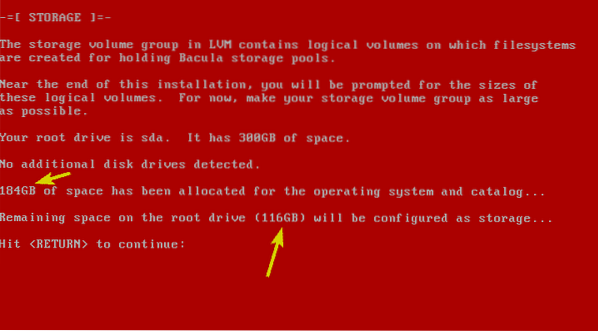
Now, all the available storage devices should be listed. I have only one storage device sda of size 300GB. Just type in the name of the storage device where you want to install Bacula Enterprise and press
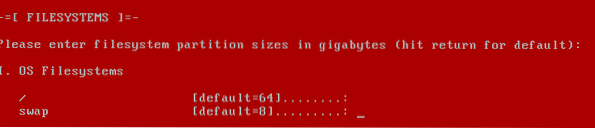
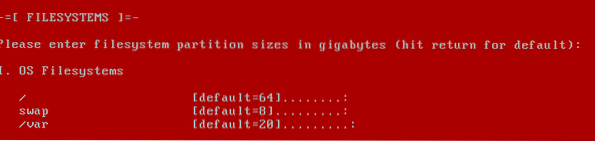
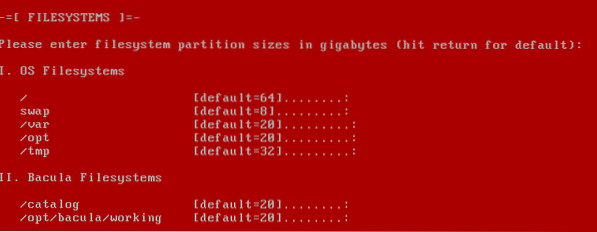
Now, type in the amount of disk space you want to allocate for the root (/) directory in GB and press

Now, type in your swap size in GB and press
Now, type in the amount of diskspace you want to allocate for the /var directory and press
Now, type in the amount of diskspace you want to allocate for the /opt directory and press

Now, type in the amount of diskspace you want to allocate for the /tmp directory and press

Now, type in the amount of diskspace you want to allocate for the /catalog directory and press

Now, type in the amount of diskspace you want to allocate for the /opt/bacula/working directory and press
As you can see, about 184 GB of disk space will be allocated for the OS and 116 GB of disk space is still left for data. Press
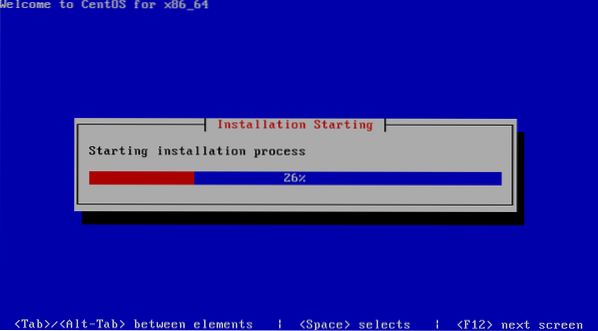
Bacula Enterprise installation should start.
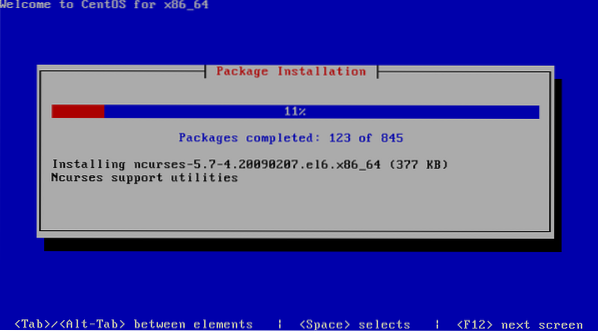
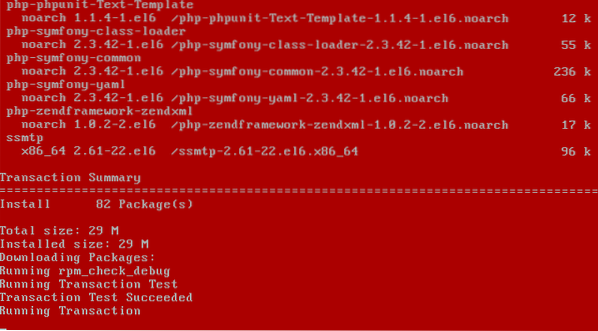
All the required packages are being installed.
Bacula Enterprise is being installed.
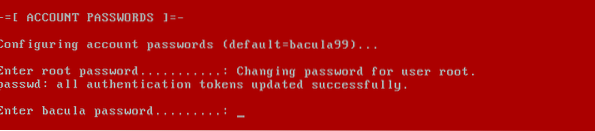
Now, type in a password for the root user and press

Now, type in a password for the bacula user and press
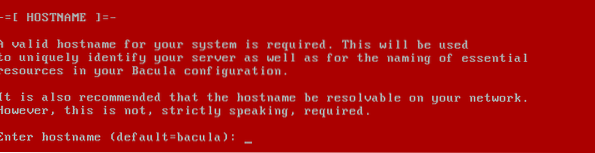
Now, type in the hostname for your Bacula Enterprise server and press
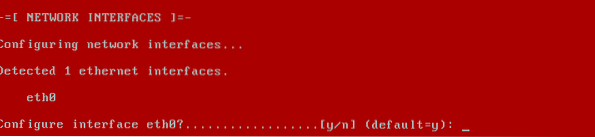
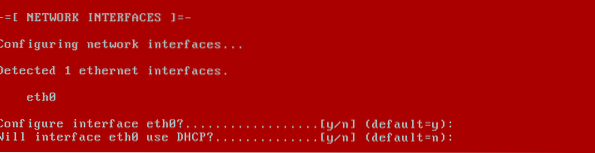
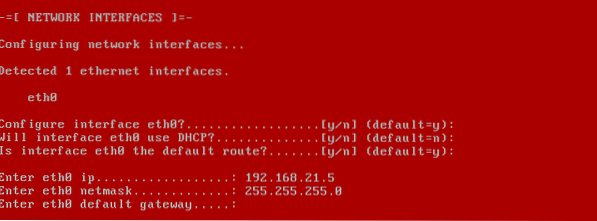
Now, you have to configure a network interface. To do that, press y and then press
If you want to use DHCP to configure the network interface, then press y and then press
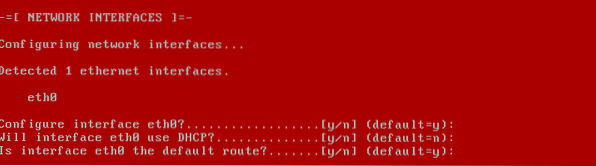
If this network interface is the default route, then press y and then press
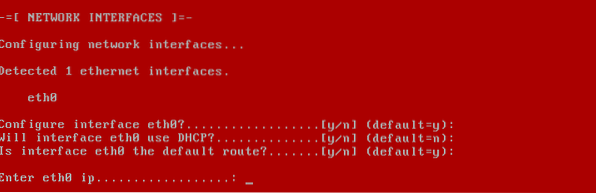
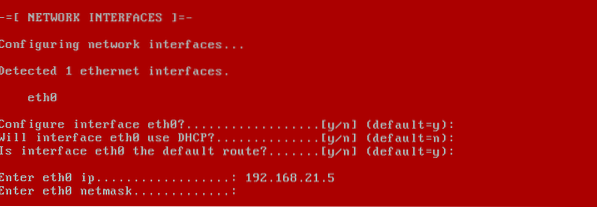
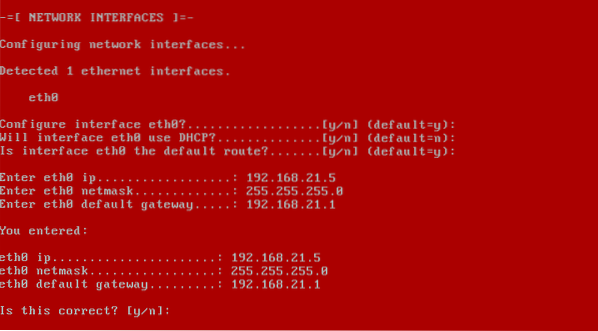
If you've decided to manually configure the network, then you have to type in an IP address for the network at this point and press
Then, type in the netmask and press
Now, type in the default gateway and press
Now, press y and then press
Now, type in a domain name for your Bacula Enterprise server and press

Now, type in the IP address of your primary DNS server and press

Now, type in the IP address of your secondary DNS server and press

Now, press y and then press

If you want to configure NTP, press y. Otherwise, press n. Then, press

If you want to configure email, press y. Otherwise, press n. Then, press

Now, type in the amount of disk space you want to allocate for the Bacula Enterprise file storage and press

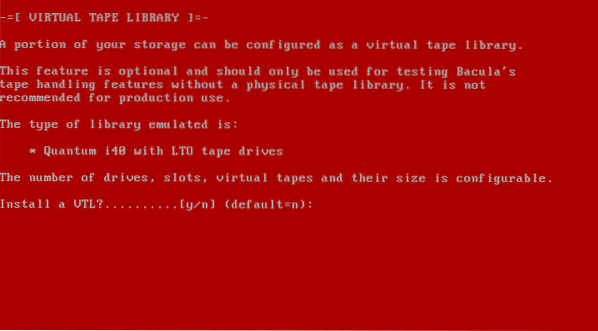
If you don't want to use Virtual Tape Library, then press n. Otherwise press y. Then press
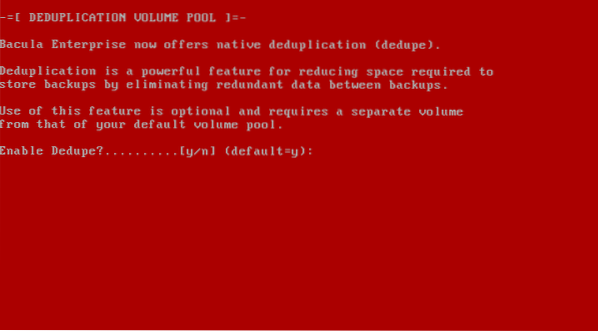
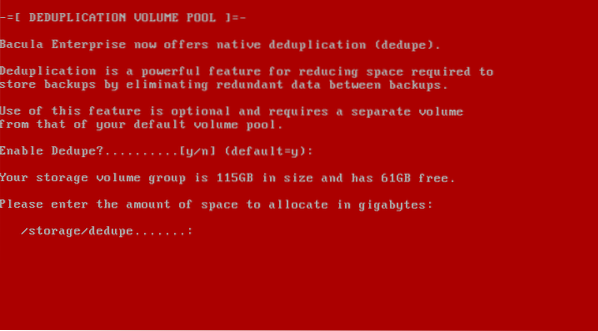
If you want to enable DeDuplication, then press y and then press
Now, type in the amount of disk space you want to allocate for dedupe storage and press
Now, type in the number of deduplication devices you want and press

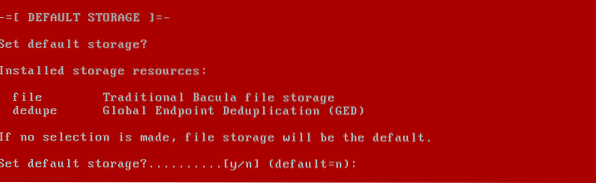
If you don't want to set any default storage, then press n. Otherwise, press y. Then press
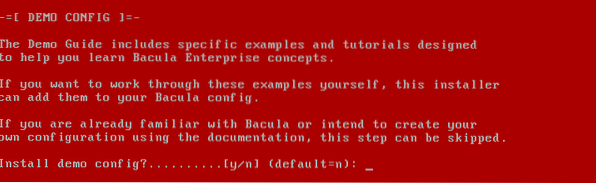
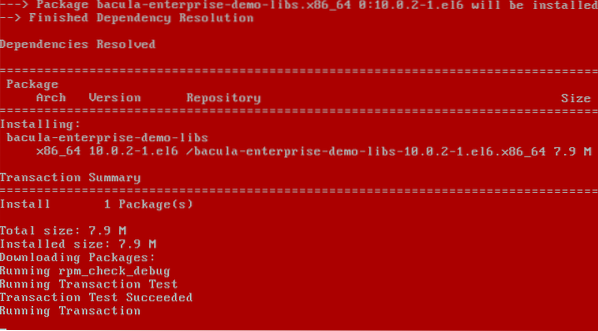
Normally, you don't want any demo configuration in a production server. So, press n and then press
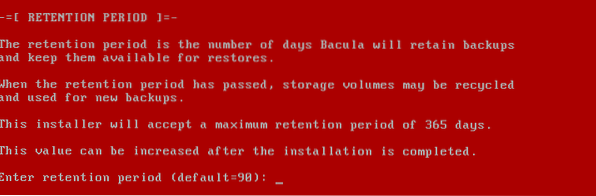
Now, type in the number of days Bacula Enterprise will keep backups (retention period) for restore. The default is 90 days. At most, you can keep backups for 365 days.
Now, Bacula Enterprise will install additional software packages depending on how you configured it.
Once Bacula Enterprise is installed, you should be booted into the following GRUB menu. Just press

You should be booted into Bacula Enterprise and you should be able to log into the system. Your management IP address is available here. You can access it from any web browser (Bacula prefers Firefox) to manage your Bacula Enterprise server.

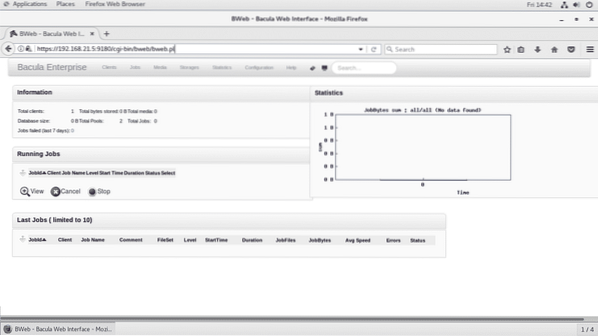
Now visit the management IP address (in my case https://192.168.21.5) from any web browser and you should see the BWeb dashboard. From here, you can configure Bacula Enterprise and backup your import data.
So, that's how you install Bacula Enterprise on your computer/server or a Virtual machine. Thanks for reading this article.


