WHAT WE WILL COVER
In this guide, we will see how to install Stringer RSS reader on a Fedora 33 workstation. Once installed, we can use it to update any website by adding them to our feeds. Let's get started with the installation process.
PREREQUISITES
Before we begin, ensure the following requirements:
- Fedora 33 OS installed on your system.
- An user account with administrative (sudo) access.
- Access to the internet for downloading various files.
INSTALLING REQUIRED PACKAGES
Step 1. We need to first install the below packages for configuring Stringer. Install those packages with the command:
# dnf install git libxml2-devel libxslt-devel curl-devel postgresql-devel sqlite-devel make automake gcc gcc-c++ postgresql-server readline-devel openssl openssl-devel nodejs
The above command will install the PostgreSQL database server, OpenSSL, NodeJS, and other dependent packages.
POSTGRESQL SETUP
Step 2. (a) Now initialize the Postgres database and start the PostgreSQL database server with the following commands:
# postgresql-setup initdb# systemctl start postgresql
(b) Use the below command to make the Postgres service automatically start at boot:
# systemctl enable postgresql(c) You can check the status of the service with the command:
# systemctl status postgresql
CREATING POSTGRES USER AND DATABASE
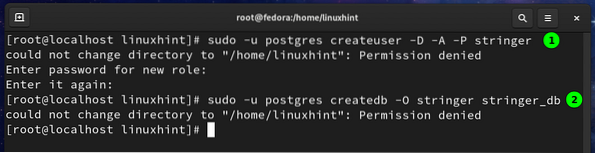
Step 3. Next, we will create a Postgresql user and a database for Stringer:
# sudo -u postgres createuser -D -A -P stringerYou will be asked to enter a password for the Stringer user when you run the above command.
The database can be created with the command:
# sudo -u postgres createdb -O stringer stringer_dbThe above user (stringer) will own this database (stringer_db).
CREATING USER FOR STRINGER
Step 4. (a) We will create a separate system used for installing Stringer. Creating a separate user is necessary for security purposes and managing various dependencies for installing Stringer. Run the below command for creating a user (Stringer) with home directory and bash shell:
# useradd stringer -m -s /bin/bash(b) Switch to the above user with the command:
# su -l stringer
INSTALLING RUBY
Step 5. (a) Install rbenv tool for managing multiple versions of Ruby. We will use rbenv with bundler to simplify the installation process. Run the below commands to grab rbenv from github:
$ git clone git://github.com/sstephenson/rbenv.git .rbenv(b) Now add rbenv to the PATH of stringer user and run rbenv init command as below:
$ echo 'export PATH="$HOME/.rbenv/bin:$PATH"' >> $HOME/.bash_profile$ echo 'eval "$(rbenv init -)"' >> $HOME/.bash_profile
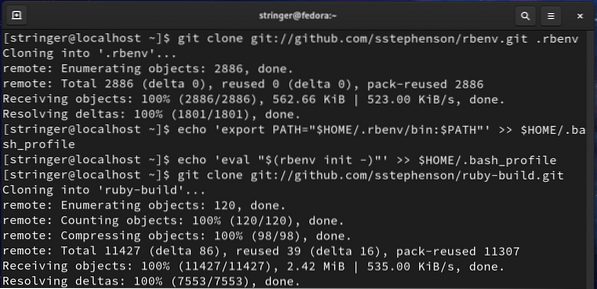
(c) To install Ruby, clone the repo 'ruby-build' to the directory '/.rbenv/plugins/' as shown below:
$ git clone git://github.com/sstephenson/ruby-build.git $HOME/.rbenv/plugins/ruby-build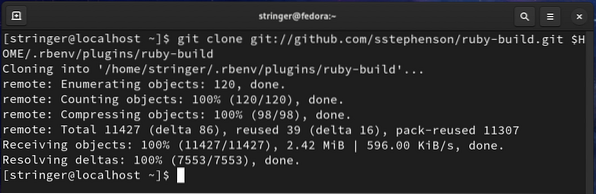
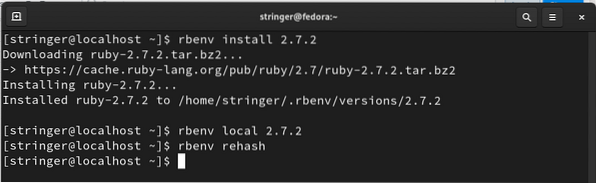
(d) Source the bash_profile with the command:
$ source ~/.bash_profile(e) Finally, install the Ruby with the command:
$ rbenv install 2.7.2$ rbenv local 2.7.2
$ rbenv rehash
INSTALLING BUNDLER
Step 6. Install bundler tool to handle various Stringer's dependencies:
$ gem install bundlerTo rehash the ruby environment, use the command:
$ rbenv rehash
In case you want to confirm the installed version of ruby, run:
$ ruby --versionINSTALLING FOREMAN
Step 7. To run the Stringer, install the Foreman tool with the command:
$ gem install foreman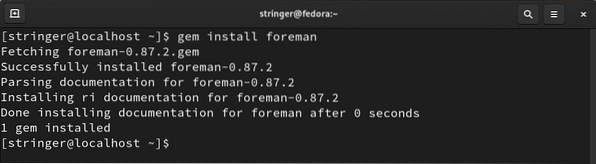
SETTING UP STRINGER
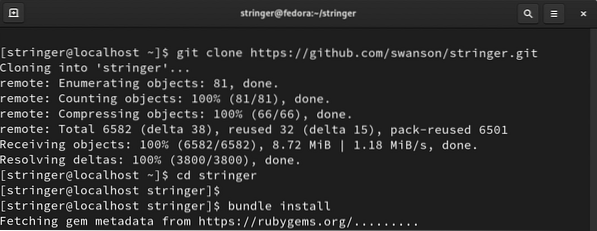
Step 8. (a) After completing the above steps, we can continue to get the Stringer from Git. Navigate to stringer's home directory:
$ cd$ git clone https://github.com/swanson/stringer.git
(b) Once the above command finishes, move to the below directory:
$ cd stringer(c) To install the dependencies for Stringer, use the bundler tool as shown below:
$ bundle install$ rbenv rehash
SETTING THE ENVIRONMENT VARIABLES
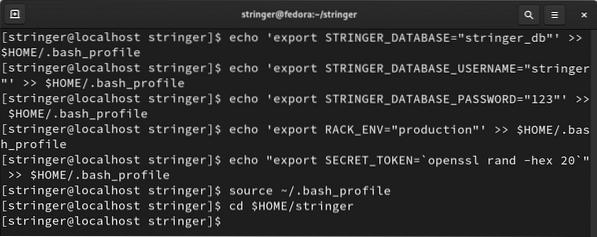
Step 9. (a) To set various environment variables for Postgres database, run the below commands:
$ echo 'export STRINGER_DATABASE="stringer_db"' >> $HOME/.bash_profile$ echo 'export STRINGER_DATABASE_USERNAME="stringer"' >> $HOME/.bash_profile
$ echo 'export STRINGER_DATABASE_PASSWORD="123"' >> $HOME/.bash_profile
$ echo 'export RACK_ENV="production"' >> $HOME/.bash_profile
$ echo "export SECRET_TOKEN='openssl rand -hex 20'" >> $HOME/.bash_profile
(b) Source the bash_profile file and change the directory.
$ source ~/.bash_profile$ cd $HOME/stringer
CONFIGURING DATABASE.YML FILE
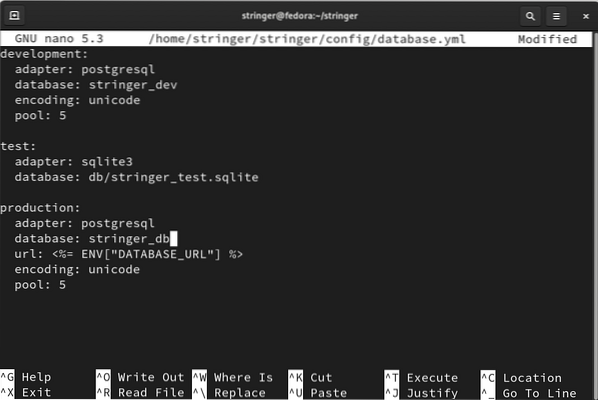
Step 10. Open database.yml file in the folder /home/stringer/stringer/config/ with any text editor like nano:
$ nano /home/stringer/stringer/config/database.ymlNow make the entry of this file look like the one below:
development:adapter: postgresql
database: stringer_dev
encoding: unicode
pool: 5
test:
adapter: sqlite3
database: db/stringer_test.sqlite
production:
adapter: postgresql
database: stringer_db
url: <%= ENV["DATABASE_URL"] %>
encoding: unicode
pool: 5
Save and close the file.
Step 11. After modifying the above file, we will run our Postgres database in production mode, using the command:
$ rake db:migrate RACK_ENV=production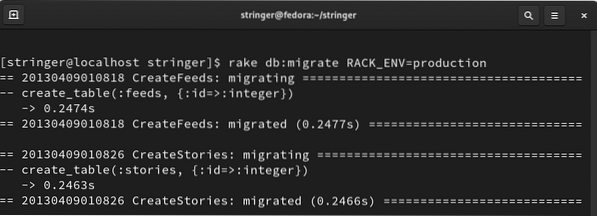
LAUNCHTHE APPLICATION
Step 12. (a) The last step is to run the Stringer application using the foreman tool:
$ foreman start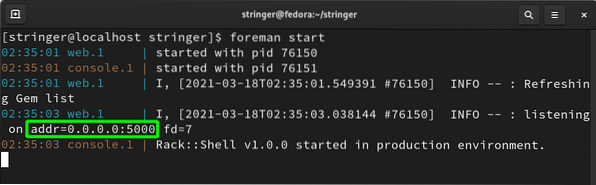
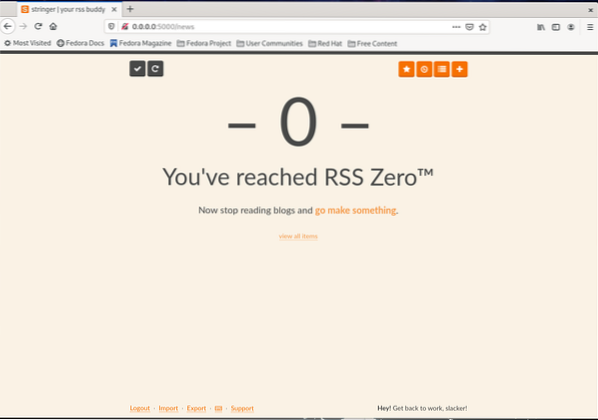
(b) If everything goes right, the Stringer will be started at the localhost address and listening on the port 5000 as shown above. To check this, open any web browser and navigate to the address: 0.0.0.0:5000
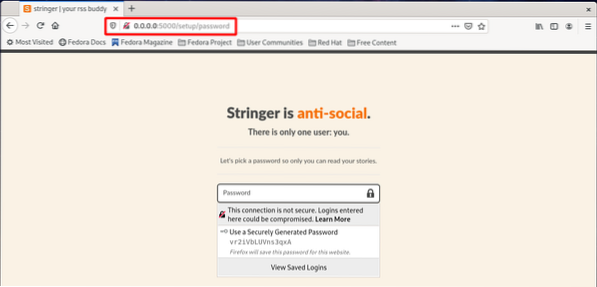
At the very first startup page, you will need to create a password for your account:
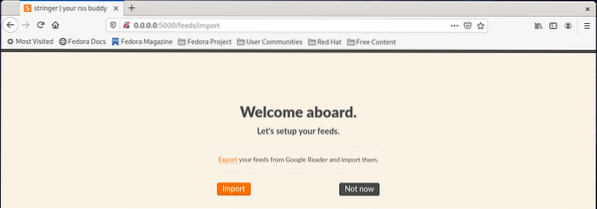
Next, it will ask you to import your feed from Google Reader:
On the next page, you can start adding your feed from the below page:
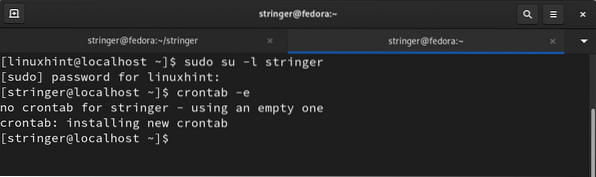
(c) We can also schedule a cron job with the command:
$ crontab -eNow put the following entry in the file and save it.
SHELL=/bin/bashPATH=/home/stringer/.rbenv/bin:/bin/:/usr/bin:/usr/local/bin/:/usr/local/sbin
*/10 * * * * source $HOME/.bash_profile; cd $HOME/stringer/; bundle exec rake fetch_feeds;
CONCLUSION
We have successfully managed to install and run the Stringer RSS Reader on Fedora 33 OS in this guide. We have learned to manage multiple ruby versions with rbenv, configuring Postgres database, etc. What you can do next is to use this guide to try to install Stringer on Centos and other RedHat-based distros. You can also use the Heroku free plan to deploy and run Stringer.


