SMTP Setup and Configuration
Open the .env file from the root folder of the Laravel project and set up the configuration according to your Gmail account. You must enable the “Less secure app” option of your Gmail account to send an email using the Gmail SMTP server.
MAIL_MAILER=smtpMAIL_HOST=smtp.gmail.com
MAIL_PORT=465
MAIL_USERNAME=YOUR_EMAIL_ADDRESS
MAIL_PASSWORD=YOUR_PASSWORD
MAIL_ENCRYPTION=ssl
***Note:
You may receive the SMTP authentication error while sending emails using the SMTP Gmail account server. Open the StreamBuffer.php file from the following location.
/var/www/html/laravelpro/vendor/swiftmailer/swiftmailer/lib/classes/Swift/Transport/StreamBuffer.php
Find and replace line 259 with the following line to authenticate the Gmail SMTP server.
$options['ssl'] = array('verify_peer' => false, 'verify_peer_name' => false,'allow_self_signed' => true);
Sending Emails Using SMTP
Perform the following steps to send email using the contact form by creating a controller, view, and mail class.
Steps:
Run the following command from the terminal to create EmailController to show the contact form and send an email using Laravel mail class.
$ php artisan make:controller EmailControllerRun the following command to create a mail class named sendingEmail. This will create the class under the App\Mail folder.
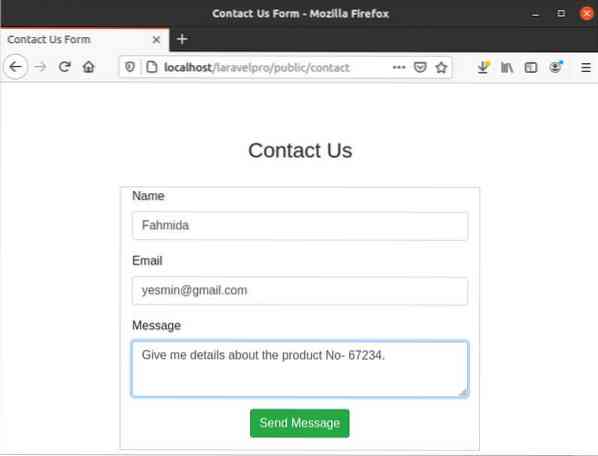
$ php artisan make:mail sendingEmailCreate a view file named emailsend.blade.php with the following code to display the contact form.
Contact Us
@if (count($errors) > 0)
- $error
@foreach ($errors->all() as $error)
@endforeach
@endif
@if ($message = Session::get('success'))
$message
@endif
Open EmailController and modify the code with the following code. The Mail facade and sendingEmail mail classes are imported at the beginning of the file. Here, the index() method will load the view file in the browser to display the contact form. After submitting the form, the send() method will be called. This method will validate the form by using the validation rules. The $data array is used to send the values of the name and message fields into the sendingEmail class. Next, the email is sent using the Mail facade. You must set a valid email address of the receiver in the to() function before executing the code. If the email sends successfully, then a success message will print.
namespace App\Http\Controllers;use Illuminate\Http\Request;
use Illuminate\Support\Facades\Mail;
use App\Mail\sendingEmail;
class EmailController extends Controller
function index()
return view('emailsend');
function send(Request $request)
$this->validate($request, [
'name' => 'required',
'email' => 'required|email',
'message' => 'required'
]);
$data = array(
'name' => $request->name,
'message' => $request->message
);
Mail::to('Receiver Email Address')->send(new sendingEmail($data));
return back()->with('success', 'Thanks for contacting us!');
Open the sendingEmail class and modify the code with the following code. The email subject is defined inside the build() method and the email_template view is used to format the email content, created in the next step. The values passed from the EmailController are stored in the $email object and are passed in the email_template view.
namespace App\Mail;use Illuminate\Bus\Queueable;
use Illuminate\Contracts\Queue\ShouldQueue;
use Illuminate\Mail\Mailable;
use Illuminate\Queue\SerializesModels;
class sendingEmail extends Mailable
use Queueable, SerializesModels;
/**
* Create a new message instance.
*
* @return void
*/
public $emails;
public function __construct($emails)
$this->emails = $emails;
/**
* Build the message.s
*
* @return $this
*/
public function build()
return $this->subject('Message from Visitor')
->view('email_template')
->with('emails', $this->emails);
Create the template view file named email_template.blade.php with the following code to send the formatted email to the sender. The values passed from the sendingEmail class are used in this template.
Hello,
I am $emails['name']
My query is about the following topic:
$emails['message'] .
It will be helpful if you give me response soon.Thank you.
Now, open the web.php file and add the following route code to open the contact form and send the email.
Route::get('/contact', '[email protected]');Route::post('/sendemail/send', '[email protected]');
Run the following URL from the browser to load the contact form.
http://localhost/laravelpro/public/contact
Fill the form and click on the Send Message button to send the content of the form to the send() method of the EmailController class.
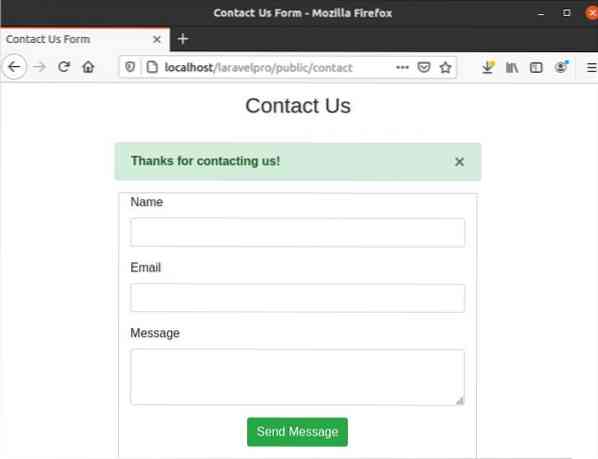
If the email is sent successfully, then you will obtain the success message, as shown in the following image.
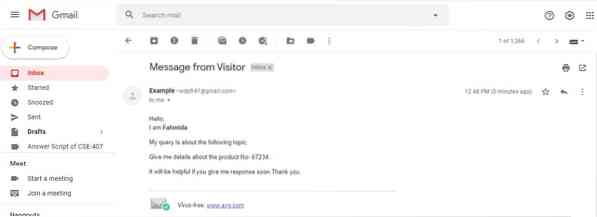
Now, open the Gmail account that you used to send an email in the send() method of the EmailController class. If you open the email, then you will get the following email content, generated by using an email_template view file.
Video Tutorial
Conclusion
Multiple ways exist in the Laravel framework to send an email. The most simple and easiest way to send email in Laravel is shown in this tutorial. If you have a Gmail account, then you can easily send an email by following the steps shown in this tutorial. The Gmail SMTP server is used here to send an email, and the email sending task is tested by running the code from the local server. This tutorial shows HTML-formatted email sending tasks only. You can also perform other tasks, like file attachment, sender name, etc., by using other methods of the Mail class.


